“Did you see that cake? The one with the shiny drip that looked like it came straight out of a magazine?” My cousin’s text popped up just as I was wrestling with my mixer and a kitchen full of flour. Honestly, I wasn’t sure if I could pull off a “perfect graduation photo cake with metallic drip buttercream” — sounds fancy, right? I’d never worked with metallic drip before, and cakes with photos always felt a little intimidating. But, hey, it was my niece’s graduation, and I wanted the cake to make a statement without driving me crazy.
The whole thing actually started as a bit of a last-minute scramble. I was juggling a hectic week and thought about just buying a cake. But when I found a simple way to print an edible photo and paired it with a quick homemade buttercream drip that literally sparkled, I got hooked. I made that cake three times in a week to get it just right — the kind that people keep asking me to make again.
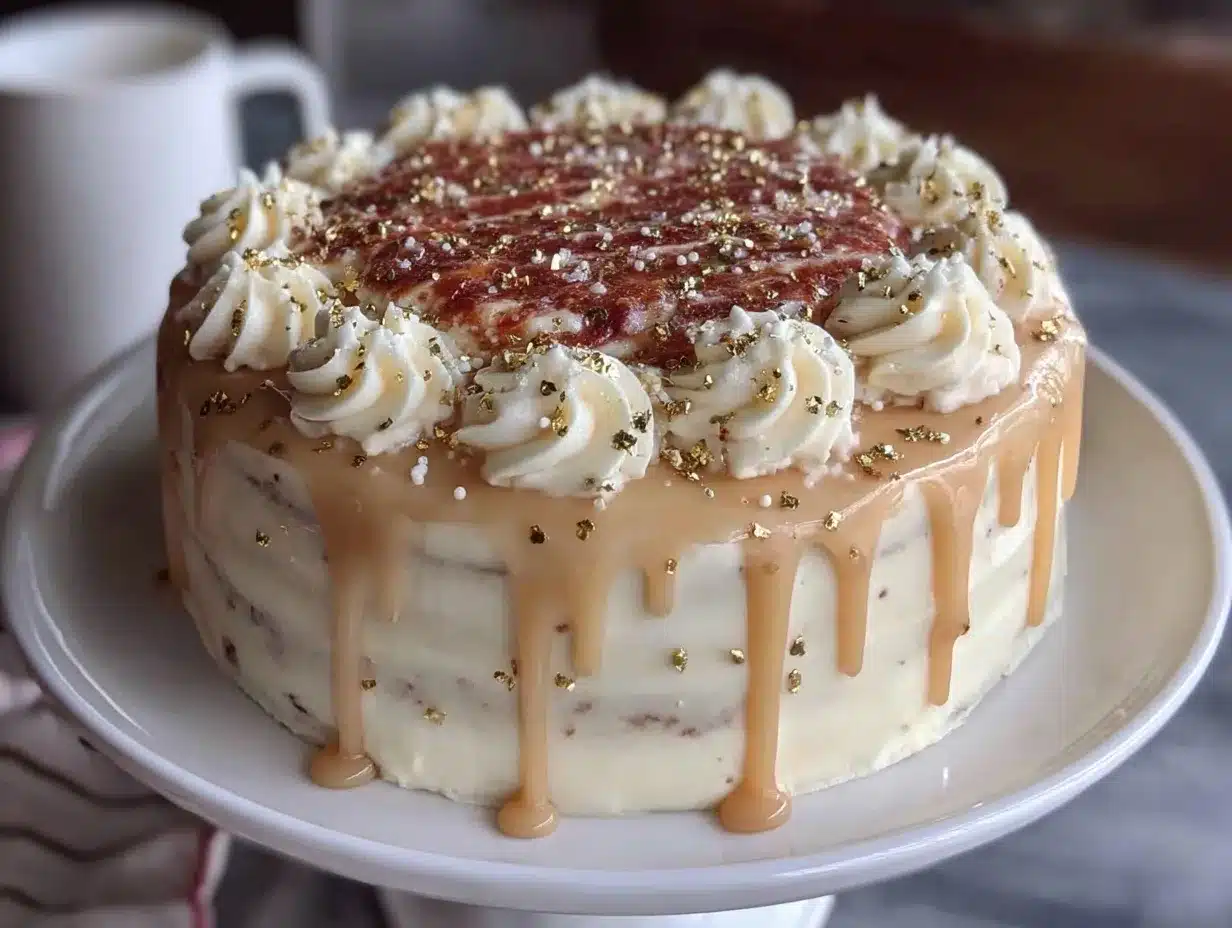
There’s something about the way the metallic drip catches the light, framing the photo like a spotlight on a proud moment. It’s not just about looks, though; the buttercream has this silky texture that melts into the cake layers perfectly. After that first bite, I realized this recipe wasn’t just a pretty face — it was a keeper.
So if you’ve got a graduation, milestone, or any special occasion coming up, this cake might be the calm in the chaos you didn’t know you needed. It feels like a small celebration in every slice, and honestly, it’s easier than it looks. Just a little patience, some simple ingredients, and a bit of sparkle. Let’s get into why you’ll love this recipe so much.
Why You’ll Love This Recipe
Over the years, I’ve tested a handful of photo cakes and drip techniques, and this one stands out because it strikes the perfect balance between show-stopping and doable. Here’s why it’s become my go-to for celebrations:
- Quick & Easy: The whole cake comes together in under 3 hours, making it perfect for last-minute party plans or when you’re juggling a million things.
- Simple Ingredients: No need to hunt for exotic stuff — most ingredients are pantry staples or easily found at your local grocery store.
- Perfect for Graduation & Special Occasions: Whether it’s a graduation, birthday, or even an anniversary, this cake’s elegance fits right in without being over the top.
- Crowd-Pleaser: Kids and adults alike love it — the buttercream is rich but not too sweet, and the cake layers stay moist and tender.
- Unbelievably Delicious: The metallic drip isn’t just for show; it’s a smooth, buttery glaze with just the right hint of vanilla that complements the cake perfectly.
What sets this apart? Well, for starters, the metallic drip is made with an easy method using edible luster dust mixed right into the buttercream, giving you that shimmering effect without the fuss of tempering chocolate or buying fancy gels. Plus, the cake layers are light but flavorful, balanced with a classic vanilla bean buttercream that’s creamy and luscious.
Honestly, it’s the kind of recipe that makes you close your eyes after the first bite and think, “Yep, this is celebration-worthy.” If you want a dessert that looks custom and tastes like you spent hours in the kitchen — but without the stress — this is it. And speaking of simple ingredients, let’s see what you’ll need to get started.
What Ingredients You Will Need
This recipe uses straightforward, wholesome ingredients to create a bold flavor and a satisfying texture without any fuss. Most of these are pantry staples, so you probably already have everything on hand. Here’s the breakdown:
- For the Cake Layers:
- All-purpose flour, sifted (for a tender crumb)
- Baking powder (to get that perfect rise)
- Salt (balances sweetness)
- Unsalted butter, softened (I prefer Land O’Lakes for its smoothness)
- Granulated sugar (for sweetness and structure)
- Large eggs, room temperature (helps with texture and richness)
- Pure vanilla extract (real vanilla beans or Nielsen-Massey brand add the best flavor)
- Whole milk, room temperature (for moisture — you can swap with almond milk for dairy-free)
- For the Buttercream Frosting:
- Unsalted butter, softened (same brand as cake for consistency)
- Powdered sugar, sifted (to avoid lumps)
- Pure vanilla extract
- Heavy cream or milk (adjust for desired consistency)
- Edible luster dust in metallic gold or silver (this is the magic for the drip; I usually get mine from Wilton)
- For the Metallic Drip:
- Buttercream frosting (a small batch from above)
- Edible metallic luster dust (pick your favorite color — rose gold is stunning too)
- A tiny bit of clear vanilla extract or vodka (to mix with the luster dust for a smooth drip)
- For the Photo Decoration:
- Edible photo printed on frosting sheets (available at most baking supply stores or online)
- Edible glue or a little extra buttercream to stick the photo onto the cake
Quick tip: When choosing your edible photo, aim for a matte finish rather than glossy — it sticks better and blends into the frosting seamlessly. You can swap the vanilla cake for a chocolate base if you want a richer flavor, just keep the buttercream the same for contrast.
Equipment Needed
Making this perfect graduation photo cake with metallic drip buttercream requires just a few basic kitchen tools, plus one or two specialty items that really make things easier:
- 9-inch (23 cm) round cake pans (two or three pans depending on your layers)
- Electric hand mixer or stand mixer (a lifesaver for smooth buttercream; I use a KitchenAid but any good-quality mixer works)
- Mixing bowls (glass or stainless steel, nothing fancy required)
- Offset spatula (essential for spreading frosting evenly and smoothing the surface)
- Bench scraper or cake scraper (helps get those clean edges)
- Piping bag with a round tip (optional, for applying the drip precisely)
- Small paintbrush (food-safe, for brushing luster dust if you want extra shimmer)
- Edible photo printer or access to a bakery that prints edible photos
If you don’t have an offset spatula, a butter knife or the back of a spoon can work in a pinch, though it’s trickier to get smooth finishes. For the drip, you can simply spoon it on if you don’t have a piping bag, but control is better with one.
Keep your mixer’s beaters clean and dry for the buttercream — any moisture can mess with the texture. If you’re on a budget, you can find affordable mixers and spatulas online that do the trick perfectly.
Preparation Method
- Prepare the Cake Layers (about 45 minutes): Preheat your oven to 350°F (175°C). Grease and flour your cake pans or line them with parchment paper. In a bowl, whisk together 2 ½ cups (320 g) all-purpose flour, 2 ½ tsp baking powder, and ½ tsp salt. In your mixer, beat 1 cup (227 g) softened unsalted butter with 2 cups (400 g) granulated sugar until light and fluffy, about 4-5 minutes. Add 4 large eggs one at a time, beating well after each. Mix in 1 tbsp pure vanilla extract. Alternate adding the dry ingredients and 1 cup (240 ml) whole milk, starting and ending with dry ingredients. Mix just until combined; overmixing can toughen the cake. Divide batter evenly into pans and bake for 25-30 minutes, or until a toothpick comes out clean. Let cool completely on wire racks.
- Make the Buttercream (20 minutes): Beat 1 cup (227 g) softened unsalted butter on medium speed until creamy, about 2 minutes. Gradually add 4 cups (480 g) powdered sugar, mixing on low speed. Add 2 tsp vanilla extract and 3-5 tbsp heavy cream or milk to reach desired consistency. Beat on high for 3 minutes until fluffy. Reserve about ½ cup (120 ml) of buttercream for the metallic drip.
- Assemble the Cake (15 minutes): Level your cake layers with a serrated knife if needed. Place the first layer on your serving plate or cake board. Spread about 1 cup (240 ml) of buttercream evenly over the top. Repeat with remaining layers. Apply a thin crumb coat of buttercream over the entire cake to seal in crumbs. Chill in the fridge for 20 minutes until firm.
- Apply Final Buttercream Layer (10 minutes): Spread the remaining buttercream smoothly over the chilled cake. Use an offset spatula and bench scraper for clean edges. Chill again for at least 15 minutes to set.
- Prepare the Metallic Drip (10 minutes): Mix 1 tbsp edible metallic luster dust with 1 tbsp clear vanilla extract or vodka to create a smooth, paint-like drip. Stir ½ cup (120 ml) reserved buttercream into this mixture until well combined. Transfer to a piping bag or use a spoon. Slowly drip the metallic buttercream around the edges of the cake, letting it run down naturally. Chill for 10 minutes to set.
- Add the Edible Photo (5 minutes): Carefully place the edible photo on top of the cake. Use a little buttercream or edible glue to secure it. Smooth gently to avoid tearing. Chill until ready to serve.
Tip: If your drip is too thick, thin it out with a few drops of vodka or cream. Too thin? Add a bit more powdered sugar. The drip should flow slowly but hold its shape.
Cooking Tips & Techniques
Working with metallic drip buttercream can seem intimidating, but here are some tips I’ve learned after plenty of trial and error:
- Buttercream Consistency: Your buttercream for the drip should be slightly thinner than your regular frosting, but not runny. Think paint—not syrup. This helps the drip settle beautifully around the edges without pooling at the bottom.
- Keep Everything Cool: Chill your cake layers and crumb coat well before applying the final frosting and the drip. Warm cake or frosting makes the drip run off too fast or look messy.
- Mixing Luster Dust: Using clear vanilla or vodka to mix your luster dust helps it dissolve evenly and gives the metallic drip that smooth, shiny finish. Water can dull the effect.
- Drip Control: Use a piping bag with a small round tip for precise drips. Start with small amounts and build up if you want a heavier effect. Practice on parchment paper first if you’re nervous.
- Photo Application: Handle the edible photo gently. If it’s too dry, lightly brush the back with edible glue or frosting so it sticks well and blends seamlessly.
- Patience is Key: Let each layer of frosting set in the fridge. Rushing this step often leads to uneven surfaces and drip mishaps.
I once tried to rush the drip and ended up with a lopsided mess that looked like a cake meltdown. Lesson learned: slow and steady wins the drip race.
Variations & Adaptations
The great thing about this recipe is how easy it is to adapt to different tastes and dietary needs:
- Flavor Variations: Swap vanilla cake layers for chocolate or lemon for a fun twist. I once made a lemon cake with a silver drip that was a big hit at a friend’s bridal shower.
- Dietary Adaptations: Use almond or oat flour for a gluten-free version. Replace dairy milk with coconut or almond milk, and butter with vegan butter to make it dairy-free.
- Metallic Colors: Instead of gold or silver, try rose gold, copper, or even a deep blue metallic luster dust for a unique look that matches your grad’s school colors or party theme.
- Drip Alternatives: If you’re not into buttercream drip, a ganache made with white chocolate and metallic dust works too — just remember to adjust the drip consistency carefully.
- Photo Placement: Try placing the edible photo on the side of the cake or as a topper on a fondant plaque for different presentation styles.
One time, I combined this metallic drip technique with a rich chocolate fudge cake recipe, and it was a total showstopper. The versatility here really lets you tailor the cake to any celebration vibe.
Serving & Storage Suggestions
This cake is best served chilled but brought to room temperature about 20 minutes before slicing — that’s when the buttercream softens just enough to melt in your mouth. Use a sharp knife dipped in hot water and wiped dry for clean slices.
Pair it with sparkling lemonade, a fruity punch, or a simple black coffee to balance the sweetness. For a full celebration meal, it’s fun to complement this cake with savory dishes like creamy one-pot chicken alfredo or a fresh cucumber avocado salad for contrast.
Store leftovers in an airtight container in the fridge for up to 4-5 days. The metallic drip holds up well, but the photo might soften a bit — still delicious though! For longer storage, the cake layers can be frozen separately wrapped tightly for up to 3 months. Thaw overnight in the fridge before assembling and frosting.
Reheat slices gently at room temperature rather than microwaving to avoid melting the drip too much. Flavors tend to deepen and the texture improves slightly after a day or two in the fridge — patience pays off.
Nutritional Information & Benefits
Each serving of this graduation photo cake with metallic drip buttercream offers a satisfying treat with balanced sweetness and richness. Roughly, one slice (1/12th of the cake) contains about:
| Calories | 350-400 kcal |
|---|---|
| Fat | 18-22 g (mostly from butter) |
| Carbohydrates | 45-50 g |
| Protein | 4-5 g |
The key ingredients like butter and eggs provide essential fats and protein, while the cake’s flour offers energy-boosting carbs. Using real vanilla and high-quality butter enhances flavor without artificial additives. For anyone watching gluten or dairy, the recipe’s easy to adjust as noted earlier.
From a wellness perspective, celebrating with treats like this cake is part of enjoying life’s milestones and sharing joy with loved ones — a reminder that food is more than fuel; it’s connection.
Conclusion
This perfect graduation photo cake with metallic drip buttercream is more than just a dessert — it’s a way to make a moment last, slice by slice. It combines simple ingredients with a bit of sparkle and a lot of heart, letting you celebrate without stress. I love how it balances elegance and ease, making special occasions feel even more memorable.
Feel free to customize the flavors, colors, and presentation to reflect your grad’s personality or party theme. After all, this cake is your canvas, and the metallic drip just adds that little bit of magic.
I’d love to hear how your cake turns out or any creative twists you try. Drop a comment, share your photos, or let me know if you have questions — making celebrations sweeter is what this recipe is all about!
Here’s to many more moments worth celebrating with cake!
FAQs
Can I use a store-bought cake instead of baking from scratch?
Absolutely! A good-quality store-bought cake works fine — just make sure it’s firm enough to hold the frosting and drip without sliding.
How do I print an edible photo for the cake?
You can order edible photos online or from local bakeries that offer edible printing services. They print the image on special frosting sheets using edible ink.
Is the metallic drip safe to eat?
Yes! Edible luster dust is specifically made for food and is FDA-approved when labeled as edible. Avoid non-toxic dusts that are only for decoration.
Can I make the cake vegan or dairy-free?
Yes, swapping dairy with plant-based butter and milk alternatives works. Use flax eggs or commercial egg replacers for vegan eggs. The drip may need tweaking to keep the right consistency.
What’s the best way to store leftover cake?
Keep it covered in the fridge in an airtight container for up to 5 days. For longer storage, freeze the layers separately and assemble fresh when needed.
Pin This Recipe!
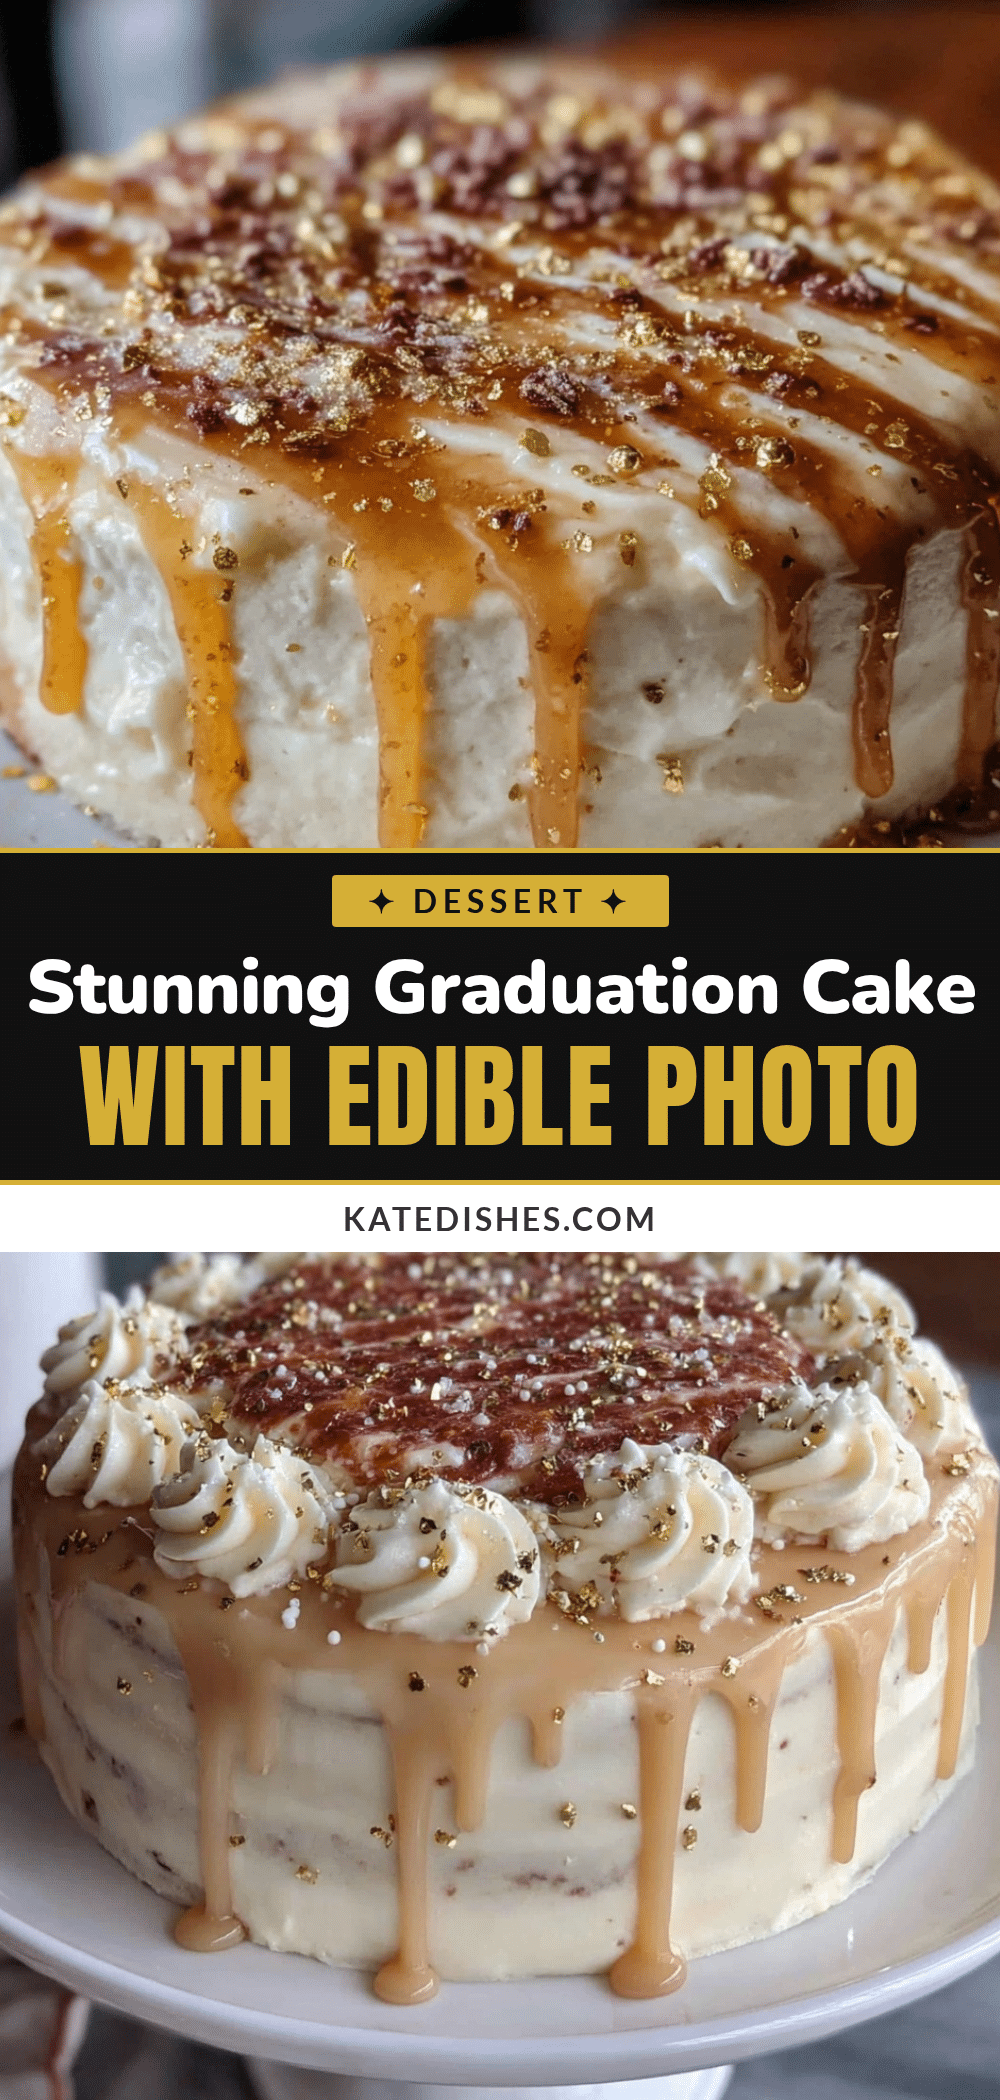
Perfect Graduation Photo Cake Recipe with Easy Metallic Drip Buttercream Tutorial
A stunning and easy-to-make graduation cake featuring light vanilla layers, silky buttercream, and a shimmering edible metallic drip that frames an edible photo perfectly.
- Prep Time: 45 minutes
- Cook Time: 30 minutes
- Total Time: 2 hours 30 minutes
- Yield: 12 servings 1x
- Category: Dessert
- Cuisine: American
Ingredients
- 2 ½ cups (320 g) all-purpose flour, sifted
- 2 ½ tsp baking powder
- ½ tsp salt
- 1 cup (227 g) unsalted butter, softened
- 2 cups (400 g) granulated sugar
- 4 large eggs, room temperature
- 1 tbsp pure vanilla extract
- 1 cup (240 ml) whole milk, room temperature (or almond milk for dairy-free)
- 1 cup (227 g) unsalted butter, softened (for buttercream)
- 4 cups (480 g) powdered sugar, sifted
- 2 tsp pure vanilla extract (for buttercream)
- 3–5 tbsp heavy cream or milk (for buttercream consistency)
- Edible luster dust in metallic gold, silver, rose gold, copper, or deep blue
- 1 tbsp clear vanilla extract or vodka (for metallic drip)
- ½ cup (120 ml) reserved buttercream frosting (for metallic drip)
- Edible photo printed on frosting sheets
- Edible glue or extra buttercream (to attach photo)
Instructions
- Prepare the Cake Layers (about 45 minutes): Preheat oven to 350°F (175°C). Grease and flour cake pans or line with parchment paper. Whisk together flour, baking powder, and salt. Beat butter and sugar until light and fluffy. Add eggs one at a time, beating well after each. Mix in vanilla extract. Alternate adding dry ingredients and milk, starting and ending with dry ingredients. Mix until combined. Divide batter into pans and bake 25-30 minutes or until toothpick comes out clean. Cool completel…
- Make the Buttercream (20 minutes): Beat butter until creamy. Gradually add powdered sugar on low speed. Add vanilla extract and heavy cream or milk to desired consistency. Beat on high until fluffy. Reserve ½ cup (120 ml) for metallic drip.
- Assemble the Cake (15 minutes): Level cake layers if needed. Place first layer on serving plate. Spread 1 cup (240 ml) buttercream evenly. Repeat with remaining layers. Apply thin crumb coat over entire cake. Chill 20 minutes until firm.
- Apply Final Buttercream Layer (10 minutes): Spread remaining buttercream smoothly over chilled cake. Use offset spatula and bench scraper for clean edges. Chill at least 15 minutes to set.
- Prepare the Metallic Drip (10 minutes): Mix edible luster dust with clear vanilla extract or vodka to create smooth drip. Stir reserved buttercream into mixture until combined. Transfer to piping bag or spoon. Slowly drip around cake edges. Chill 10 minutes to set.
- Add the Edible Photo (5 minutes): Carefully place edible photo on top of cake. Use buttercream or edible glue to secure. Smooth gently to avoid tearing. Chill until serving.
Notes
Use matte finish edible photos for better adhesion. Chill cake layers and crumb coat well before final frosting and drip application. Adjust drip consistency with vodka or cream if too thick or powdered sugar if too thin. Handle edible photo gently and secure with edible glue or buttercream. Store leftovers in airtight container in fridge up to 5 days; freeze layers separately for up to 3 months.
Nutrition
- Serving Size: 1 slice (1/12th of c
- Calories: 375
- Sugar: 35
- Sodium: 150
- Fat: 20
- Saturated Fat: 12
- Carbohydrates: 48
- Fiber: 1
- Protein: 4.5
Keywords: graduation cake, photo cake, metallic drip, buttercream, edible photo cake, celebration cake, easy cake recipe, vanilla cake, party cake