“I wasn’t expecting much from that patch of dandelions behind Mrs. Ellery’s old farmhouse,” I admitted to myself one breezy Saturday morning. The sun was just creeping over the horizon, casting a golden hue on those bright yellow flowers I usually ignored. But that day, curiosity got the better of me. My neighbor, Ben, had mentioned his grandmother’s secret recipe for something called dandelion honey jelly, a little treasure that tasted like sunshine trapped in a jar. Honestly, I thought he was joking. Yet, there I was, armed with a cracked enamel pot and a slightly cracked vanilla bean pod—the very pod I forgot to soak the night before—standing in my kitchen ready to give this old-fashioned recipe a try.
You know that feeling when a simple ingredient, often overlooked, surprises you with layers of flavor and history? That’s exactly how this homemade dandelion honey jelly with vanilla bean found its way into my weekly routine. It’s not just jelly; it’s a sweet reminder of lazy spring afternoons and the kind of comfort food that doesn’t shout but whispers. Maybe you’ve been there too, staring at a wild patch of weeds, wondering what on earth you could do with them besides curse their persistence. This recipe turns those pesky dandelions into a golden delight that’s as versatile as it is delicious.
And let me tell you, after a few spills, a bit of sticky mess on the counter, and a neighbor popping in with a cup of tea just in time to taste-test, this jelly stuck around. It’s the kind of recipe that makes you smile with every spoonful, perfect for slathering on toast, swirling into yogurt, or even stirring into tea. So, if you’re ready to turn weeds into wonder, join me as we walk through this sweet, simple homemade dandelion honey jelly with vanilla bean journey.
Why You’ll Love This Recipe
This homemade dandelion honey jelly with vanilla bean isn’t your everyday jam. Trust me—I’ve tested it multiple times, tweaking the sugar balance and vanilla infusion until it felt just right. Here’s why it might become your new favorite pantry staple:
- Quick & Easy: You can have this jelly ready in about 90 minutes, including prep and cooking—perfect for those spontaneous weekend kitchen projects.
- Simple Ingredients: No obscure items here. If you’ve got fresh dandelion flowers, sugar, lemon, and a vanilla bean, you’re set. And yes, those dandelions really do need to be fresh and free from pesticides.
- Perfect for Spring & Summer: When dandelions are abundant, this recipe shines. It’s a great way to celebrate the season’s bounty and add a floral note to your breakfast table.
- Crowd-Pleaser: I brought this to a Sunday brunch once, and honestly, it stole the show. Even my pickiest friend, who usually avoids “weird” flavors, went back for seconds.
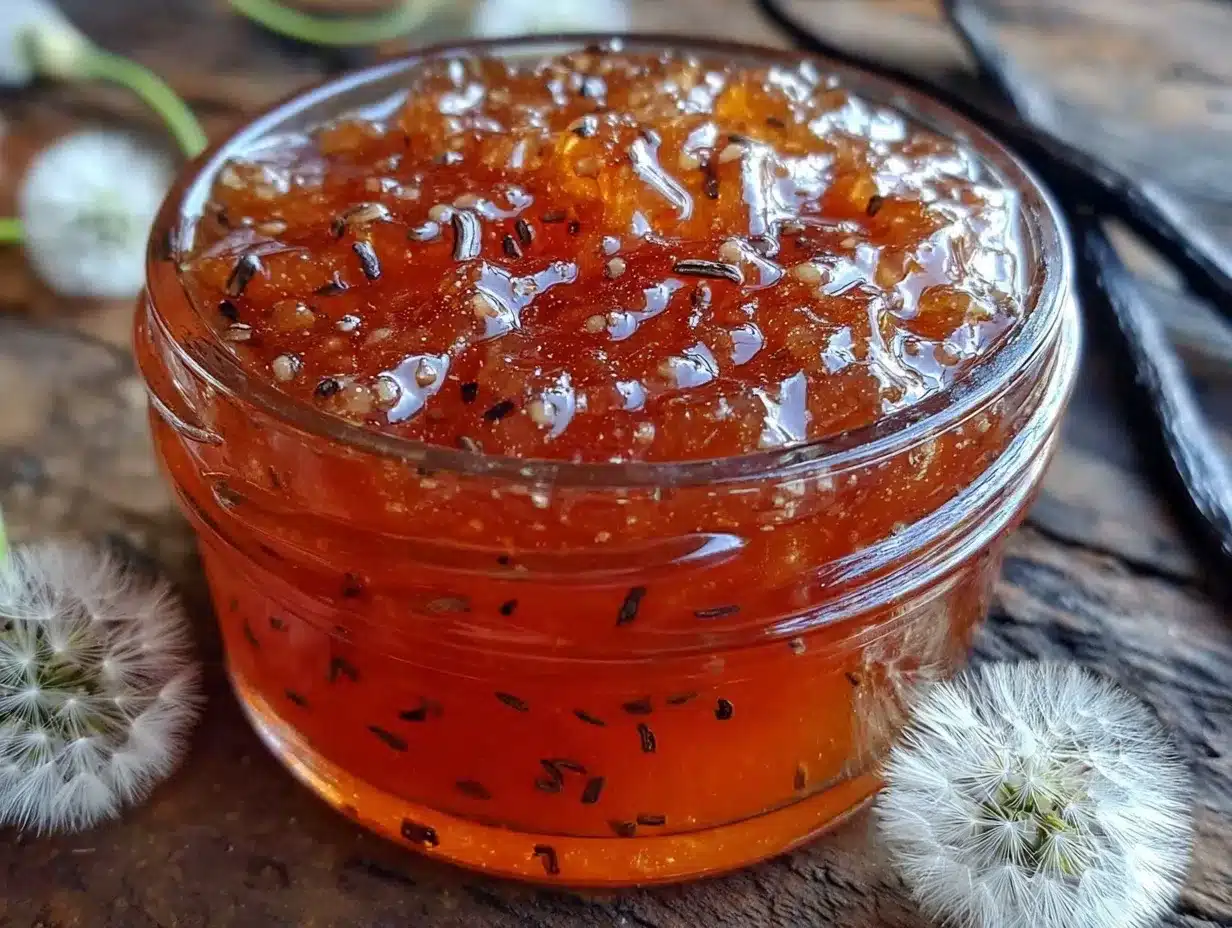
- Unbelievably Delicious: The vanilla bean adds a rich, mellow depth that balances the floral brightness of dandelion honey, resulting in a smooth, luscious texture.
What sets this recipe apart is the way the vanilla bean is gently simmered with the jelly, releasing tiny black flecks and an aroma that fills your kitchen with warmth. It’s not just jelly—it’s a little jar of nostalgia and nature’s sweetness combined. If you’ve been hesitant about foraging or trying herbal jellies, this is a friendly, straightforward recipe that’ll win you over without fuss.
What Ingredients You Will Need
This recipe uses simple, wholesome ingredients to deliver bold flavor and satisfying texture without the fuss. Most of these are pantry staples, except for the dandelion flowers, which are seasonal and best foraged carefully.
- Dandelion Flowers: About 4 cups of fresh, yellow petals only (discard green parts to avoid bitterness). Pick them from pesticide-free areas early in the morning when they’re fully open.
- Granulated Sugar: 4 cups (800g) – I prefer organic cane sugar for a clean sweetness.
- Lemon Juice: 1/4 cup (60ml), freshly squeezed – adds brightness and helps with setting.
- Water: 4 cups (960ml) – to extract the dandelion essence.
- Vanilla Bean: 1 whole bean, split lengthwise – for that cozy, fragrant touch. If unavailable, substitute with 1 tablespoon of pure vanilla extract added at the end.
- Pectin: 1 package (about 1.75 oz / 50g) – I recommend Sure-Jell for reliable results.
For substitution, if you want a vegan-friendly pectin, look for fruit-based pectin powders, and use coconut sugar to make the jelly a bit richer but still plant-based. In summer, you can swap lemon juice for lime juice for a slightly different zing.
Equipment Needed
- Large Saucepan or Stockpot: At least 4-quart capacity to hold the dandelion infusion and jelly mixture comfortably.
- Fine Mesh Strainer or Cheesecloth: To strain the dandelion petals thoroughly—avoid gritty bits in the jelly.
- Wooden Spoon or Heatproof Silicone Spatula: For stirring the jelly mixture without scratching your cookware.
- Measuring Cups and Spoons: Accurate measurements keep the jelly consistent.
- Jam Jars with Lids: Sterilized and ready for storing your jelly.
- Optional: Candy thermometer can be handy if you want to check the jelly’s setting point, but I’ve found timing and texture cues work just fine.
If you don’t have cheesecloth, a doubled-up clean kitchen towel works well for straining. My old stockpot has served me through countless jelly batches, and honestly, any heavy-bottomed pot helps prevent burning sugar. For beginners, a set of reusable silicone spatulas can be a real game-changer—easy to clean and gentle on your pots.
Preparation Method
- Harvest and Prepare the Dandelion Petals: Pick bright yellow dandelion flowers, avoiding any green parts. Rinse them gently in cold water to remove dirt and tiny bugs. Pat dry with a towel. (About 30 minutes)
- Make the Dandelion Infusion: In your large saucepan, combine 4 cups (960ml) of water and the dandelion petals. Bring to a gentle boil, then reduce heat and simmer uncovered for 20 minutes. You’ll notice a lovely golden color developing. (20–25 minutes)
- Strain the Liquid: Pour the infusion through a fine mesh strainer or cheesecloth into a clean bowl or pot. Press the petals gently to extract as much liquid as possible, but avoid pressing too hard to keep the jelly clear and bright. Discard the petals. (10 minutes)
- Prepare the Vanilla Bean: Split the vanilla bean lengthwise with a sharp knife, scraping out the tiny seeds. Add both seeds and pod to the dandelion liquid. (5 minutes)
- Add Sugar and Lemon Juice: Stir in 4 cups (800g) granulated sugar and 1/4 cup (60ml) fresh lemon juice into the dandelion-vanilla mixture. Mix gently until sugar dissolves. (5 minutes)
- Bring to a Boil and Add Pectin: Place the pot back on medium-high heat and bring the mixture to a full rolling boil. Once boiling, quickly stir in the pectin powder, whisking to dissolve completely. Boil hard for 1-2 minutes while stirring constantly. (5–7 minutes)
- Test the Jelly Set: To check if the jelly is ready, place a small spoonful on a chilled plate. Let it cool for a minute, then tilt the plate. If it wrinkles and holds shape, it’s done. If not, boil another minute and test again. (3–5 minutes)
- Remove Vanilla Pod and Jar the Jelly: Take out the vanilla bean pod and discard. Pour the hot jelly into sterilized jars, leaving about 1/4 inch headspace. Seal with lids immediately. (10 minutes)
- Cool and Store: Let jars cool at room temperature for several hours or overnight. The jelly will thicken as it cools. Store in a cool, dark place or refrigerate after opening. (Several hours cooling)
Pro tip: I once forgot to remove the vanilla bean pod before jarring, and the flavor became overpowering after a few days. So, don’t skip that step! Also, stirring constantly during the boil prevents the sugar from scorching—a sticky mess that’s tougher to clean than you’d think.
Cooking Tips & Techniques
Making jelly is a bit of a science, but it’s also about patience and attention. Here’s what I’ve learned from trial, error, and a few sticky fingers:
- Picking Petals: Always harvest dandelions from safe areas—no roadsides or chemically treated lawns. Early morning picks ensure the flowers are fresh and full of flavor.
- Straining Well: Leaving behind any green parts or stems is crucial to avoid bitterness. A double strain is sometimes necessary if you notice tiny bits sneaking through.
- Boil Timing: Don’t rush the boiling step after adding pectin. The jelly needs that full rolling boil to activate the setting properties properly.
- Vanilla Bean Handling: Split and scrape the bean carefully to maximize flavor. Toss the pod after cooking to prevent an overly intense vanilla taste.
- Testing Set: The wrinkle test on a cold plate is foolproof. Trust your senses—texture and appearance beat timers every time.
- Cleaning Up: Soak your pots and utensils immediately after use to avoid hardened sugar residue. I keep hot water and vinegar handy for stubborn spots.
Honestly, my first batch was too runny because I underestimated how much pectin to use, and the jelly barely thickened after cooling. But persistent adjustments got me here—don’t be discouraged if your first try isn’t perfect. Jelly making is a rewarding process that gets smoother with practice.
Variations & Adaptations
This homemade dandelion honey jelly with vanilla bean is delightfully versatile. Here are some ways to customize or adapt it:
- Flavored Twists: Add a teaspoon of ground ginger or cinnamon during the boil for a warming spice note.
- Sweetener Substitutes: Use honey or maple syrup instead of granulated sugar for a richer, more complex sweetness, adjusting pectin accordingly.
- Low-Sugar Version: Use a low-sugar pectin and reduce sugar by half. The jelly will be less firm but still delicious.
- Fruit Infusion: Stir in mashed strawberries or raspberries after cooking for a berry-dandelion combo.
- Allergen-Friendly: This recipe is naturally gluten-free and nut-free. For vegan pectin, check labels carefully.
Personally, I once swapped vanilla bean for lavender flowers to make a floral jelly that my aunt adored. It’s a bit more delicate but absolutely charming on a scone. Experiment and find your favorite! Just remember to balance flavors so the dandelion brightness doesn’t get lost.
Serving & Storage Suggestions
This jelly is best served at room temperature to fully enjoy the vanilla and floral notes. Spread it on warm toast, swirl it into plain yogurt, or dollop it on top of creamy ricotta for a quick dessert.
Pair it with a mild cheese board or drizzle over pancakes for brunch. It also shines as a sweetener for herbal teas, adding subtle depth and natural sweetness.
For storage, keep unopened jars in a cool, dark place for up to a year. Once opened, refrigerate and consume within 3 weeks for best flavor and safety. If you want to freeze it, use freezer-safe containers, but note the texture may soften slightly after thawing.
Flavors actually mellow and meld beautifully after a few days in the fridge, so don’t rush to finish your jar. Let the jelly rest and deepen—it’s worth the wait.
Nutritional Information & Benefits
Per tablespoon (about 20g) of this homemade dandelion honey jelly with vanilla bean:
| Calories | 50 |
|---|---|
| Carbohydrates | 13g (all sugars) |
| Fat | 0g |
| Protein | 0g |
Dandelions are a surprising source of antioxidants, vitamins A, C, and K, and have traditionally been used to support digestion and liver health. While the jelly contains sugar, using fresh dandelion petals adds a subtle floral complexity without artificial flavorings.
For those watching sugar intake, this jelly can be enjoyed sparingly or adapted with low-sugar pectin. It’s naturally gluten-free and vegan when using plant-based pectin and sweeteners.
Conclusion
This homemade dandelion honey jelly with vanilla bean is more than just a sweet spread—it’s a little celebration of spring, patience, and the joy of turning everyday weeds into something special. You can tweak the sweetness, spice it up, or keep it classic, but whatever you do, you’re in for a treat that’s gentle on the soul and easy on the kitchen stress.
I love this recipe because it reminds me that sometimes the simplest things—like a forgotten flower in the yard—can surprise you with unexpected delight. If you try it, I’d love to hear how it turns out for you or any creative spins you add. Don’t be shy—share your thoughts, questions, and jelly triumphs below!
Happy jelly-making, and remember: sweet adventures often start with a humble dandelion.
FAQs
Can I use dandelion leaves instead of flowers for this jelly?
Dandelion leaves are quite bitter and not recommended for jelly. The flowers provide the sweet, floral flavor essential for this recipe.
How do I know if my dandelions are safe to use?
Only harvest from pesticide-free areas away from roads or industrial sites. Early morning picks ensure freshness and avoid insects.
Can I substitute vanilla extract for the vanilla bean?
Yes, add 1 tablespoon of pure vanilla extract after cooking, just before jarring, to keep the flavor bright and fresh.
How long does homemade dandelion jelly last?
Unopened jars can last up to a year when stored properly. Once opened, refrigerate and consume within 3 weeks.
What should I do if my jelly doesn’t set?
If your jelly is too runny, you can re-cook it with a bit more pectin and boil for another minute or two, then re-jar in sterilized containers.
Pin This Recipe!
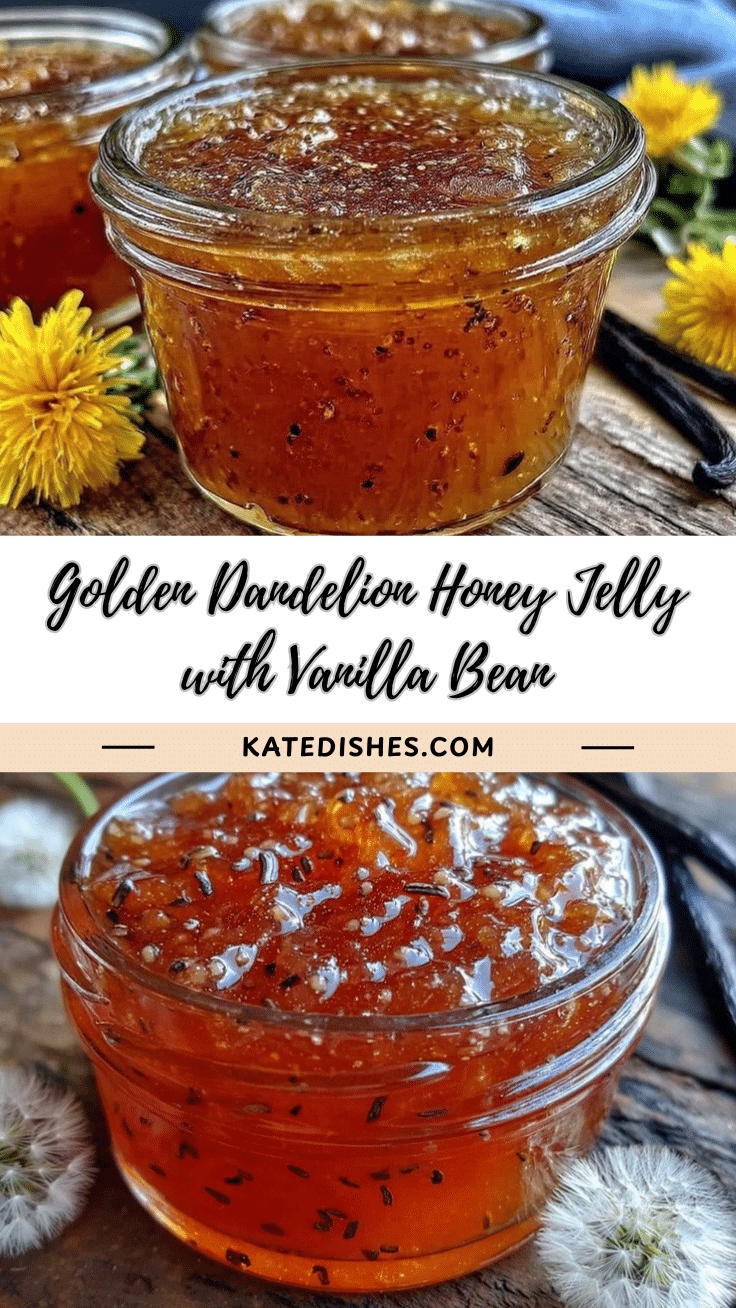
Homemade Dandelion Honey Jelly with Vanilla Bean
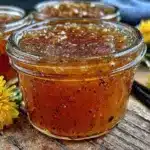
A sweet, floral jelly made from fresh dandelion flowers and infused with vanilla bean, perfect for spring and summer. This easy recipe yields a luscious jelly ideal for toast, yogurt, or tea.
- Prep Time: 35 minutes
- Cook Time: 55 minutes
- Total Time: 90 minutes
- Yield: About 5 half-pint jars (approximately 10 servings) 1x
- Category: Preserves
- Cuisine: American
Ingredients
- 4 cups fresh yellow dandelion petals (discard green parts)
- 4 cups (800g) granulated sugar
- 1/4 cup (60ml) freshly squeezed lemon juice
- 4 cups (960ml) water
- 1 whole vanilla bean, split lengthwise (or 1 tablespoon pure vanilla extract as substitute)
- 1 package (about 1.75 oz / 50g) pectin (Sure-Jell recommended)
Instructions
- Pick bright yellow dandelion flowers, avoiding green parts. Rinse gently in cold water and pat dry. (About 30 minutes)
- In a large saucepan, combine 4 cups water and dandelion petals. Bring to a gentle boil, then simmer uncovered for 20 minutes until golden color develops. (20–25 minutes)
- Strain the infusion through a fine mesh strainer or cheesecloth into a clean bowl, pressing gently to extract liquid. Discard petals. (10 minutes)
- Split the vanilla bean lengthwise and scrape out seeds. Add seeds and pod to the dandelion liquid. (5 minutes)
- Stir in sugar and lemon juice until sugar dissolves. (5 minutes)
- Bring mixture to a full rolling boil over medium-high heat. Quickly stir in pectin powder and boil hard for 1-2 minutes, stirring constantly. (5–7 minutes)
- Test jelly set by placing a spoonful on a chilled plate; if it wrinkles and holds shape, it’s ready. If not, boil another minute and test again. (3–5 minutes)
- Remove vanilla bean pod and discard. Pour hot jelly into sterilized jars, leaving 1/4 inch headspace. Seal immediately. (10 minutes)
- Let jars cool at room temperature for several hours or overnight to thicken. Store in a cool, dark place or refrigerate after opening.
Notes
Remove the vanilla bean pod before jarring to avoid overpowering flavor. Stir constantly during boiling to prevent sugar scorching. Use pesticide-free dandelions picked early in the morning. Double strain if needed to avoid grit. Jelly sets best after a full rolling boil with pectin. Soak pots immediately after use to ease cleaning.
Nutrition
- Serving Size: 1 tablespoon (about
- Calories: 50
- Sugar: 13
- Carbohydrates: 13
Keywords: dandelion jelly, homemade jelly, vanilla bean jelly, spring recipes, floral jelly, easy jelly recipe, foraged jelly, natural sweetener