“The power went out halfway through making these Creamy No-Bake Robin’s Egg Cheesecake Bites,” my friend Lisa confessed last spring. Honestly, I was skeptical at first—no-bake cheesecakes usually feel like a shortcut, right? But as I watched her whip up this pastel-hued delight with a few simple ingredients, I realized something different was happening here. These cheesecake bites weren’t just a quick fix; they had this melt-in-your-mouth, velvety texture that surprised me.
Maybe you’ve been there—craving a fresh, spring-inspired treat that’s just as fun to make as it is to eat, but not wanting to slave over a hot oven. I mean, who wants to heat up the kitchen when the tulips are blooming outside? What makes these cheesecake bites special is that subtle pop of robin’s egg blue, inspired by those charming candy-coated chocolate eggs that always appear around Easter. But it’s not just about the look; it’s the creamy, dreamy filling paired with a crunchy crust that keeps you coming back for more.
One afternoon, while chatting with Lisa on her porch, I watched her almost forget to add the vanilla extract—yes, a tiny mess-up!—and still, the bites turned out perfect. This recipe stuck with me because it’s approachable, festive, and honestly, a little addictive. Whether you’re hosting a spring brunch or just want a sweet pick-me-up, these cheesecake bites have a way of feeling both special and down-to-earth at the same time.
Why You’ll Love This Recipe
Having tested this recipe multiple times in my kitchen (and yes, tasted way too many batches), I can tell you this one stands out for a few reasons that make it a keeper:
- Quick & Easy: Comes together in under 30 minutes without any baking—ideal for last-minute dessert needs or when you want to keep things simple.
- Simple Ingredients: You probably already have most of these in your pantry or fridge—no complicated shopping required.
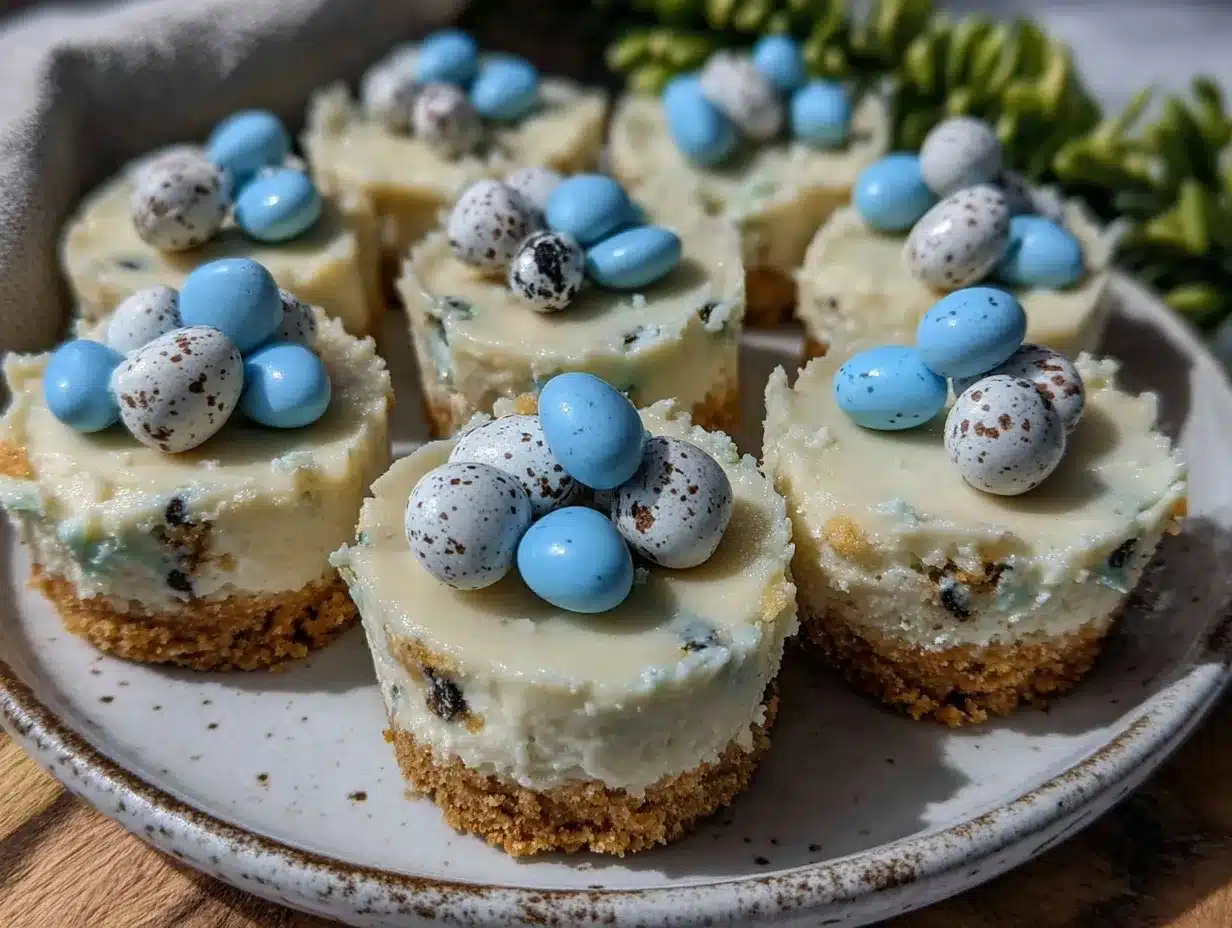
- Perfect for Spring Gatherings: The pastel robin’s egg colors and light texture make it a charming choice for Easter, baby showers, or just a sunny afternoon treat.
- Crowd-Pleaser: Kids love the fun colors, adults appreciate the creamy richness, and everyone asks for seconds.
- Unbelievably Delicious: The balance of tangy cream cheese, sweetened condensed milk, and a hint of vanilla creates an irresistible flavor combo that feels indulgent but not heavy.
What really makes this recipe different? It’s the no-bake method combined with a buttery graham cracker crust that stays crisp, and the way the filling sets up perfectly in the fridge without feeling dense or chalky. Instead of the usual plain white cheesecake, the robin’s egg blue tint is subtle but festive—a playful nudge to springtime celebrations. Honestly, this recipe isn’t just a dessert; it’s a little mood booster that’s ready whenever you are.
What Ingredients You Will Need
This recipe uses simple, wholesome ingredients to deliver bold flavor and satisfying texture without the fuss. The components are pantry-friendly and easy to swap if needed—plus, the pastel color is all about those robin’s egg vibes, which you can adjust or skip if you want.
- Graham Cracker Crust
- 1 ½ cups graham cracker crumbs (about 10 full sheets; I prefer the honey-flavored kind for depth)
- 6 tbsp unsalted butter, melted (adds richness and helps bind the crust)
- 2 tbsp granulated sugar
- Cheesecake Filling
- 16 oz (450 g) cream cheese, softened (I recommend Philadelphia for the smoothest texture)
- 1 can (14 oz / 396 g) sweetened condensed milk (makes the filling luxuriously creamy)
- 1 tsp pure vanilla extract
- 2 tbsp fresh lemon juice (balances sweetness with a little tang)
- 3-4 drops blue food coloring (gel-based works best for vibrant color without watering down)
- Optional Toppings
- Mini robin’s egg candies or pastel sprinkles (for that festive spring look)
- Whipped cream (for extra indulgence)
Substitution tips: Use dairy-free cream cheese and coconut condensed milk to make this vegan-friendly. Gluten-free graham crackers or crushed nuts work well for the crust if needed. If you want to skip the food coloring, the bites still taste amazing—just less pastel.
Equipment Needed
- Mixing bowls – a medium and large one
- Electric mixer or hand whisk – electric mixer recommended for smooth cream cheese blending
- Measuring cups and spoons – accurate measuring is key to texture
- 9×9 inch (23×23 cm) square baking pan or a similar-sized dish – for setting the cheesecake bites
- Parchment paper – helps with easy removal and clean edges
- Spatula – for scraping the bowl and smoothing the filling
- Knife or small cookie cutter (optional) – if you want to cut into perfect squares or shapes
If you don’t have a mixer, a sturdy whisk and some elbow grease will do—but expect a little extra arm workout! For budget-friendly options, store-brand parchment paper and mixing bowls work just fine. Keeping your cream cheese softened at room temperature is a tip I learned the hard way—it blends much easier and prevents lumps.
Preparation Method
- Prepare the crust: In a medium bowl, combine 1 ½ cups graham cracker crumbs, 6 tbsp melted unsalted butter, and 2 tbsp sugar. Mix until all crumbs are evenly coated and resemble wet sand. This should take about 3 minutes.
- Press the crust: Line your 9×9 inch pan with parchment paper, leaving some overhang for easy lifting later. Press the crumb mixture firmly into the bottom of the pan using the back of a spoon or your fingers. Try to get an even layer—about ¼ inch thick. Chill the crust in the fridge for 10-15 minutes while you make the filling.
- Make the filling: In a large bowl, beat 16 oz softened cream cheese with an electric mixer on medium speed until smooth and fluffy (about 2-3 minutes). Scrape down the sides as needed to avoid lumps.
- Add the sweetened condensed milk: Slowly pour in the entire 14 oz can while mixing on low speed to combine. The filling will become creamy and a bit thick.
- Flavor and color: Mix in 1 tsp vanilla extract and 2 tbsp fresh lemon juice. Then add 3-4 drops of blue gel food coloring, mixing until the color is evenly distributed. Add more drops if you want a stronger robin’s egg blue (but don’t overdo it—you want a soft pastel, not smurf-blue!).
- Assemble the cheesecake bites: Pour the filling over the chilled crust and spread evenly with a spatula. Smooth the top gently.
- Chill to set: Cover the pan tightly with plastic wrap and refrigerate for at least 4 hours, preferably overnight. The longer the better for firm, sliceable bites.
- Cut and serve: Use the parchment paper overhang to lift the set cheesecake from the pan. Cut into 1 ½-inch squares with a sharp knife. If you want, garnish each bite with a mini robin’s egg candy or pastel sprinkles for that festive touch.
Pro tip: If the cheesecake feels too soft after chilling, pop it back into the fridge for an extra hour. Also, wiping your knife clean between cuts helps keep the edges neat. I once forgot to chill the crust first and the bites ended up a bit crumbly—lesson learned!
Cooking Tips & Techniques
Working with no-bake cheesecake is all about patience and texture balance. Here’s what I’ve learned from multiple attempts and friendly kitchen mishaps:
- Soften cream cheese properly: Take it out at least 30 minutes before mixing. Cold cream cheese makes the filling lumpy and harder to blend.
- Use gel food coloring: It provides vibrant color without thinning the filling, unlike liquid food coloring which can mess with the texture.
- Press crust firmly: A well-packed crust prevents crumbling when cutting. Use a flat-bottomed glass or measuring cup to press evenly.
- Chill enough: Don’t rush the setting process. The filling needs time to firm up—otherwise, you’ll have a messy, oozy cheesecake.
- Multitasking tip: While the crust chills, prepare the filling to save time. It’s a nice way to keep momentum going.
- Avoid overmixing the filling: Once the condensed milk is incorporated, mix just until combined to keep the texture light and airy.
Honestly, the first time I tried this, I added the lemon juice too late and the flavor was a bit flat. Now, I add it right after the vanilla for that perfect tang. You know what they say—practice makes perfect, or at least edible!
Variations & Adaptations
Feel free to switch things up based on your preferences or what’s in your pantry. Here are a few ways I’ve played around with this recipe:
- Chocolate crust: Swap graham crackers for chocolate cookie crumbs for a richer base. Add a teaspoon of cocoa powder to the filling for a subtle chocolate twist.
- Fruit swirl: Fold in a few tablespoons of raspberry or strawberry jam to the filling before chilling for a pretty swirl and fruity burst.
- Vegan version: Use vegan cream cheese and coconut condensed milk, and a nut-based crust (like almonds and dates) for a dairy-free treat.
- Different colors: Use pastel pink or lavender food coloring instead of blue for other spring occasions or to match your party theme.
- Mini cheesecake bites: Make these in silicone mini muffin pans for perfectly portioned, bite-size treats that are perfect for kid’s parties.
I once tried adding crushed pistachios on top before chilling—delicious! Just a sprinkle adds a subtle crunch and a pop of color.
Serving & Storage Suggestions
These cheesecake bites are best served chilled. Let them sit at room temperature for 5-10 minutes before serving to soften slightly and release their full flavor.
For presentation, arrange the bites on a pretty platter and add a few fresh mint leaves or edible flowers for a springtime vibe. They pair wonderfully with a light cup of tea or sparkling lemonade.
Storage: Store leftover bites in an airtight container in the refrigerator for up to 4 days. They keep their creamy texture well but may soften slightly over time.
If you want to freeze them, place them in a single layer on a baking sheet first, freeze until solid (about 2 hours), then transfer to a freezer-safe container. Thaw in the fridge overnight before serving.
Reheating is not recommended since this is a no-bake chilled dessert, but a gentle room temperature rest helps bring out flavor nuances developed during storage.
Nutritional Information & Benefits
Each serving (about one cheesecake bite) contains approximately:
| Calories | 120 |
|---|---|
| Fat | 7g |
| Carbohydrates | 13g |
| Protein | 2g |
| Sugar | 11g |
The cream cheese provides calcium and protein, while the lemon juice adds a bit of vitamin C. Using sweetened condensed milk means this recipe is on the sweeter side, so it’s a treat best enjoyed in moderation.
This recipe is naturally gluten-containing due to the graham crackers, but swapping with gluten-free crackers makes it accessible for gluten sensitivities. It’s not low-carb but can fit into balanced diets for special occasions.
From a wellness perspective, I love that this dessert doesn’t require heavy cream or multiple steps of whipping—less fuss, less chance to overdo it, and still plenty satisfying when you want a taste of something creamy and sweet without the sugar overload of typical desserts.
Conclusion
If you’re looking for an easy, charming, and creamy dessert that captures the spirit of spring without the fuss of baking, these Creamy No-Bake Robin’s Egg Cheesecake Bites are a solid bet. They bring a little whimsy with their pastel color and a lot of comfort with their luscious texture.
Don’t hesitate to tweak the colors, toppings, or crust to make them your own—this recipe is forgiving and friendly to creativity. Honestly, I keep coming back to this one whenever I want a sweet that feels special but doesn’t require hours in the kitchen.
Give it a try and let me know how your version turns out! I’d love to hear your favorite twists or tips in the comments below. Here’s to sweet spring moments and simple pleasures!
FAQs
Can I make these cheesecake bites ahead of time?
Yes! They actually taste better after chilling overnight and can be stored in the fridge for up to 4 days.
What if I don’t have blue food coloring?
You can skip the coloring entirely or use another pastel shade like pink or purple to keep the festive look.
Can I freeze the cheesecake bites?
Absolutely. Freeze them on a tray first, then transfer to a container. Thaw in the fridge before serving.
Is there a gluten-free option for the crust?
Yes, use gluten-free graham crackers or crushed nuts like almonds to make a delicious gluten-free crust.
Can I use a different type of crust?
Definitely! Chocolate cookie crumbs or crushed digestive biscuits also work well and add their own flavor twist.
Pin This Recipe!
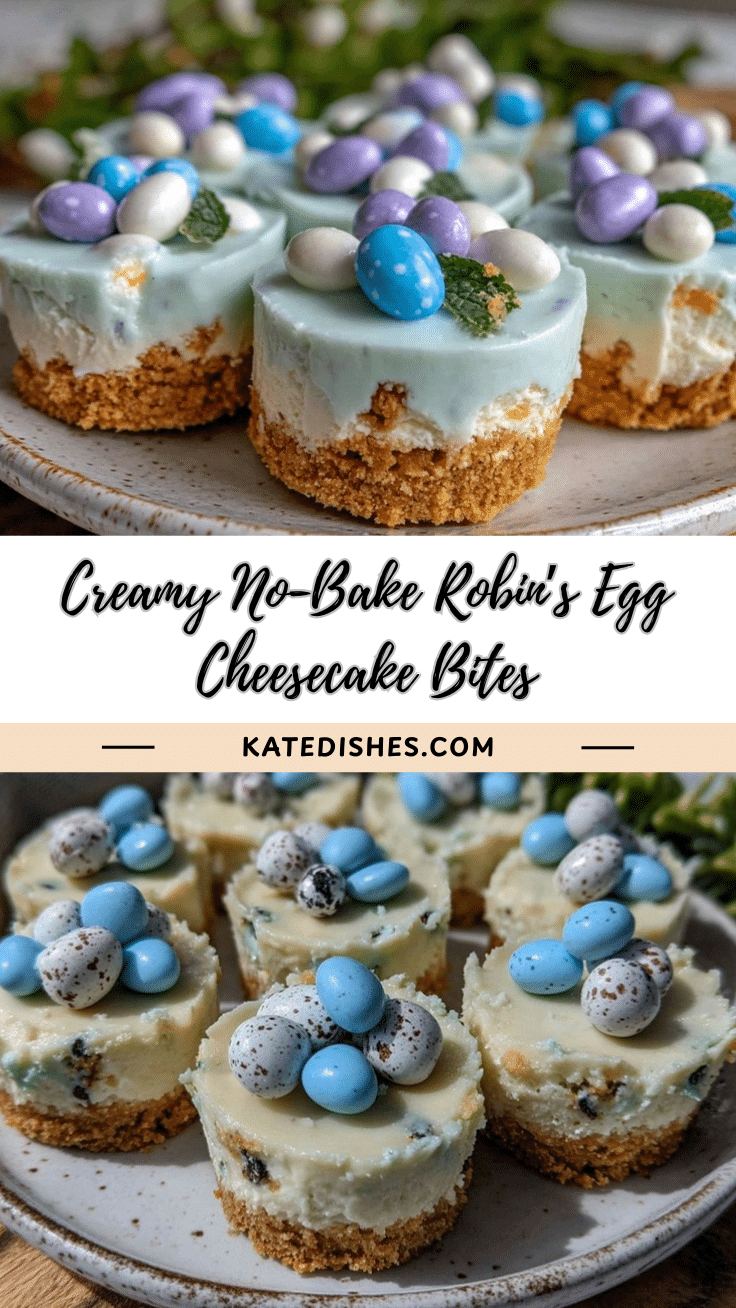
Creamy No-Bake Robins Egg Cheesecake Bites Easy Spring Recipe

These no-bake cheesecake bites feature a pastel robin’s egg blue color, a creamy filling, and a crunchy graham cracker crust, perfect for spring gatherings and easy to make without an oven.
- Prep Time: 15 minutes
- Cook Time: 0 minutes
- Total Time: 4 hours 15 minutes
- Yield: 16 servings 1x
- Category: Dessert
- Cuisine: American
Ingredients
- 1 ½ cups graham cracker crumbs (about 10 full sheets; honey-flavored preferred)
- 6 tbsp unsalted butter, melted
- 2 tbsp granulated sugar
- 16 oz cream cheese, softened
- 1 can (14 oz) sweetened condensed milk
- 1 tsp pure vanilla extract
- 2 tbsp fresh lemon juice
- 3–4 drops blue gel food coloring
- Optional toppings: mini robin’s egg candies or pastel sprinkles, whipped cream
Instructions
- In a medium bowl, combine graham cracker crumbs, melted butter, and sugar. Mix until crumbs are evenly coated and resemble wet sand (about 3 minutes).
- Line a 9×9 inch pan with parchment paper, leaving overhang for easy lifting. Press the crumb mixture firmly into the bottom of the pan in an even ¼ inch layer. Chill in the fridge for 10-15 minutes.
- In a large bowl, beat softened cream cheese with an electric mixer on medium speed until smooth and fluffy (2-3 minutes), scraping sides as needed.
- Slowly pour in sweetened condensed milk while mixing on low speed until creamy and thick.
- Mix in vanilla extract and fresh lemon juice. Add blue gel food coloring drops and mix until color is evenly distributed.
- Pour filling over chilled crust and spread evenly with a spatula. Smooth the top gently.
- Cover pan tightly with plastic wrap and refrigerate for at least 4 hours or overnight to set.
- Use parchment paper overhang to lift cheesecake from pan. Cut into 1 ½-inch squares. Garnish with mini robin’s egg candies or sprinkles if desired.
Notes
Soften cream cheese at room temperature for at least 30 minutes before mixing to avoid lumps. Use gel food coloring for vibrant color without thinning the filling. Press crust firmly to prevent crumbling. Chill cheesecake bites for at least 4 hours or overnight for best texture. Clean knife between cuts for neat edges. Can substitute dairy-free and gluten-free ingredients for vegan or gluten-free versions.
Nutrition
- Serving Size: 1 cheesecake bite (a
- Calories: 120
- Sugar: 11
- Fat: 7
- Carbohydrates: 13
- Protein: 2
Keywords: no-bake cheesecake, robin's egg cheesecake, spring dessert, easy cheesecake bites, pastel dessert, graham cracker crust