“Are you sure this is going to work without baking?” my friend asked, raising an eyebrow as I pulled out a pack of Oreos and a tub of whipped cream. Honestly, I wasn’t fully convinced either at first. The idea of stacking cookies and cream in a dish, then letting it chill in the fridge for hours, sounded almost too simple to produce anything worth writing home about. But that night, with only a handful of ingredients and zero oven time, this creamy no-bake Oreo icebox cake came together and surprised us both.
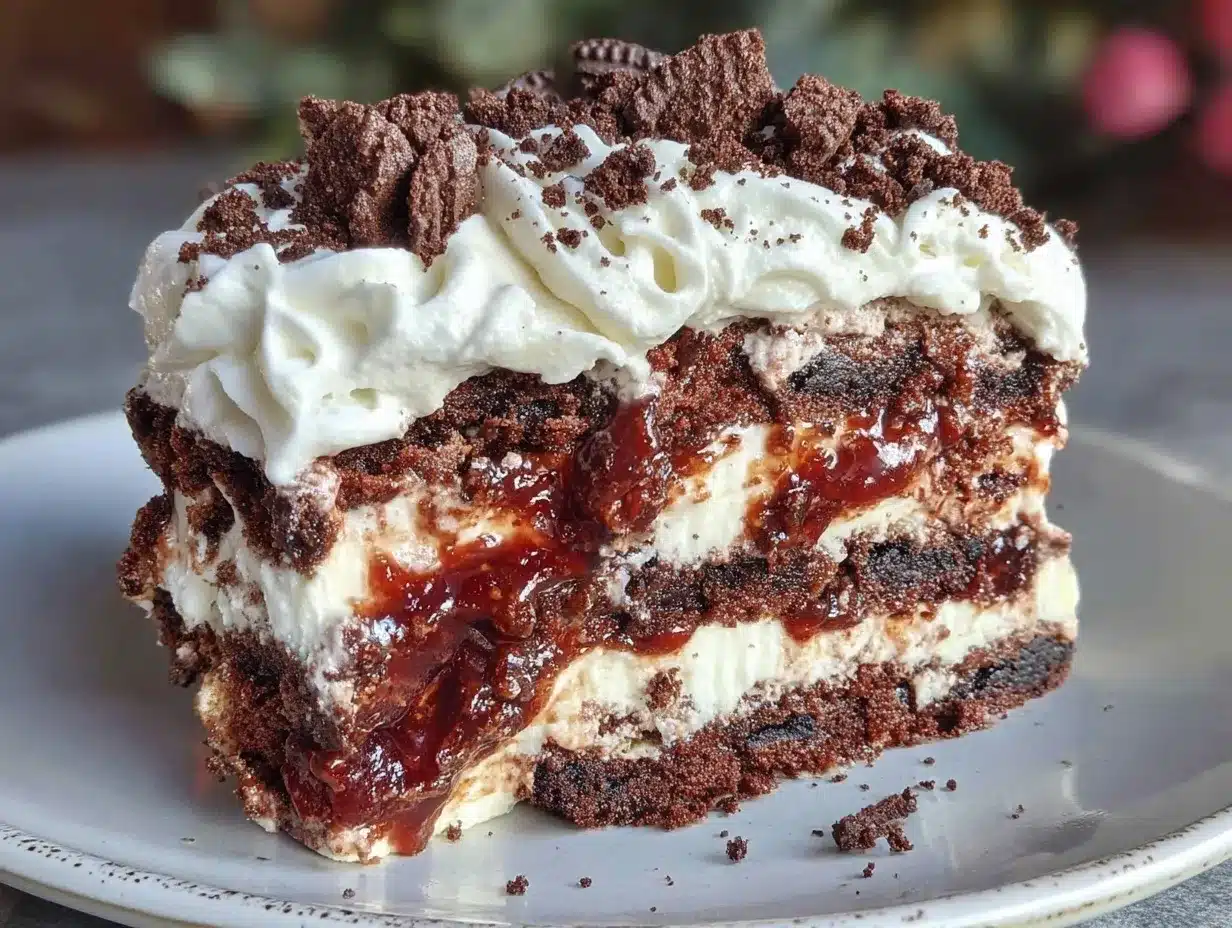
I remember grabbing this recipe between a whirlwind of work calls and the chaos of a last-minute get-together invite. I didn’t want to spend hours in the kitchen or mess with complicated techniques. Instead, I layered Oreos with silky whipped cream and a touch of cream cheese, then let the fridge do its magic overnight. The next day? The cookies softened just right, the cream set beautifully, and the whole thing tasted like a dream — rich, smooth, and indulgent without being heavy.
What stuck with me was how this easy dessert managed to feel special without any fuss. It’s the kind of recipe that makes you quietly smile when you serve it, because it hits that comforting sweet spot with minimal effort. I’ve since come to think of this creamy no-bake Oreo icebox cake as my go-to for unexpected guests or when I want a quick treat without sweating the details. Plus, it’s a total mood-lifter after a long day — a little bowl of creamy happiness that’s just as easy to make as it is to eat.
Why You’ll Love This Recipe
Over the years, I’ve tested plenty of no-bake desserts, but this creamy no-bake Oreo icebox cake always stands out. Here’s why it’s earned a permanent spot in my recipe rotation:
- Quick & Easy: Takes just about 15 minutes to assemble, leaving the fridge to do the rest. Perfect for busy weeknights or last-minute dessert plans.
- Simple Ingredients: No need for fancy or hard-to-find items. Just Oreos, cream, cream cheese, and a few pantry staples.
- Perfect for Any Occasion: Whether it’s a casual family dinner, a potluck, or a cozy treat after a hectic day, this icebox cake fits right in.
- Crowd-Pleaser: Kids and adults alike always ask for seconds — the creamy texture and cookie crunch combo is irresistible.
- Unbelievably Delicious: The balance of smooth cream and softened Oreos creates a dreamy, comforting dessert that feels indulgent but not overwhelming.
This recipe isn’t just another Oreo dessert. What makes it special is the way the cream cheese blends into the whipped cream, giving the filling a subtle tang and creaminess that lifts it above the usual whipped topping. I also love that it requires zero baking, so you can whip it up even in the hottest months without heating up your kitchen. Honestly, once you try this, it might become your favorite quick dessert, much like how my creamy one-pot chicken Alfredo has been a go-to for busy nights — straightforward but packed with flavor.
What Ingredients You Will Need
This creamy no-bake Oreo icebox cake recipe relies on simple, wholesome ingredients to deliver bold flavor and satisfying texture without any complicated steps. Most of these are pantry essentials, and you might already have them on hand.
- Oreos: About 36 classic Oreos (regular or double-stuffed if you prefer extra cream). I recommend using fresh cookies for the best texture.
- Heavy Whipping Cream: 2 cups (480 ml), cold. This whips up into a fluffy, luscious filling.
- Cream Cheese: 8 ounces (225 g), softened. Adds richness and a subtle tanginess to the cream.
- Powdered Sugar: 1/2 cup (60 g), sifted. Sweetens the cream without any grittiness.
- Vanilla Extract: 1 teaspoon. For a warm, inviting flavor boost.
- Milk (optional): 1/4 cup (60 ml) to help soften the Oreos if you want them less crunchy.
Sometimes I swap the classic Oreos for chocolate wafer cookies when I want a slightly different texture, and it’s just as good. If you’re dairy-free, you can try coconut cream instead of heavy whipping cream, and a dairy-free cream cheese alternative, but I haven’t tested those variations as extensively. For a gluten-free option, there are gluten-free chocolate sandwich cookies that work well here.
Pro tip: Using a trusted brand like Philadelphia for cream cheese gives the smoothest result. Also, cold heavy cream whips best, so keep it chilled until you’re ready to use it.
Equipment Needed
- Mixing Bowls: One large bowl for whipping cream and another for beating cream cheese mixture.
- Electric Mixer or Stand Mixer: Essential for whipping the cream to soft peaks and combining cream cheese smoothly. A hand whisk works but requires more effort.
- Spatula: For folding the whipped cream and cream cheese mixture gently.
- 9×13-inch Baking Dish or Similar Sized Glass Dish: To layer your cake. A clear glass dish lets you see those beautiful Oreo layers.
- Measuring Cups and Spoons: For accuracy in ingredients.
I’ve tried making this in disposable aluminum pans when bringing it to gatherings, and it works great for easy transport. If you don’t have a stand mixer, a handheld electric mixer is a budget-friendly option that gets the job done quickly. Just be sure to clean your beaters promptly after use to avoid hardened cream cheese buildup.
Preparation Method
- Prepare the Cream Mixture (10 minutes): In a large bowl, beat the softened cream cheese with powdered sugar and vanilla extract until smooth and creamy, about 2-3 minutes. Meanwhile, in a separate chilled bowl, whip the cold heavy cream until it forms soft peaks.
- Combine Cream and Cream Cheese: Gently fold the whipped cream into the cream cheese mixture using a spatula. Fold just until combined — you want to keep as much air as possible for that light, fluffy texture.
- Layer the Oreos: In your 9×13-inch dish, spread a thin layer of the cream mixture on the bottom. Then arrange a single layer of Oreos over the cream. If you like softer cookies, quickly dip each Oreo in milk before layering.
- Repeat Layers: Spread more cream mixture over the Oreos, then add another layer of cookies. Continue layering until you’ve used all the cream and cookies, finishing with a thick layer of cream on top.
- Chill the Cake: Cover the dish with plastic wrap and refrigerate for at least 6 hours, preferably overnight. This allows the cookies to soften and the flavors to meld.
- Serve: Slice into squares and serve chilled. The cake should be creamy with cookies softened to a cake-like texture but still slightly firm.
Watch out for overmixing the whipped cream and cream cheese — it can turn runny if you’re too aggressive. Also, don’t skip the chilling step; that’s where the magic happens. The longer it rests, the better the texture.
Cooking Tips & Techniques
Honestly, this recipe is pretty forgiving, but a few tips from my trials can save you some headaches:
- Use Cold Ingredients: Cold cream whips better, and cold cream cheese blends smoother. Room temperature cream cheese is fine, but too warm and it’s harder to whip up a fluffy filling.
- Folding Technique: When mixing whipped cream and cream cheese, fold gently to keep the airy texture. Stirring too hard deflates the mixture, making it dense.
- Cookie Layering: For softer cookies, a quick dip in milk before layering works wonders but don’t soak them! A quick dunk and shake is all you need.
- Chill Time: I’ve learned that at least 6 hours is the minimum. The first time I tried serving it after 3 hours, the cookies were still too crunchy, and the cream hadn’t set well.
- Multitasking: While this chills, it’s a perfect time to prepare a quick dinner like the five-dollar chicken fried rice — quick, flavorful, and done in one pan!
Variations & Adaptations
This creamy no-bake Oreo icebox cake is versatile. Here are some ways I’ve switched it up depending on mood or occasion:
- Chocolate Lover’s Version: Add a layer of melted chocolate ganache between the cream and cookies for extra richness.
- Peanut Butter Twist: Fold 1/4 cup of creamy peanut butter into the cream mixture for a nutty flavor that pairs beautifully with Oreos.
- Berry Burst: Mix in fresh raspberries or sliced strawberries between layers for a tart contrast and a pop of color.
- Vegan Option: Use coconut cream for whipping and dairy-free cream cheese to make a plant-based version. The texture changes slightly but still delicious.
- Mini Icebox Cakes: Layer Oreos and cream in individual jars or cups for portable, single-serving treats.
One personal favorite is the berry burst variation — it brightens up the classic Oreo flavor and makes the dessert feel a little lighter, especially in warmer months.
Serving & Storage Suggestions
Serve this creamy no-bake Oreo icebox cake chilled straight from the fridge. It’s perfect on its own, but if you want to get fancy, top with a sprinkle of crushed Oreos or a drizzle of chocolate sauce.
Pair it with a cold glass of milk or a cup of coffee for a delightful treat. For a fun contrast, a scoop of vanilla ice cream on the side works surprisingly well.
To store, cover tightly with plastic wrap or a lid and keep refrigerated for up to 3 days. The flavors actually deepen after a day, but the texture is best fresh within 48 hours. You can freeze individual slices wrapped in foil and plastic wrap for up to a month; just thaw in the fridge before serving.
If you want to plan ahead, this dessert is a lifesaver. I’ve made it the night before a family gathering and found it’s a stress-free way to have a homemade treat ready to impress without last-minute hassle.
Nutritional Information & Benefits
While this creamy no-bake Oreo icebox cake is definitely a treat, it’s made with minimal ingredients and no artificial additives. Here’s a rough estimate per serving (based on 12 servings):
| Calories | 280 kcal |
|---|---|
| Fat | 18 g |
| Carbohydrates | 28 g |
| Protein | 3 g |
Key ingredients like cream cheese provide calcium and vitamin A, while heavy cream adds some fat-soluble vitamins. Of course, the Oreos bring in sugars and carbs, so this is best enjoyed in moderation as a sweet indulgence.
For those who are gluten-sensitive, swapping Oreos for gluten-free sandwich cookies keeps it accessible, and you can find recipes like high-protein flatbread options for balancing meals throughout your day.
Conclusion
This creamy no-bake Oreo icebox cake recipe is a little gem that’s easy to make and impossible not to love. It’s the kind of dessert that feels like a special treat but comes together with everyday ingredients and zero oven time. I appreciate how it fits into busy schedules while still delivering that rich, creamy, cookie-packed satisfaction.
Feel free to tweak the layers, add a personal touch, or turn it into mini servings for parties. I’ve found this recipe a reliable way to impress without stress, and I hope it becomes a favorite in your kitchen, just like it did in mine.
If you give it a try, I’d love to hear how you customized it or what moments you served it for. Sharing those little recipe stories is part of the fun — it’s what makes cooking feel like a shared adventure.
Frequently Asked Questions
Can I use a different cookie instead of Oreos?
Yes! Chocolate wafer cookies or gluten-free sandwich cookies work well. Just make sure they’re sturdy enough to hold up during chilling.
How long should I chill the icebox cake?
At least 6 hours is ideal, but overnight chilling gives the best texture and flavor melding.
Can I make this recipe ahead of time?
Absolutely. It’s perfect for prepping a day in advance or even freezing slices for later enjoyment.
Is it possible to make this dairy-free?
Yes, using coconut cream and dairy-free cream cheese substitutes works, though texture and flavor may vary slightly.
What’s the best way to serve this dessert?
Serve chilled, optionally topped with crushed Oreos or a drizzle of chocolate sauce. It pairs wonderfully with milk or coffee.
Pin This Recipe!
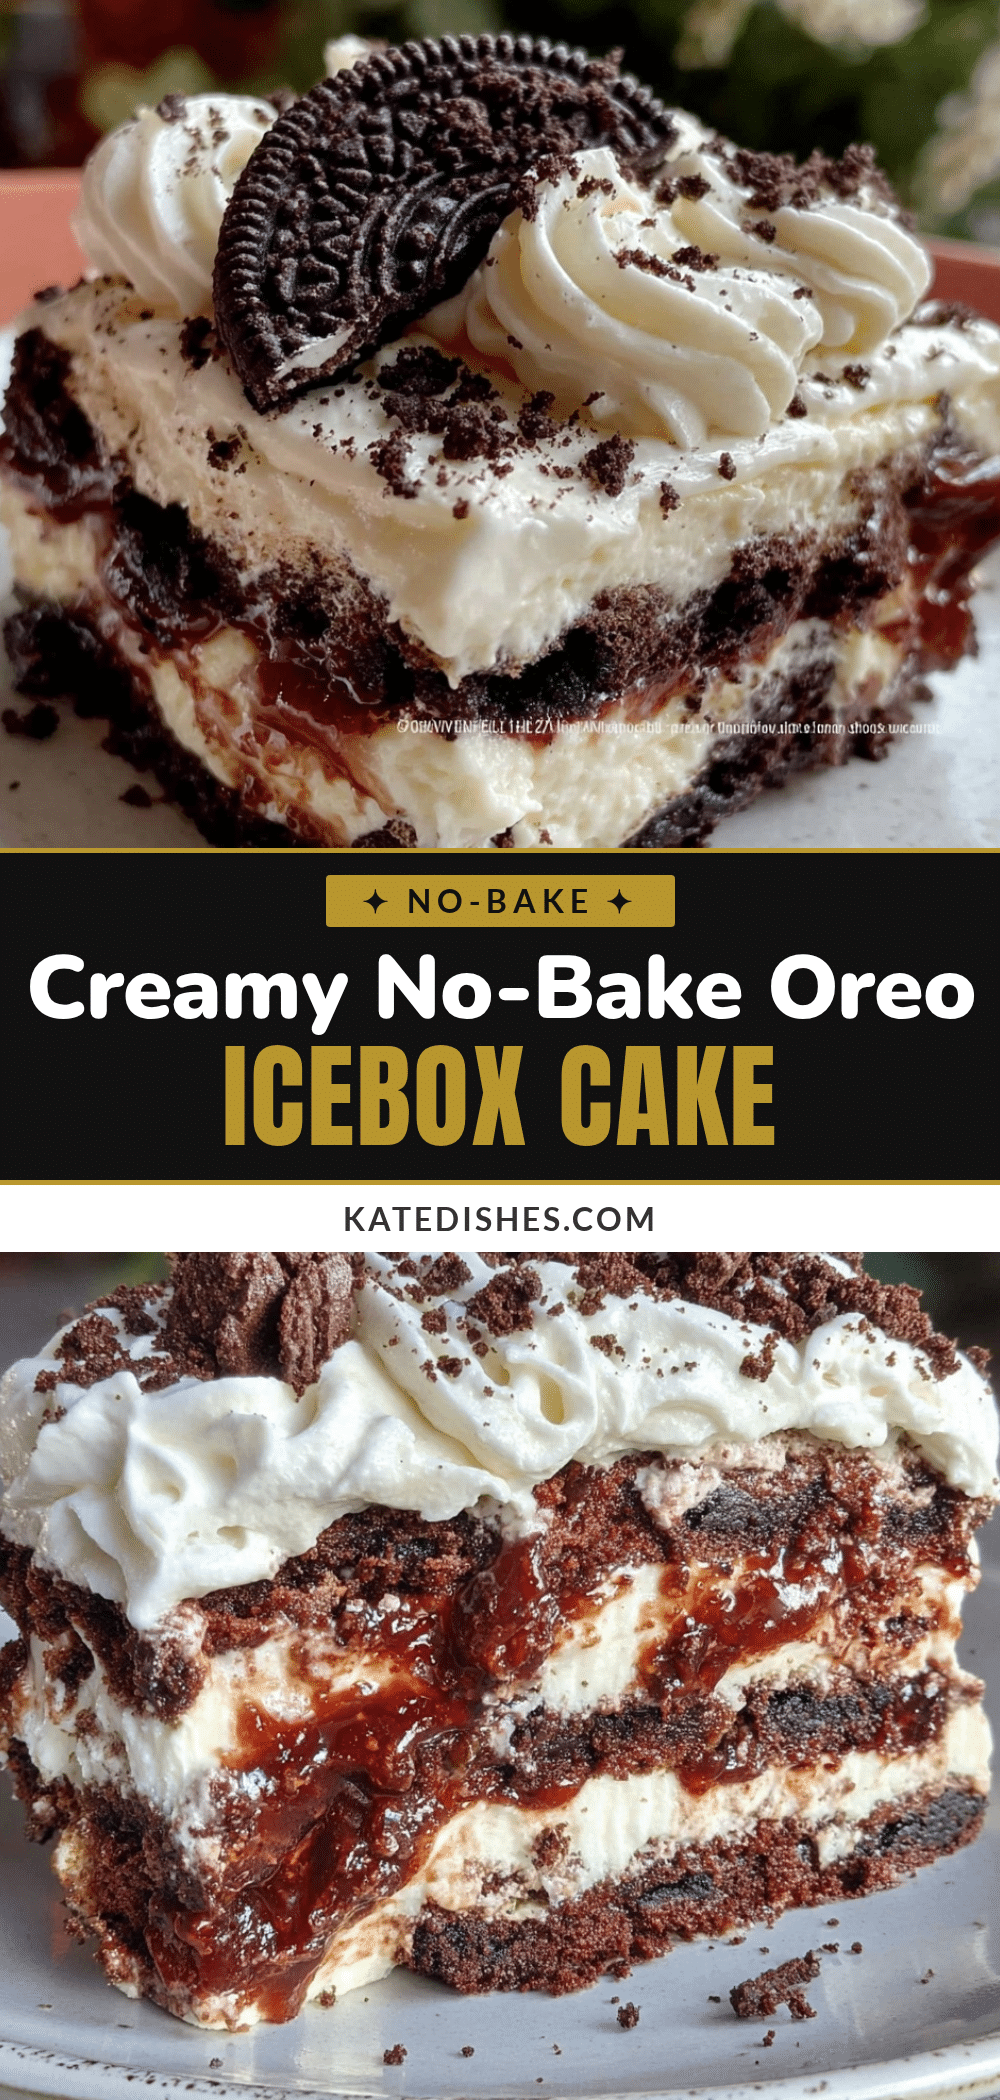
Creamy No-Bake Oreo Icebox Cake

A rich and indulgent no-bake dessert layering Oreos with a creamy mixture of whipped cream and cream cheese, chilled overnight for a soft, cake-like texture.
- Prep Time: 15 minutes
- Cook Time: 0 minutes
- Total Time: 6 hours 15 minutes
- Yield: 12 servings 1x
- Category: Dessert
- Cuisine: American
Ingredients
- 36 classic Oreos (regular or double-stuffed)
- 2 cups (480 ml) heavy whipping cream, cold
- 8 ounces (225 g) cream cheese, softened
- 1/2 cup (60 g) powdered sugar, sifted
- 1 teaspoon vanilla extract
- 1/4 cup (60 ml) milk (optional, for softening Oreos)
Instructions
- In a large bowl, beat the softened cream cheese with powdered sugar and vanilla extract until smooth and creamy, about 2-3 minutes.
- In a separate chilled bowl, whip the cold heavy cream until it forms soft peaks.
- Gently fold the whipped cream into the cream cheese mixture using a spatula, folding just until combined to keep it light and fluffy.
- Spread a thin layer of the cream mixture on the bottom of a 9×13-inch dish.
- Arrange a single layer of Oreos over the cream. For softer cookies, quickly dip each Oreo in milk before layering.
- Repeat layering cream mixture and Oreos until all are used, finishing with a thick layer of cream on top.
- Cover the dish with plastic wrap and refrigerate for at least 6 hours, preferably overnight, to allow cookies to soften and flavors to meld.
- Slice into squares and serve chilled.
Notes
Use cold heavy cream and cream cheese for best whipping results. Fold whipped cream gently into cream cheese mixture to keep it airy. Chill at least 6 hours or overnight for best texture. For softer Oreos, dip quickly in milk before layering but do not soak.
Nutrition
- Serving Size: 1 slice (1/12th of c
- Calories: 280
- Fat: 18
- Carbohydrates: 28
- Protein: 3
Keywords: no-bake, Oreo, icebox cake, easy dessert, creamy, whipped cream, cream cheese, quick dessert