“I wasn’t expecting much when my neighbor, Mrs. Thompson, slid a square of what looked like a simple lime dessert across the fence one sunny Saturday afternoon. Honestly, I thought it was just another sweet treat, but that first bite of the creamy no-bake key lime pie bars stopped me in my tracks. The tangy zing mixed with the smooth, velvety texture was unlike anything I’d tasted before. It was one of those rare moments when a dessert transported me straight to a breezy beach day, even though I was standing in my cluttered backyard surrounded by garden tools and half-finished projects.
You know that feeling when a recipe sneaks up on you and instantly becomes a favorite? That’s exactly what happened here. I tried to recreate those bars immediately, but it took a few messy kitchen experiments—like the time I forgot to chill the crust and ended up with a crumbly disaster—before I nailed the perfect balance of tart and sweet. Maybe you’ve been there, scrambling to whip up something refreshing without turning on the oven during the summer heat.
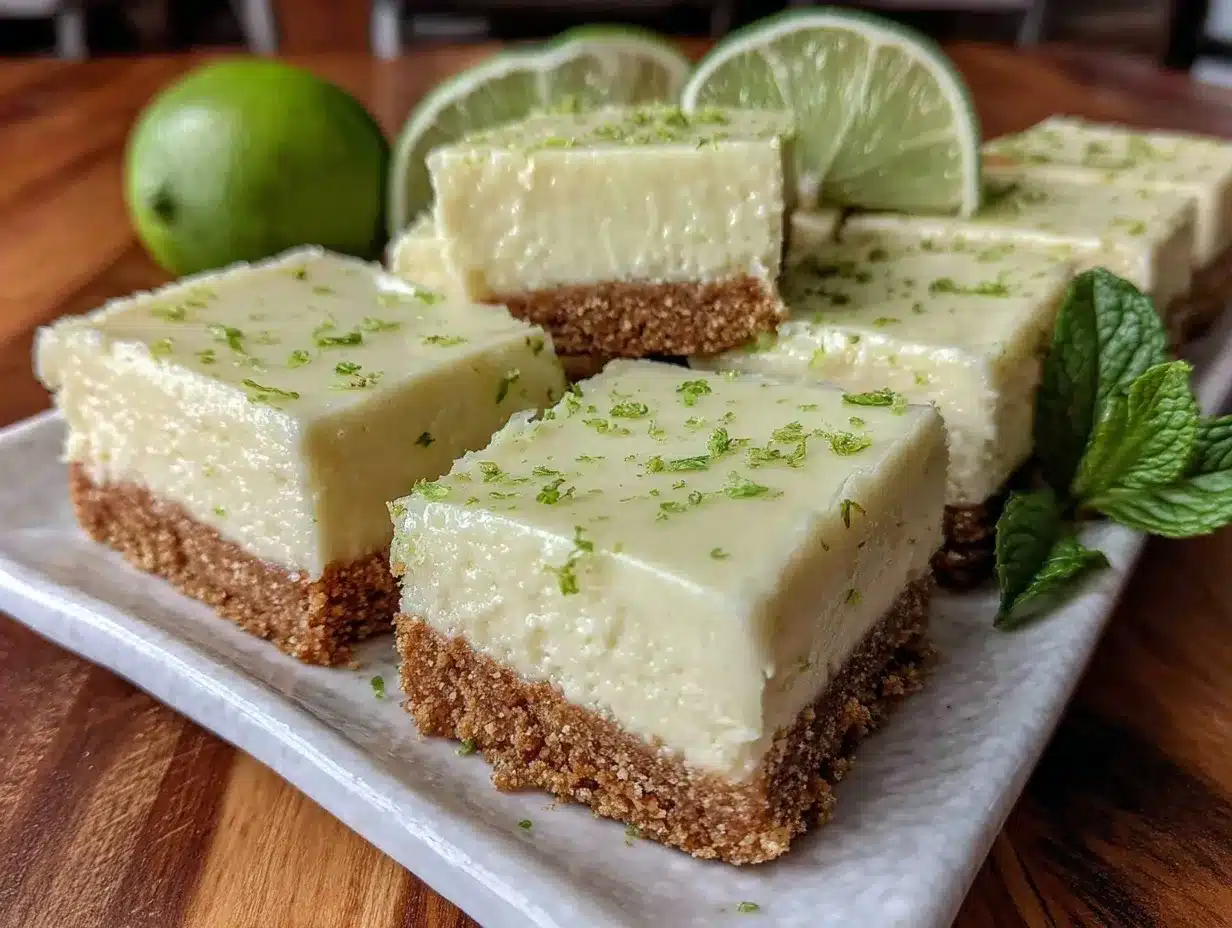
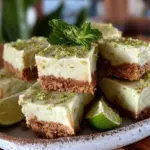
These creamy no-bake key lime pie bars have stuck with me ever since because they’re so simple yet so satisfying. The crust has just enough crunch, and the filling is luscious without being too heavy. Plus, they come together quickly, which is a real lifesaver when unexpected guests drop by or when you’re craving something cool and zesty late at night. Let me tell you, once you try these bars, they’ll become your go-to treat for warm days and chill evenings alike.
Why You’ll Love This Recipe
This creamy no-bake key lime pie bars recipe isn’t just another dessert; it’s a little celebration of summer in every bite. After testing countless variations and tasting feedback from friends and family, I’m confident in saying this is a recipe you’ll want to keep close. Here’s what makes it stand out:
- Quick & Easy: Ready in under 30 minutes, making it perfect for busy afternoons or last-minute dessert plans.
- Simple Ingredients: Uses pantry staples and fresh key lime juice—no hunting for exotic items!
- Perfect for Summer: Ideal for barbecues, picnics, or when you want a cool, bright finish to your meal.
- Crowd-Pleaser: Kids and adults alike rave about the smooth texture and refreshing zing.
- Unbelievably Delicious: The creamy filling has a silky mouthfeel while packing just the right amount of tartness.
What really sets this apart is the technique of folding whipped cream into the lime mixture, giving the filling a light, airy texture that feels indulgent but never heavy. The crust is buttery and crisp, with a hint of sweetness that balances the tang. Honestly, it’s the kind of dessert that makes you close your eyes and smile after the first bite. Whether you’re impressing guests or treating yourself to a little summer joy, these bars deliver every time.
What Ingredients You Will Need
This recipe uses simple, wholesome ingredients to deliver bold flavor and satisfying texture without the fuss. Most of these items are pantry staples, and if you don’t have key limes on hand, regular limes will work just fine (though the flavor won’t be quite as bright). Here’s what you’ll need:
- For the Crust:
- 1 ½ cups graham cracker crumbs (I like using Honey Maid for a perfect texture)
- 6 tablespoons unsalted butter, melted (adds richness and binds the crust)
- ¼ cup granulated sugar (balances the buttery crust)
- For the Filling:
- 1 can (14 oz / 400 g) sweetened condensed milk (the heart of the creamy filling)
- ½ cup fresh key lime juice (about 4-5 key limes, freshly squeezed for best brightness)
- 1 teaspoon lime zest (for an extra citrus punch)
- 1 cup heavy cream, chilled (to be whipped and folded into the filling)
- Optional: pinch of salt (to balance the sweetness)
Ingredient Tips: If you can’t find key limes, regular Persian limes will do, but try to get the freshest possible juice. For dairy-free options, swap butter for coconut oil and use coconut cream instead of heavy cream—though the flavor will shift slightly. Pro tip: zest your limes before juicing to make things easier and to avoid bitterness in the filling.
Equipment Needed
- 8×8-inch (20×20 cm) square baking pan – I recommend one with a removable bottom if you have it, but a regular pan lined with parchment works just as well.
- Mixing bowls – one large for the crust, one medium for the filling, and one chilled for whipping cream.
- Electric hand mixer or stand mixer – whipping the cream by hand is possible but takes a good bit of effort and patience.
- Fine grater or zester – for zesting the limes finely without the bitter pith.
- Citrus juicer or reamer – makes extracting juice easier and less messy.
- Rubber spatula – perfect for folding whipped cream gently into the filling mixture.
If you’re on a budget, no worries—just line your pan well with parchment paper to help remove the bars easily. I once tried making these bars in a glass dish and had to break them up to serve; lesson learned! Keeping your mixing bowls chilled also helps the cream whip faster and hold its shape better.
Preparation Method
- Prepare the Crust (10 minutes): In a large bowl, combine 1 ½ cups graham cracker crumbs, 6 tablespoons melted unsalted butter, and ¼ cup granulated sugar. Mix until the crumbs are evenly coated and the mixture holds together when pressed. You want it sandy but slightly sticky.
- Press the Crust: Line your 8×8-inch pan with parchment paper, leaving some overhang for easy lifting. Press the crust mixture firmly and evenly into the bottom of the pan using the back of a spoon or your fingers. Make sure the crust is compact to hold the filling well. Chill the crust in the refrigerator for at least 15 minutes while you prepare the filling.
- Whip the Cream (5-7 minutes): In a chilled bowl, beat 1 cup heavy cream with an electric mixer until stiff peaks form. Be careful not to overbeat or it will turn grainy. Set aside in the fridge.
- Make the Filling: In a medium bowl, whisk together 1 can (14 oz or 400 g) sweetened condensed milk, ½ cup fresh key lime juice, 1 teaspoon lime zest, and a pinch of salt if using. The mixture will thicken as the acid reacts with the milk.
- Fold in the Whipped Cream: Gently fold the whipped cream into the lime mixture using a rubber spatula. Use light sweeping motions to keep the mixture airy and fluffy. This step gives the filling that creamy, melt-in-your-mouth texture.
- Assemble the Bars: Pour the filling over the chilled crust in the pan and spread it evenly with a spatula. Smooth the top to create a clean finish.
- Chill and Set (minimum 2 hours): Refrigerate the bars for at least 2 hours or until firm enough to cut cleanly. Overnight chilling is even better for flavor and texture.
- Slice and Serve: Using the parchment overhang, lift the bars out of the pan and place on a cutting board. Cut into 12 squares using a sharp knife (dipping the knife in hot water and wiping it clean between cuts helps with neat edges).
- Garnish (optional): Add a sprinkle of extra lime zest or a dollop of whipped cream on top for presentation.
Pro tips: Don’t skip chilling the crust before adding the filling, or it might crumble when slicing. Also, be patient with the chilling time to get those perfect firm bars that hold together well but still have that creamy softness inside.
Cooking Tips & Techniques
Getting the creamy no-bake key lime pie bars just right is all about a few key techniques. First, when mixing the crust, you want it moist enough to hold together but not soggy. Too much butter and the base will be oily; too little and it crumbles apart. I learned this the hard way after a crumbly first batch ended up more like key lime crumble than bars!
Whipping the cream is another game changer. Make sure your cream and bowl are well-chilled before starting, and whip slowly at first to avoid splatters, then crank up the speed. Stop as soon as stiff peaks form—if you go too far, it turns into butter (yes, it happened to me once). Folding in the whipped cream gently is crucial; vigorous mixing deflates the air bubbles and makes the filling dense.
When juicing the limes, strain out seeds and pulp for a smooth filling. If you accidentally add too much juice, the filling might not set properly. If that happens, add a bit more condensed milk or chill longer. Patience is key here.
Finally, slicing cold bars with a hot knife helps keep edges clean and pretty, especially if you’re serving guests. I always keep a kitchen towel and a cup of hot water nearby for this step. Multitasking tip: start whipping cream while the crust chills to save time.
Variations & Adaptations
- Dietary Swaps: For a gluten-free crust, swap graham crackers with gluten-free cookies or almond flour mixed with a bit more butter. Use coconut cream instead of heavy cream for a dairy-free version.
- Flavor Twists: Add a teaspoon of vanilla extract or a tablespoon of finely chopped fresh mint to the filling for a subtle flavor twist. You can also swirl in some passionfruit puree before chilling for a tropical vibe.
- Alternative Crusts: Try a crushed pretzel crust for a salty-sweet contrast, or use crushed digestive biscuits for a less sweet base. Toasting the crumbs lightly in a pan before mixing with butter adds a nutty depth.
- Cooking Method: While this is a no-bake recipe, you can warm the crust mixture slightly in a pan to melt the butter evenly before pressing it in the pan.
- Personal Variation: Once, I added a thin layer of blueberry compote between the crust and filling for a summer berry surprise. It was a messy experiment but surprisingly delicious!
Serving & Storage Suggestions
Serve these creamy no-bake key lime pie bars chilled for the best texture and flavor. They pair wonderfully with a cup of iced tea, sparkling water with a lime wedge, or even a light white wine for grown-up gatherings. Presentation-wise, a sprinkle of extra lime zest or a small mint leaf on each square adds a pop of color and freshness.
To store, cover the bars tightly with plastic wrap or keep them in an airtight container in the refrigerator. They’ll stay fresh for up to 4 days, though honestly, they rarely last that long here! If you want to keep them longer, you can freeze the bars for up to a month—just thaw in the fridge overnight before serving.
When reheating, it’s best to avoid the microwave since these bars are meant to be enjoyed cold. If you prefer a softer slice straight from the fridge, let them sit at room temperature for 10 minutes to take the chill off without melting the filling.
Flavors actually deepen after a day or two, so if you can wait, the bars get even better. Just don’t forget to cover them well so they don’t absorb any fridge odors.
Nutritional Information & Benefits
Each creamy no-bake key lime pie bar contains approximately 220 calories, with about 12 grams of fat, 25 grams of carbohydrates, and 3 grams of protein. The key lime juice adds a boost of vitamin C and antioxidants, supporting your immune system and skin health.
Using fresh key lime juice rather than bottled ensures you get the most vibrant flavor and nutrients. Sweetened condensed milk adds richness but also sugar, so these bars are best enjoyed as an occasional treat. For a lighter version, you can try reducing the sugar in the crust or using light condensed milk, though the texture will be less creamy.
This dessert is gluten-containing unless you swap the crust ingredients, and contains dairy, so keep that in mind if you have allergies. From a wellness perspective, it’s a delightful way to satisfy a sweet craving with some fresh citrus brightness—much better than heavy, overly sweet desserts!
Conclusion
These creamy no-bake key lime pie bars are a refreshing, simple treat that’s perfect for those warm days when you want something tangy and luscious without heating up the kitchen. I love how they balance tart lime flavor with a smooth, airy filling and a crunchy base—honestly, each bite feels like a little celebration. Feel free to tweak the recipe to suit your taste or dietary needs; it’s forgiving and versatile.
Whether you’re new to key lime desserts or a longtime fan, this recipe is worth keeping in your back pocket for summer gatherings, casual snacks, or whenever you need a quick, delightful pick-me-up. If you try it, please drop a comment or share your variations—I’m always curious how others make it their own!
Here’s to many more cozy moments with this sunny, creamy treat in your kitchen!
FAQs
Can I use regular limes instead of key limes?
Yes, regular limes work fine, though key limes have a slightly more floral and tart flavor. Freshly squeezed juice is best for both.
How long do these bars last in the fridge?
They stay fresh for about 4 days when stored in an airtight container. For longer storage, freeze and thaw before serving.
Can I make this recipe vegan or dairy-free?
Swap butter with coconut oil, use coconut cream instead of heavy cream, and find a vegan sweetened condensed milk alternative. The texture and flavor will differ slightly.
Do I have to chill the crust before adding the filling?
Chilling the crust helps it set firmly so the bars hold together when sliced. It’s a step worth not skipping.
What’s the best way to get clean slices?
Use a sharp knife dipped in hot water and wiped dry between cuts. This prevents sticking and keeps edges neat.
Pin This Recipe!
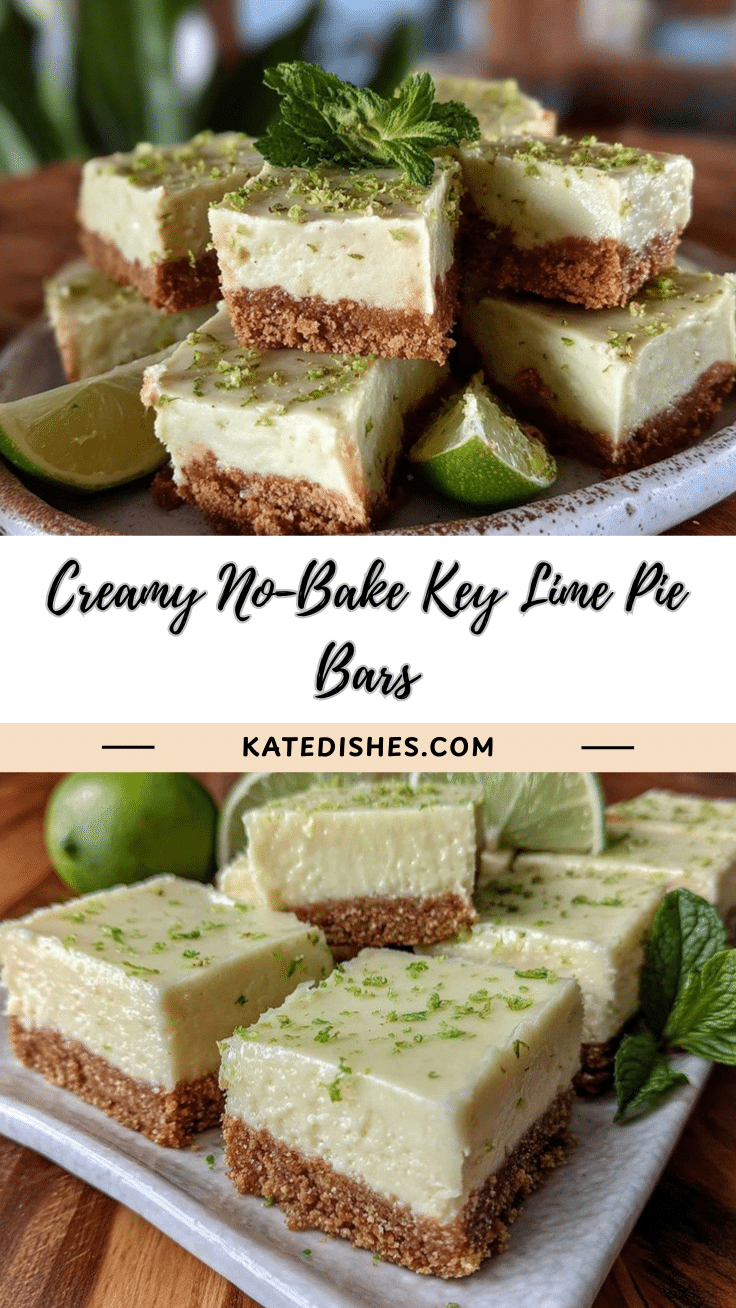
Creamy No-Bake Key Lime Pie Bars
These creamy no-bake key lime pie bars are a quick, refreshing summer dessert with a buttery graham cracker crust and a light, airy lime filling. Perfect for warm days and chill evenings, they combine tartness with a smooth, velvety texture.
- Prep Time: 15 minutes
- Cook Time: 0 minutes
- Total Time: 2 hours 15 minutes
- Yield: 12 servings 1x
- Category: Dessert
- Cuisine: American
Ingredients
- 1 ½ cups graham cracker crumbs
- 6 tablespoons unsalted butter, melted
- ¼ cup granulated sugar
- 1 can (14 oz / 400 g) sweetened condensed milk
- ½ cup fresh key lime juice (about 4–5 key limes)
- 1 teaspoon lime zest
- 1 cup heavy cream, chilled
- Pinch of salt (optional)
Instructions
- In a large bowl, combine graham cracker crumbs, melted butter, and granulated sugar. Mix until crumbs are evenly coated and mixture holds together when pressed.
- Line an 8×8-inch pan with parchment paper, leaving overhang for easy lifting. Press crust mixture firmly and evenly into the bottom of the pan. Chill in refrigerator for at least 15 minutes.
- In a chilled bowl, beat heavy cream with an electric mixer until stiff peaks form. Set aside in fridge.
- In a medium bowl, whisk together sweetened condensed milk, fresh key lime juice, lime zest, and a pinch of salt if using. The mixture will thicken as the acid reacts with the milk.
- Gently fold whipped cream into the lime mixture using a rubber spatula, keeping the mixture airy and fluffy.
- Pour filling over chilled crust and spread evenly with a spatula. Smooth the top.
- Refrigerate bars for at least 2 hours or until firm enough to cut cleanly. Overnight chilling is recommended for best flavor and texture.
- Lift bars out of pan using parchment overhang and cut into 12 squares with a sharp knife dipped in hot water and wiped clean between cuts.
- Optional: garnish with extra lime zest or a dollop of whipped cream.
Notes
Chill the crust before adding the filling to prevent crumbling. Use a sharp knife dipped in hot water and wiped clean between cuts for neat slices. Keep mixing bowls chilled to whip cream faster and better. For dairy-free or gluten-free options, substitute ingredients as suggested in the recipe. Overnight chilling improves flavor and texture.
Nutrition
- Serving Size: 1 bar (1/12th of rec
- Calories: 220
- Sugar: 20
- Sodium: 90
- Fat: 12
- Saturated Fat: 7
- Carbohydrates: 25
- Fiber: 0.5
- Protein: 3
Keywords: key lime pie bars, no-bake dessert, summer dessert, creamy lime bars, easy key lime recipe, refreshing dessert