“You know, I wasn’t expecting a kitchen lesson from my neighbor, Mrs. Lawson, but there I was on a humid Saturday afternoon, watching her whisk together what looked like a simple pudding mix. The sizzle of the afternoon cicadas played in the background as she casually mentioned her secret to the creamiest banana pudding—her grandmother’s recipe. Honestly, this wasn’t just any dessert; it was the kind that made you pause, close your eyes, and remember sunny family reunions.
It all started when I had just run out of ideas for a last-minute potluck. I begged Mrs. Lawson for something foolproof, and she handed me this recipe on a scrap of paper, almost like a treasure map. I admit, I spilled a bit of milk on the floor and forgot the vanilla extract the first time, but the results? Pure magic that stuck with me—easy, creamy, and packed with that nostalgic flavor only banana pudding can bring.
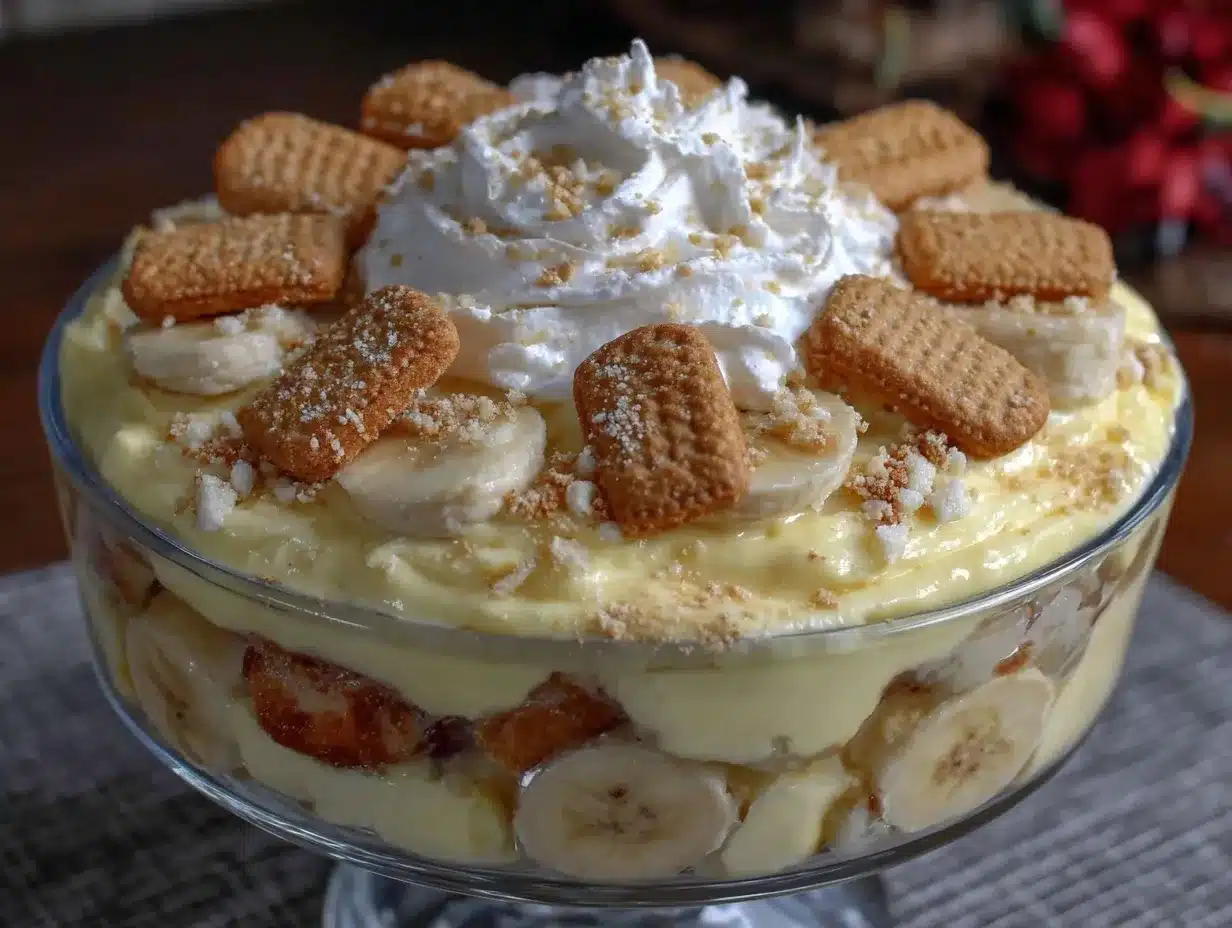
Maybe you’ve been there—looking for a dessert that feels like a warm hug and doesn’t take hours to prepare. This creamy grandma’s banana pudding with Nilla Wafers is exactly that. It’s simple, comforting, and just sweet enough to satisfy those late-night cravings or family gatherings when everyone’s looking for something familiar yet special.
Why You’ll Love This Recipe
After several tries (and a few messes), this recipe has earned a permanent spot in my dessert rotation. It’s been tested by family, friends, and yes, a few skeptical coworkers who came back asking for seconds. Here’s what makes this creamy grandma’s banana pudding with Nilla Wafers stand out:
- Quick & Easy: Ready in under 30 minutes, perfect for busy weeknights or surprise guests.
- Simple Ingredients: No need for specialty stores; most items are pantry staples you probably already have.
- Perfect for Potlucks & Family Dinners: Always a crowd-pleaser that both kids and adults adore.
- Unbelievably Creamy Texture: Thanks to the classic use of sweetened condensed milk and whipped cream, it’s luscious without being heavy.
- Balanced Sweetness: The ripe bananas and crunchy Nilla Wafers add just the right contrast to the smooth pudding.
What really sets this apart? The subtle hint of vanilla and the layering technique that ensures every bite has the perfect mix of creamy pudding, fresh banana slices, and that nostalgic crunch. Plus, it’s one of those desserts where you can close your eyes and feel like you’re right back on your grandma’s porch, watching the world slow down just a bit.
What Ingredients You Will Need
This recipe uses straightforward, wholesome ingredients that come together to create a rich, creamy pudding without any fuss. Most are pantry basics, making it easy to pull together even on short notice.
- Bananas: 4 ripe bananas, sliced (ripe but firm for best texture)
- Instant Vanilla Pudding Mix: 2 packets (about 3.4 oz each) for smooth, quick pudding
- Sweetened Condensed Milk: 1 (14 oz) can (adds creaminess and sweetness)
- Cold Whole Milk: 2 ½ cups (for the pudding base; you can use 2% for lighter version)
- Vanilla Extract: 1 tsp (to boost flavor depth; don’t skip this!)
- Whipped Topping: 1 (8 oz) tub of whipped cream or homemade whipped cream (for that airy texture)
- Nilla Wafers: About 45 wafers (you can also use vanilla-flavored cookies if Nilla isn’t available)
Pro tip: For the best results, choose firm bananas that aren’t overripe to avoid mushiness. I personally like to use the Pillsbury brand pudding mix—it gives a velvety texture that really stands out. If you want a dairy-free version, swap the milk and condensed milk with coconut milk varieties and use dairy-free whipped topping.
Equipment Needed
Gathering the right tools can make this recipe a breeze. Here’s what you’ll want:
- Mixing Bowls: One large for pudding, one medium for whipped topping.
- Whisk: Essential for blending the pudding mix smoothly without lumps.
- Measuring Cups & Spoons: For precise ingredient amounts.
- 9×13-inch Baking Dish or Glass Trifle Bowl: Perfect for layering the pudding, bananas, and wafers.
- Spatula: To fold the whipped topping gently into the pudding.
- Refrigerator: To chill the pudding before serving, which helps it set perfectly.
If you don’t have a whisk, a hand mixer works great for smoothing out the pudding base. For budget-friendly options, any sturdy glass or plastic mixing bowl will do—no need to splurge on fancy equipment here. Just keep a paper towel handy for inevitable drips (learned that the hard way!).
Preparation Method
- Prepare the pudding base: In a large bowl, whisk together the 2 packets of instant vanilla pudding mix with 2 ½ cups of cold whole milk. Whisk vigorously for 2 minutes until the mixture thickens and smooths out. This usually takes about 2–3 minutes. If lumps remain, keep whisking gently but thoroughly.
- Add sweetened condensed milk and vanilla: Stir in the entire 14 oz can of sweetened condensed milk and 1 teaspoon of vanilla extract. Mix until fully combined. This gives the pudding its signature rich creaminess and smooth texture. You’ll notice the mixture becomes luscious and thick.
- Fold in whipped topping: Gently fold in the 8 oz whipped topping using a spatula. This step adds lightness and softness to the pudding. Don’t overmix—just enough to blend the whipped topping evenly without deflating it.
- Layer the pudding, bananas, and wafers: In your chosen dish, start with a layer of Nilla Wafers (about ¼ of the total). Next, add a layer of sliced bananas (about half the bananas). Then spread about one-third of the pudding mixture on top. Repeat the layers—another ¼ of wafers, remaining bananas, and another third of pudding. Finish with a final layer of wafers and pudding on top.
- Chill: Cover the dish with plastic wrap and refrigerate for at least 4 hours, preferably overnight. This resting time allows the wafers to soften slightly and the flavors to meld beautifully. If you’re in a hurry, 3 hours can work, but the texture improves with longer chilling.
- Serve: Before serving, optionally garnish with a few extra Nilla Wafers or banana slices for a pretty presentation. Use a large spoon to dish out creamy, layered servings.
Note: If your bananas brown too quickly while preparing, toss them in a little lemon juice to keep them fresh-looking. I once forgot this step, and the pudding looked a little less photogenic but still tasted amazing—so no stress!
Cooking Tips & Techniques
Making this creamy grandma’s banana pudding with Nilla Wafers is pretty forgiving, but a few insider tips can make it shine every time:
- Whisk the pudding mix well: Instant pudding can clump if not whisked properly. Use a circular motion and steady speed to get a smooth base.
- Don’t overmix the whipped topping: Folding gently keeps the pudding airy. Overmixing will deflate the cream and lead to a denser texture.
- Layering matters: Alternating the wafers, bananas, and pudding helps balance textures. Too many wafers on one side can make bites too crunchy or soggy.
- Chill adequately: This is key for the pudding to set and the wafers to soften slightly, marrying the flavors and textures beautifully.
- Banana freshness: Slice bananas just before layering or toss with a bit of lemon juice to prevent browning and keep things looking fresh.
Honestly, my first attempt was a bit of a mess—bananas browned, pudding too runny—but after a few tries, I nailed the balance. One time, I even tried making it in individual glasses, which was great for portion control at parties!
Variations & Adaptations
This creamy grandma’s banana pudding with Nilla Wafers is super flexible. Here are a few ways to tweak it for different tastes or needs:
- Chocolate Banana Pudding: Add a layer of chocolate pudding or sprinkle mini chocolate chips between layers for a chocolaty twist.
- Gluten-Free Option: Use gluten-free vanilla wafers or substitute with crushed gluten-free cookies to keep it safe for gluten-sensitive eaters.
- Dairy-Free Version: Swap whole milk and sweetened condensed milk with coconut or almond milk versions, and use dairy-free whipped topping. The texture is slightly different but still delicious.
- Tropical Flavor: Add diced pineapple or mango slices along with bananas for a fresh, fruity upgrade.
- Adult Version: Mix a tablespoon of rum or banana liqueur into the pudding for a subtle boozy note that’s perfect for grown-up gatherings.
Personally, I once threw in some toasted coconut flakes for a bit of crunch and that tropical flair—it surprised everyone and tasted fantastic!
Serving & Storage Suggestions
This banana pudding is best served chilled straight from the fridge. It’s a perfect make-ahead dessert for busy days.
- Serving: Scoop into dessert bowls or serve family-style right from the baking dish. Garnish with extra wafers or a sprinkle of cinnamon for a pretty finish.
- Pairings: Goes wonderfully with a hot cup of coffee or a cold glass of milk. For brunch, try alongside fresh fruit salad for a balanced spread.
- Storage: Cover tightly with plastic wrap and keep refrigerated. It stays fresh for up to 3 days, though the wafers will soften over time (some say that’s even better!).
- Freezing: Not recommended as the texture of the pudding and bananas changes when thawed.
- Reheating: Best enjoyed cold, but if you want a warm dessert, scoop a small portion and microwave briefly (10–15 seconds) to soften slightly, though it won’t have the same creamy texture.
Flavors deepen after resting, so leftovers are often tastier the next day—if you don’t eat it all right away, that is!
Nutritional Information & Benefits
This creamy grandma’s banana pudding with Nilla Wafers is a moderate treat with some nutritional perks worth noting:
- Calories: Approximately 280 calories per serving (1/8 of recipe).
- Carbohydrates: Mainly from bananas, wafers, and sweetened condensed milk—provides quick energy.
- Calcium & Protein: Thanks to the milk and pudding base, it contributes to daily calcium needs.
- Potassium: Bananas offer a good dose of potassium, supporting heart and muscle function.
- Allergens: Contains dairy, gluten (from wafers), and eggs (in pudding mix). Dairy-free and gluten-free substitutions can be made.
While it’s a dessert, the fresh bananas add natural sweetness and nutrients, making it a better choice than many overly processed sweets. I find it’s a nice comfort food that feels indulgent but not over-the-top heavy.
Conclusion
Creamy grandma’s banana pudding with Nilla Wafers isn’t just dessert; it’s a little moment of joy you can whip up with simple ingredients and a few minutes of effort. Whether you’re after a nostalgic treat or a quick crowd-pleaser, this recipe fits the bill.
Feel free to customize it with your favorite add-ins or tweaks—maybe you’ll find a new family favorite, just like I did. I keep making this because it’s a sweet reminder of simpler times and comes together with minimal fuss, every single time.
If you give it a try, I’d love to hear your thoughts or any twists you’ve added—share your experience in the comments or tag me on social media. Here’s to cozy kitchens and creamy, dreamy desserts!
FAQs about Creamy Grandma’s Banana Pudding with Nilla Wafers
- Can I make this banana pudding ahead of time?
Absolutely! It actually tastes better after chilling for several hours or overnight to let the flavors meld. - What if my bananas brown too quickly?
Slice them just before assembling, or toss the slices in a little lemon juice to slow browning. - Can I use homemade pudding instead of instant mix?
Yes, but the texture and preparation time will differ. Instant pudding makes it quick and reliably creamy. - How do I keep the Nilla Wafers from getting too soggy?
Layer them last or serve immediately after chilling. Some softness is normal and adds to the classic texture. - Is there a dairy-free version of this recipe?
Definitely. Use coconut or almond milk substitutes and dairy-free whipped topping for a delicious alternative.
Pin This Recipe!
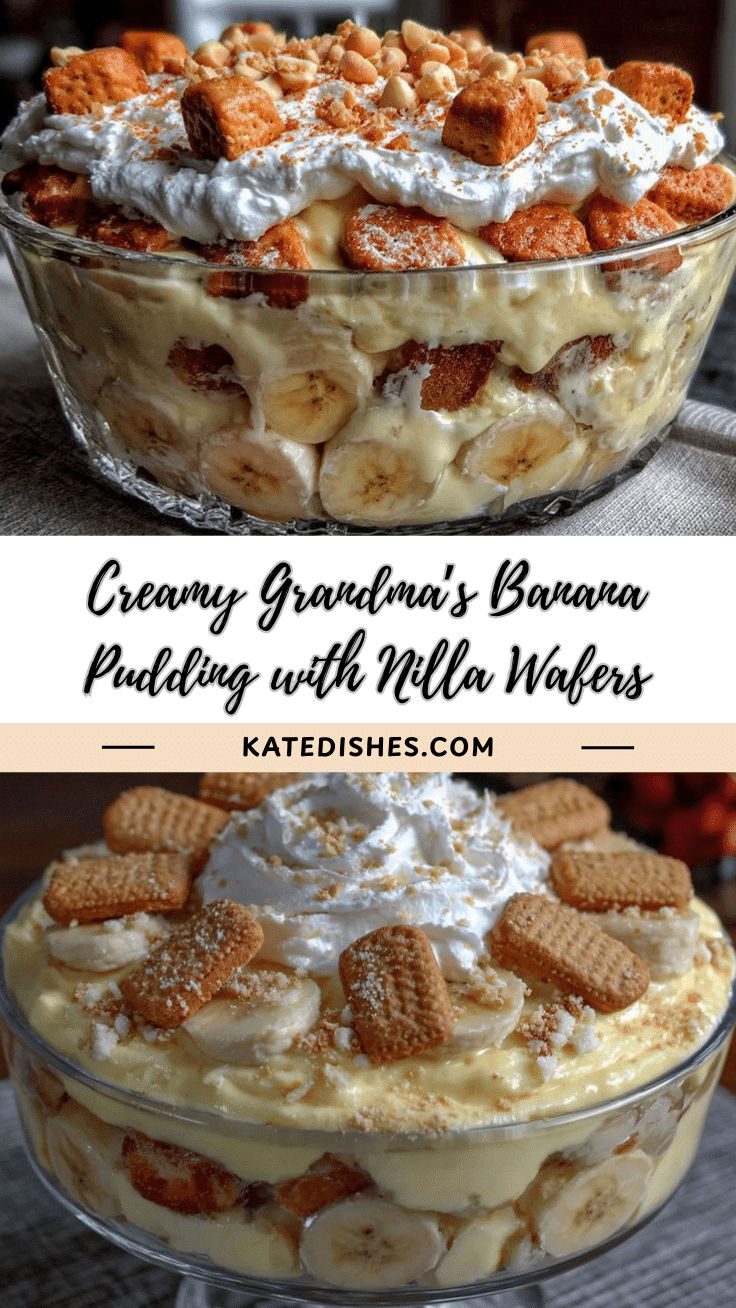
Creamy Grandma’s Banana Pudding Recipe with Nilla Wafers
A quick and easy creamy banana pudding layered with ripe bananas and crunchy Nilla Wafers, perfect for potlucks and family gatherings. This nostalgic dessert combines smooth pudding, airy whipped topping, and a hint of vanilla for a luscious treat.
- Prep Time: 15 minutes
- Cook Time: 0 minutes
- Total Time: 4 hours 15 minutes
- Yield: 8 servings 1x
- Category: Dessert
- Cuisine: American
Ingredients
- 4 ripe bananas, sliced (ripe but firm for best texture)
- 2 packets instant vanilla pudding mix (about 3.4 oz each)
- 1 (14 oz) can sweetened condensed milk
- 2 ½ cups cold whole milk (can substitute 2% milk for lighter version)
- 1 tsp vanilla extract
- 1 (8 oz) tub whipped topping or homemade whipped cream
- About 45 Nilla Wafers (or vanilla-flavored cookies)
Instructions
- In a large bowl, whisk together the 2 packets of instant vanilla pudding mix with 2 ½ cups of cold whole milk. Whisk vigorously for 2–3 minutes until the mixture thickens and smooths out.
- Stir in the entire 14 oz can of sweetened condensed milk and 1 teaspoon of vanilla extract until fully combined and thick.
- Gently fold in the 8 oz whipped topping using a spatula, blending evenly without deflating the whipped topping.
- In a 9×13-inch baking dish or glass trifle bowl, layer about ¼ of the Nilla Wafers, then half of the sliced bananas, followed by one-third of the pudding mixture.
- Repeat the layers with another ¼ of wafers, remaining bananas, and another third of pudding.
- Finish with a final layer of wafers and the remaining pudding on top.
- Cover the dish with plastic wrap and refrigerate for at least 4 hours, preferably overnight, to allow flavors to meld and wafers to soften.
- Before serving, optionally garnish with extra Nilla Wafers or banana slices. Serve chilled.
Notes
Use firm ripe bananas to avoid mushiness. Toss banana slices in lemon juice to prevent browning. Do not overmix whipped topping to keep pudding airy. Chilling overnight improves texture and flavor. For dairy-free version, substitute milk and condensed milk with coconut or almond milk and use dairy-free whipped topping. Gluten-free option available by using gluten-free vanilla wafers.
Nutrition
- Serving Size: 1/8 of the recipe
- Calories: 280
- Sugar: 35
- Sodium: 210
- Fat: 7
- Saturated Fat: 4
- Carbohydrates: 50
- Fiber: 2
- Protein: 4
Keywords: banana pudding, creamy dessert, Nilla Wafers, easy pudding recipe, potluck dessert, nostalgic dessert