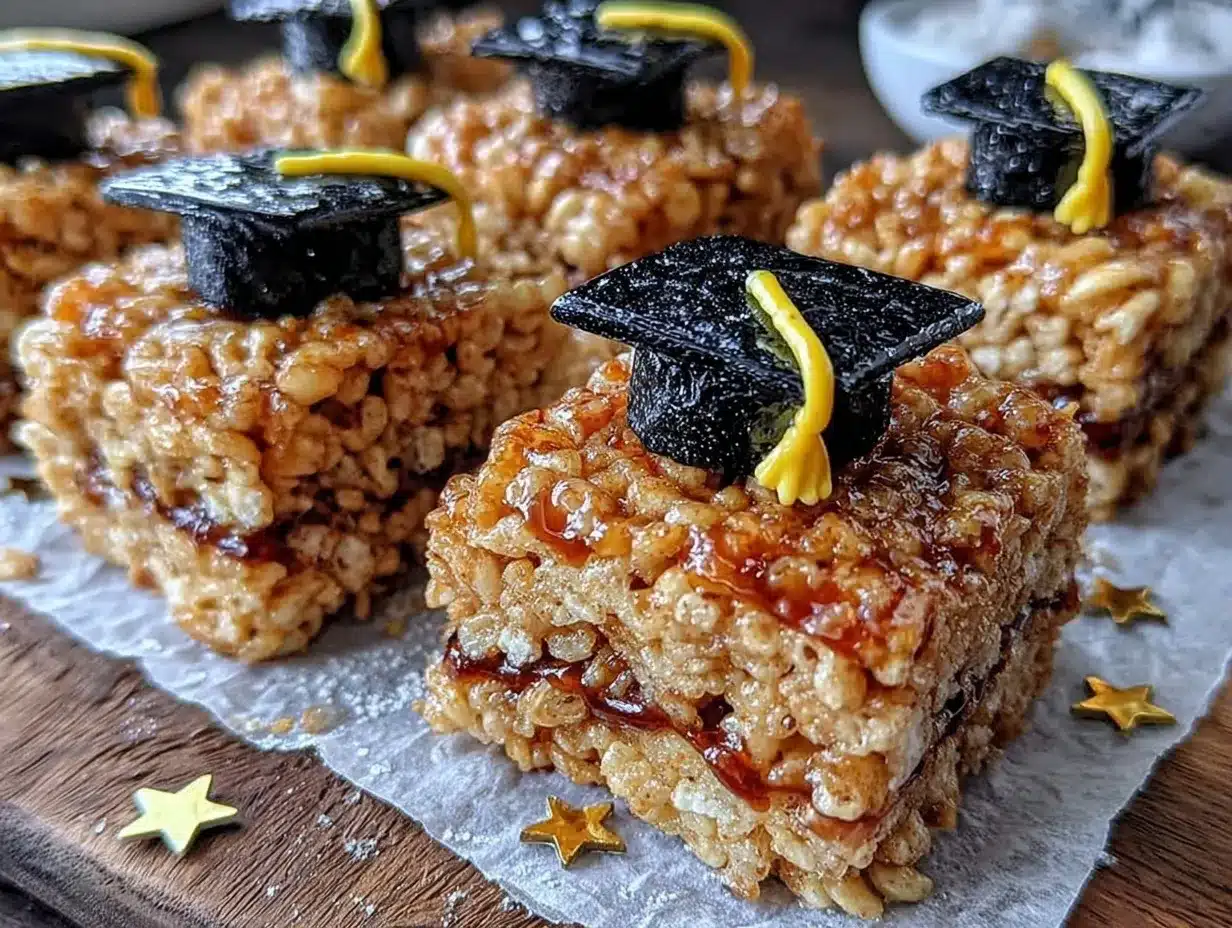
“I never thought a simple snack could cause such a commotion,” my friend Lisa chuckled as she eyed the tray of Festive Graduation Cap Rice Krispie Treat Pops cooling on the counter. It was the day of her son’s graduation party, and honestly, between juggling last-minute decorations and a mountain of dishes, I wasn’t sure these little pops would make much of a splash. But as soon as kids and adults alike started grabbing them, the room buzzed with compliments and laughter.
The idea came to me quite unexpectedly. I was rummaging through a dusty box of party supplies when I stumbled upon a pack of mini candy eyes and some leftover black licorice sticks. For a moment, I thought, why not turn the classic Rice Krispie treat into something playful—a graduation cap on a stick? It was a bit of a last-minute experiment, and yes, I accidentally dropped half the marshmallows on the floor (don’t judge), but the result? Totally worth it!
Maybe you’ve been there, trying to find that perfect, fuss-free party treat that’s both nostalgic and festive. These pops hit that sweet spot with their crunchy, chewy texture and just the right amount of chocolate and candy decoration. Plus, they’re surprisingly easy to make—even if you’re not exactly a dessert wizard. Let me tell you, this recipe stuck with me because it’s the one I reach for when I want to impress without the stress. So, go ahead—grab your apron and let’s whip up some smiles!
Why You’ll Love This Recipe
This recipe isn’t just about making a cute treat; it’s about creating memories with simple ingredients and playful presentation. I’ve tested this recipe multiple times—from casual family gatherings to a more formal graduation party—and it always delivers. Here’s why it’s a keeper:
- Quick & Easy: Ready in under 30 minutes, perfect for last-minute celebrations or spontaneous kitchen creativity.
- Simple Ingredients: You likely already have most items in your pantry—marshmallows, cereal, and basic candies.
- Perfect for Graduation Parties: The themed design makes it a standout snack that brings joy and nostalgia.
- Crowd-Pleaser: Kids adore the fun shape, and adults appreciate the classic Rice Krispie flavor turned festive.
- Unbelievably Delicious: The crispy, chewy texture combined with a bit of chocolate and candy detail is irresistible.
What makes this recipe different? Honestly, it’s the little touches—the perfectly square “cap” shape, a mini candy button acting as the top, and the black licorice tassel that swings with every bite. It’s not just a treat; it’s a conversation starter. And if you’re like me, always scrambling to make something special with what’s on hand, this recipe feels like a friendly kitchen hack you’ll want to keep close.
What Ingredients You Will Need
This recipe uses straightforward, pantry-friendly ingredients that come together to create a festive and tasty treat without any fuss. Each ingredient plays a role in texture, flavor, or decoration, making sure these Graduation Cap Rice Krispie Treat Pops look as good as they taste.
- For the Rice Krispie Treat Base:
- 6 cups Rice Krispies cereal (or similar crispy rice cereal)
- 4 cups mini marshmallows (about 10 oz; I prefer Jet-Puffed for consistent melting)
- 3 tablespoons unsalted butter (helps with smooth melting and richness)
- For the Decoration:
- Black licorice sticks (cut into small pieces for the tassels)
- Mini candy buttons or small round candies (to serve as the top button on the cap)
- Chocolate melts or black candy melts (for coating the pops and helping decorations stick)
- Wooden lollipop sticks or sturdy craft sticks
- Optional:
- Colored sprinkles or edible glitter (for a bit of sparkle if you want to jazz it up)
- Non-stick cooking spray or parchment paper (to aid in shaping and prevent sticking)
You can swap regular marshmallows for vegan or allergy-friendly versions if needed. For a gluten-free option, ensure your Rice Krispies are certified gluten-free (some brands are). When selecting licorice, look for firm sticks that won’t snap too easily, which helps when shaping the tassels. I found that Wilton’s black candy melts give the best shine and hold for decorations.
Equipment Needed
- Large mixing bowl (for combining cereal and marshmallows)
- Medium saucepan (to melt butter and marshmallows)
- Wooden spoon or heat-resistant spatula (for stirring)
- Square or rectangular baking pan (8×8 or 9×9 inch works well for shaping the treats)
- Parchment paper or silicone baking mat (to line the pan and prevent sticking)
- Sharp knife (for cutting the Rice Krispie treats into squares)
- Lollipop sticks or sturdy craft sticks (to hold the pops)
- Microwave-safe bowl (for melting chocolate/candy melts)
- Cooling rack or wax paper (to place pops on after dipping)
If you don’t have a baking pan, a rimmed dish or even a large plate lined with parchment can work. For melting chocolate, a double boiler is nice but not required; the microwave method is quick and effective if you heat in short bursts and stir often. When cutting the treats, a buttered or dampened knife helps prevent crumbling.
Preparation Method
- Prepare your workspace: Line your baking pan with parchment paper or spray lightly with non-stick cooking spray. This will make removing the treats much easier later. Gather all ingredients and tools.
- Melt the butter and marshmallows: In a medium saucepan over low heat, melt the butter until just melted (about 2 minutes). Add the mini marshmallows and stir constantly until completely melted and smooth. This usually takes about 5 minutes. Be careful not to scorch the mixture—low and slow is key.
- Combine with Rice Krispies: Remove the saucepan from heat and immediately add the Rice Krispies cereal. Stir gently but thoroughly until every bit is coated with the marshmallow mixture. You want a sticky, evenly mixed batch—this is the base of your graduation caps.
- Press into the pan: Transfer the sticky mixture into your prepared pan. Using a buttered spatula or wax paper, press the mixture evenly into the pan to about 1-inch thickness. Don’t press too hard—keep it light to maintain some crispness. Let it cool at room temperature for at least 30 minutes until firm.
- Cut into squares: Once set, carefully lift the block from the pan using the parchment paper. Place on a cutting board and use a sharp knife to slice into approximately 2-inch squares. These squares will become the “caps.”
- Insert sticks: Gently insert a wooden lollipop stick into each square, pushing about halfway through the treat. If the mixture feels too hard, warm the bottom of the treat slightly with your hand before inserting to avoid cracking.
- Melt the chocolate coating: In a microwave-safe bowl, heat the black candy melts in 30-second intervals, stirring well between each, until smooth. Be careful not to overheat.
- Dip the treats: Holding the stick, dip each Rice Krispie square into the melted chocolate to evenly coat the top and sides. Let any excess drip off. Place them on a cooling rack or wax paper.
- Add tassels and decorations: Before the chocolate sets, attach a small strand of cut black licorice on one corner of the square to mimic the tassel. Place a mini candy button in the center to serve as the top button on the cap.
- Let set completely: Allow the pops to rest at room temperature or in the refrigerator for about 20 minutes until the chocolate hardens fully.
Pro tip: If your Rice Krispie treats feel a bit dry or crumbly, add an extra tablespoon of butter or a handful of marshmallows when melting to boost stickiness next time. Also, don’t rush the cooling step—trying to cut or dip too soon can cause the treats to crumble.
Cooking Tips & Techniques
Making these Graduation Cap Rice Krispie Treat Pops is straightforward, but a few tricks can keep your process smooth and your treats picture-perfect. First off, melting marshmallows slowly with butter prevents burning and keeps the mixture silky. I learned this the hard way after a scorched batch that smelled like a campfire gone wrong.
When pressing the cereal mixture into the pan, use gentle, even pressure. If you press too hard, the treats get dense and lose that classic airy crunch. Also, a buttered spatula or lightly greased hands are your best friends here to avoid sticking.
Cutting the treats with a sharp knife dipped in hot water (wiped dry each time) reduces crumbling and gives you clean edges. This little trick keeps your graduation caps neat and uniform.
For dipping, don’t rush the chocolate melts. Stirring frequently and heating in short bursts helps avoid clumps or burning. If your chocolate gets too thick, a tiny splash of vegetable oil can smooth it out.
Lastly, attaching the licorice tassel while the chocolate is still tacky ensures it stays put. If you wait too long, a dab of melted chocolate acts like edible glue. And hey, if a tassel slips off, just call it a modern art statement—it happens!
Variations & Adaptations
Feel like mixing things up? These pops are a perfect canvas for creativity:
- Flavor Twists: Add a teaspoon of vanilla extract or almond extract to the melted marshmallow mixture for a subtle flavor boost.
- Colorful Caps: Swap black candy melts for colored ones matching your school colors—navy blue, crimson, or gold. You can also drizzle contrasting colors over the caps for a fun pattern.
- Allergy-Friendly: Use allergy-friendly marshmallows and gluten-free crispy rice cereal to make the recipe safe for sensitive eaters.
- Nutty Surprise: Stir in 1/2 cup chopped toasted nuts or mini chocolate chips into the cereal mixture for added texture and flavor.
- Mini Versions: Instead of squares, press the mixture into mini muffin tins and use smaller sticks for bite-sized pops.
One time, I swapped out licorice tassels for thin strips of fruit leather, which added a sweet chew and a pop of color. It was a hit at a summer graduation party and offered a nice alternative for those who didn’t love licorice.
Serving & Storage Suggestions
These Festive Graduation Cap Rice Krispie Treat Pops are best served at room temperature to enjoy their perfect chewy texture and chocolate coating crunch. Arrange them on a decorative platter or stand them upright in a foam block for a charming display that guests will love.
For beverages, they pair nicely with cold milk, iced coffee, or a sparkling lemonade for a refreshing contrast. If serving at an outdoor event, keep them in a shaded area to prevent melting.
To store, place the pops in an airtight container layered with parchment paper to prevent sticking. They stay fresh at room temperature for up to 3 days. For longer storage, refrigerate them for up to a week or freeze for a month. When reheating frozen pops, let them thaw completely at room temperature to avoid condensation ruining the chocolate coating.
Over time, the treats may soften slightly, but the flavors often deepen. You might find the marshmallow sweetness mellows, making for a more nostalgic, almost toasted flavor.
Nutritional Information & Benefits
Each Rice Krispie Treat Pop contains roughly 150-180 calories, depending on size and added decorations. The main ingredients provide a quick energy boost from the cereal and sugar, making them a fun occasional treat.
While not a nutritional powerhouse, using unsalted butter and quality marshmallows reduces excess additives. The recipe is naturally gluten-free if you use certified gluten-free cereal, and dairy-free versions are possible by substituting butter and marshmallows with vegan options.
From a wellness perspective, these pops bring joy and celebration, which is just as important as their ingredients. Treats like these, shared among friends and family, contribute to happy memories and social connection—an essential part of any balanced lifestyle.
Conclusion
The Festive Graduation Cap Rice Krispie Treat Pops offer a fun, approachable way to celebrate milestones with style and sweetness. They’re simple enough for beginners but charming enough to impress any crowd. Whether you’re making them for your own grad party or helping a friend, these pops bring smiles and a little bit of magic to the table.
Feel free to personalize the decorations or tweak the flavors to fit your vibe. The best part? This recipe is forgiving and flexible—just like any good party snack should be. I love these pops because they combine childhood nostalgia with festive flair, reminding me that celebrations are about joy and creativity, not perfection.
If you give this recipe a try, I’d love to hear how you made it your own! Share your photos and stories in the comments or tag me on social media. Let’s keep the party going, one delicious pop at a time!
FAQs
Can I make these Rice Krispie Treat Pops ahead of time?
Yes! Make them a day or two before your event and store them in an airtight container at room temperature. Just add the decorative tassels right before serving for the freshest look.
What can I use instead of black licorice for the tassels?
You can try thin strips of fruit leather, black fondant, or even black licorice-flavored candy strings. Just pick something flexible enough to resemble a tassel.
How do I prevent the Rice Krispie treats from sticking to my hands while shaping?
Lightly butter your hands or spray them with non-stick cooking spray. You can also use a piece of wax paper to press and shape the mixture instead of using your hands directly.
Is there a gluten-free option for this recipe?
Absolutely! Use gluten-free crispy rice cereal and check that your marshmallows are gluten-free to make the entire recipe safe for gluten-sensitive guests.
Can I store leftover pops in the freezer?
Yes, wrap each pop individually in plastic wrap and place them in an airtight container or freezer bag. Thaw at room temperature before serving to keep the chocolate coating intact.
Pin This Recipe!
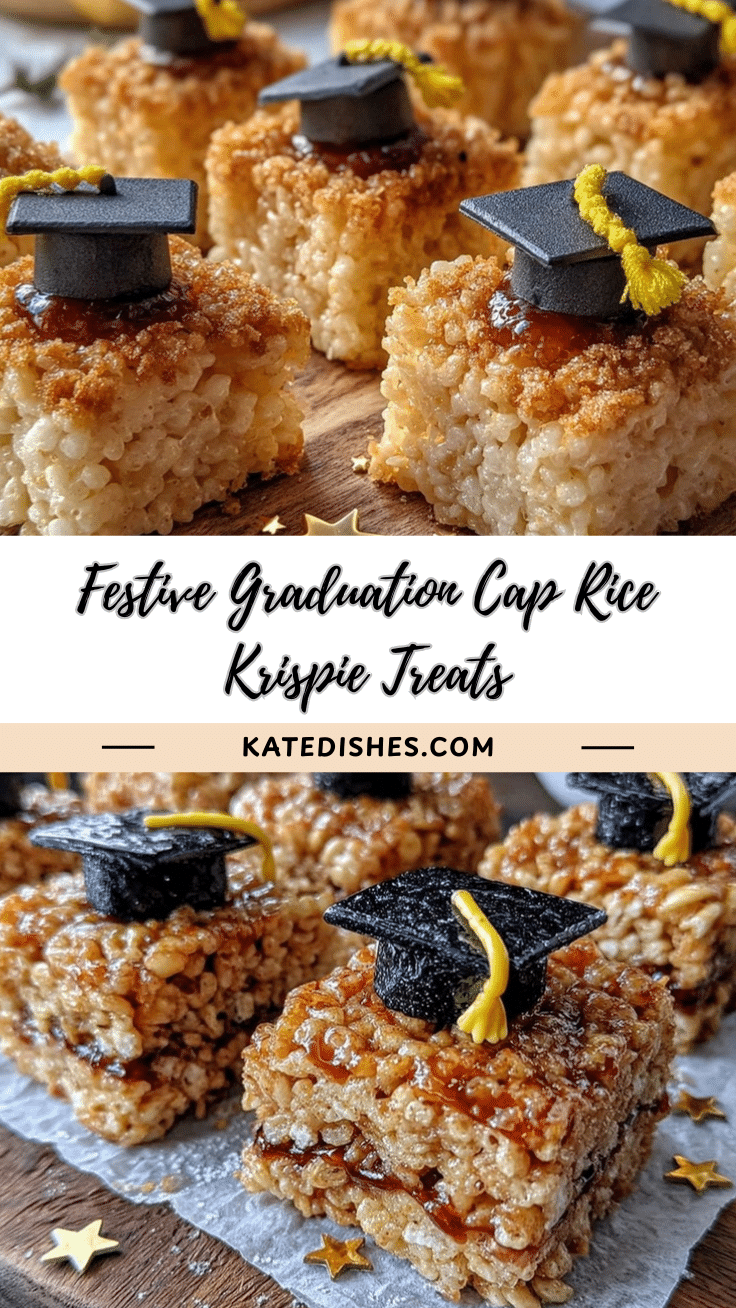
Festive Graduation Cap Rice Krispie Treat Pops

These fun and festive Rice Krispie Treat Pops are shaped like graduation caps, decorated with candy and licorice tassels, perfect for celebrating graduation parties with a nostalgic and playful treat.
- Prep Time: 10 minutes
- Cook Time: 10 minutes
- Total Time: 40 minutes
- Yield: 12 servings 1x
- Category: Dessert
- Cuisine: American
Ingredients
- 6 cups Rice Krispies cereal (or similar crispy rice cereal)
- 4 cups mini marshmallows (about 10 oz; Jet-Puffed preferred)
- 3 tablespoons unsalted butter
- Black licorice sticks (cut into small pieces for tassels)
- Mini candy buttons or small round candies (for the top button on the cap)
- Chocolate melts or black candy melts (for coating the pops and decorations)
- Wooden lollipop sticks or sturdy craft sticks
- Optional: Colored sprinkles or edible glitter
- Optional: Non-stick cooking spray or parchment paper
Instructions
- Line your baking pan with parchment paper or spray lightly with non-stick cooking spray. Gather all ingredients and tools.
- In a medium saucepan over low heat, melt the butter until just melted (about 2 minutes). Add the mini marshmallows and stir constantly until completely melted and smooth (about 5 minutes).
- Remove the saucepan from heat and immediately add the Rice Krispies cereal. Stir gently but thoroughly until evenly coated.
- Transfer the mixture into the prepared pan. Using a buttered spatula or wax paper, press the mixture evenly to about 1-inch thickness. Let cool at room temperature for at least 30 minutes until firm.
- Lift the block from the pan using the parchment paper. Place on a cutting board and slice into approximately 2-inch squares.
- Gently insert a wooden lollipop stick into each square, pushing about halfway through the treat.
- In a microwave-safe bowl, heat the black candy melts in 30-second intervals, stirring well between each, until smooth.
- Holding the stick, dip each Rice Krispie square into the melted chocolate to coat the top and sides. Let excess drip off. Place on a cooling rack or wax paper.
- Before the chocolate sets, attach a small strand of cut black licorice on one corner to mimic the tassel. Place a mini candy button in the center as the top button.
- Allow the pops to rest at room temperature or in the refrigerator for about 20 minutes until the chocolate hardens fully.
Notes
Melt marshmallows slowly over low heat to avoid scorching. Use a buttered or dampened sharp knife for clean cuts. Stir chocolate melts frequently and heat in short bursts to prevent burning. Attach licorice tassels while chocolate is still tacky for best adhesion. Add extra butter or marshmallows if mixture feels dry or crumbly. Let treats cool fully before cutting or dipping to avoid crumbling.
Nutrition
- Serving Size: 1 Rice Krispie Treat
- Calories: 165
- Sugar: 18
- Sodium: 90
- Fat: 5
- Saturated Fat: 3
- Carbohydrates: 29
- Protein: 1
Keywords: Rice Krispie Treats, Graduation Party, Party Snacks, Easy Dessert, DIY Treats, Candy Pops, Festive Snacks