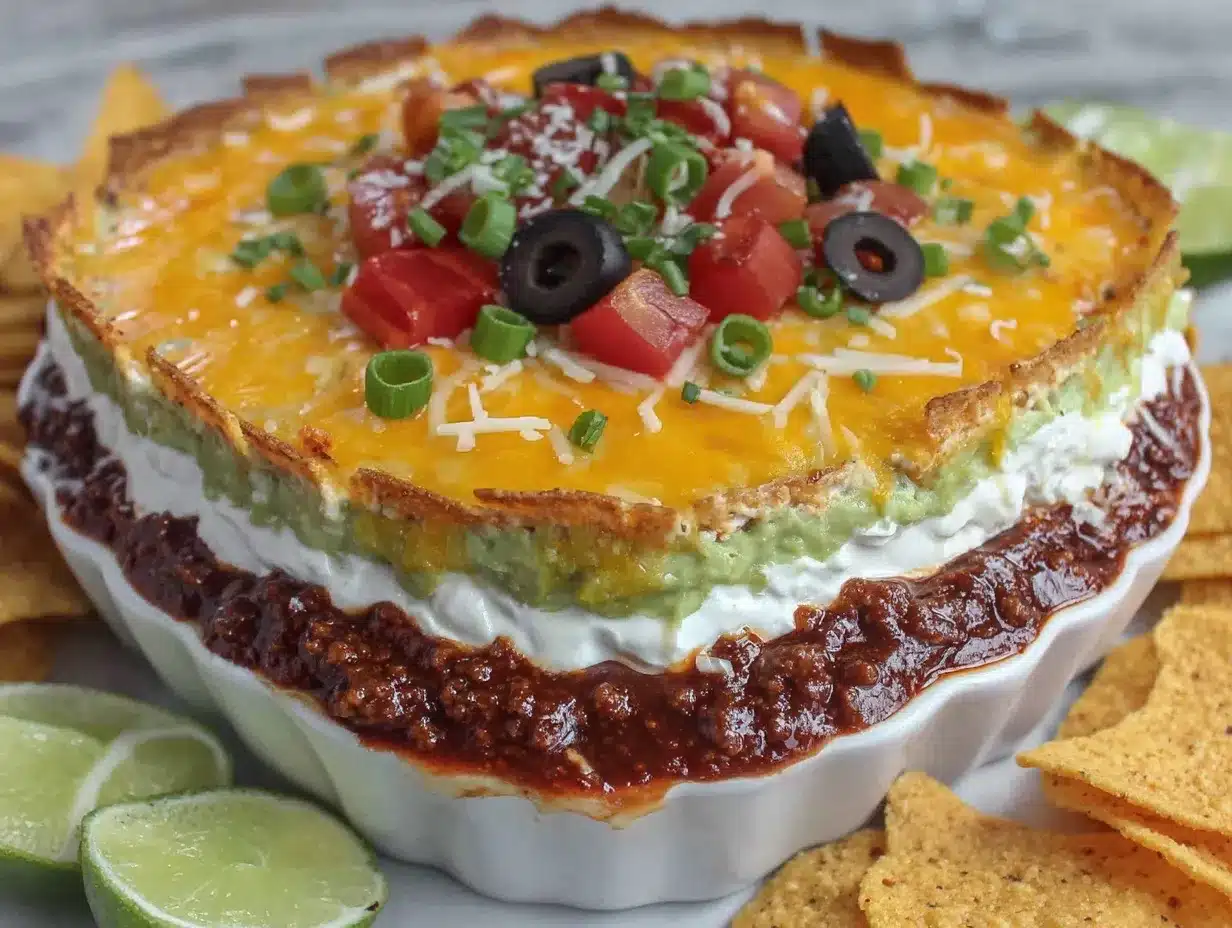
Picture this: You walk into the living room, carrying a massive platter shaped like a football field, brimming with layers of creamy refried beans, zesty salsa, velvety guacamole, clouds of sour cream, sharp cheddar cheese, crunchy lettuce, and a confetti of fresh toppings. The air smells like toasted cumin and tangy lime, and your friends’ eyes go wide as they spot the “stadium bowl” centerpiece. It’s not just food—it’s an event. The first time I set out my Seven-Layer Taco Dip Stadium Bowl for a game day party, there was a hush, then a chorus of “Whoa!” and “Is that really all dip?” That first scoop was pure bliss—cool, creamy, spicy, and fresh all at once. My cousin literally did a happy dance (and I’m not exaggerating).
You know, some recipes are just fun, and this one is the kind of over-the-top party dish that makes people grin. My dad called it “almost too pretty to eat” (then proceeded to eat half the left side). This recipe takes me back to childhood potlucks, when I was knee-high to a grasshopper and layered taco dip was always the first thing to disappear. Only now, I’ve turned it into an edible stadium that’s dangerously easy to assemble and sure to impress. Seriously, if you want to brighten up your Pinterest feed or take your next tailgate to legendary status, this Seven-Layer Taco Dip Stadium Bowl is your ticket.
Let’s face it, the hardest part is fighting off snackers stealing tortilla chips before kickoff. I’ve made this for Super Bowl Sundays, birthday bashes, and even a “just because” weekend. Every time, it’s a hit—a recipe I wish I’d discovered years ago. After dozens of test runs (in the name of research, of course), I can honestly say this is a staple for gatherings, gifting, and whenever you want a dish that feels like a warm hug. Trust me, you’re going to want to bookmark this one—and maybe guard it with your life when you set it out.
Why You’ll Love This Seven-Layer Taco Dip Stadium Bowl
If you’re on the hunt for a next-level party showstopper, this Seven-Layer Taco Dip Stadium Bowl truly has it all. I’ve tested dozens of taco dips—everything from classic Pyrex pans at family reunions to “fancy” versions at catered events. But this one stands out for so many reasons, and after making it for a crowd (and sneaking bites every time I walk by the fridge), I know you’ll love it too. Here’s why:
- Quick & Easy: Comes together in under 30 minutes—no baking, no stress, just simple assembly (even if you’re running late to your own party).
- Simple Ingredients: Nothing fancy here—just pantry staples and a few fresh veggies you probably already have on hand.
- Perfect for Parties: This dip is made for sharing—potlucks, game days, family nights, birthday celebrations, you name it.
- Crowd-Pleaser: Kids, teens, and grumpy uncles all go back for seconds (and thirds). I’ve yet to see leftovers last more than an hour.
- Unbelievably Delicious: Cool, creamy, spicy, and crunchy in every bite—this is comfort food at its most fun.
What makes this Seven-Layer Taco Dip Stadium Bowl different from all the rest? First, the stadium bowl presentation: shaping the dip like a mini football field (with “bleachers” of chips) turns a classic snack into an edible centerpiece. I layer the beans and guacamole just right for scooping, and the sour cream stripes give it real field flair. You can totally customize the toppings, from spicy jalapeños to sweet bell peppers or even black olives for “fans” in the stands.
This isn’t just another taco dip—it’s my go-to, stress-free solution for feeding a crowd without breaking a sweat. You’ll impress your friends, satisfy picky eaters, and make every occasion feel special (even if it’s just Tuesday). The best part? That moment when everyone gathers around, digs in, and you know you nailed it. It’s the kind of food that brings people together. And honestly, what’s better than that?
What Ingredients You Will Need
This Seven-Layer Taco Dip Stadium Bowl is all about building layers of texture and flavor with easy-to-find ingredients. Most are pantry staples, and you can swap or adjust based on what you have. Here’s what you’ll need for a classic version, plus some notes on brands and substitutions that work best from my kitchen to yours:
- For the Base:
- 2 cans (16 oz/455g each) refried beans (I love Rosarita Traditional for creaminess)
- 1 packet taco seasoning (or homemade blend: chili powder, cumin, garlic powder, onion powder, paprika, salt)
- For the Creamy Layer:
- 1 1/2 cups (340g) sour cream (full-fat for best texture, or swap Greek yogurt for a lighter option)
- 1 (8 oz/225g) block cream cheese, softened (optional for extra richness—soften at room temp for easy mixing)
- For the Salsa Layer:
- 1 1/2 cups (360g) salsa (pick your favorite heat level; drain excess liquid if using chunky salsa)
- For the Guacamole Layer:
- 3 medium ripe avocados, mashed
- 1/4 cup (15g) fresh cilantro, chopped
- Juice of 1 lime (about 2 tbsp/30ml)
- Pinch of salt and pepper
- For the Cheese & Veggies:
- 2 cups (200g) shredded sharp cheddar cheese (or a Mexican blend; Cabot and Tillamook are my favorites)
- 2 cups (100g) shredded iceberg or Romaine lettuce
- 1 cup (150g) diced tomatoes (roma or grape tomatoes work well—drain excess juice)
- 1/2 cup (75g) sliced black olives (optional, but my kids would riot without them!)
- 1/4 cup (30g) sliced green onions
- 1 jalapeño, thinly sliced (optional for heat)
- For Stadium “Bleachers” and Field Lines:
- 2 bags (10 oz/283g each) tortilla chips (sturdy ones for scooping—Mission or On the Border are great)
- Additional sour cream for piping “yard lines”
Ingredient Tips: If you need a gluten-free dip, check your taco seasoning packet (or make your own). For a dairy-free option, swap in plant-based sour cream and cheese. In the summer, use fresh corn and sliced radishes for extra crunch. Honestly, this dip is a blank canvas—add or subtract as your heart (and snack table) desires!
Equipment Needed
- Large Serving Platter or Sheet Pan: The “stadium” look works best in a rectangular or oval rimmed tray. I use a 12″x18″ (30x45cm) rimmed baking sheet lined with parchment—super easy for shaping and clean-up.
- Rubber Spatulas: For smoothing and spreading each layer evenly. A silicone spatula works wonders for the guacamole—just saying.
- Mixing Bowls: One for the beans, another for guac, and a small one for combining sour cream and cream cheese (if using).
- Piping Bag or Zip-Top Bag: For those “yard lines”—just snip the corner for a DIY solution. If you don’t have one, a spoon works in a pinch (it just won’t look as Pinterest-perfect).
- Chef’s Knife & Cutting Board: For prepping fresh veggies and toppings.
- Measuring Cups & Spoons: To keep each layer consistent (and to avoid the dreaded “guac overload” on one side).
If you don’t have a rimmed baking sheet, a sturdy roasting pan or oversized casserole dish will do. I’ve even used a pizza stone with foil borders for a round stadium—use what you have! Just wash everything well, especially after cutting jalapeños (ask me how I learned that one…). Most of these tools are budget-friendly and found in any basic kitchen. If you invest in a piping bag, it’s handy for all sorts of party snacks and desserts later on.
Preparation Method
-
Prepare the Stadium “Field” Base:
In a medium mixing bowl, combine 2 cans (32 oz/910g) refried beans with 1 packet taco seasoning. Mix until well blended. Spread the bean mixture evenly onto your platter or sheet pan, forming a large rectangle or oval “field” in the center. Leave at least a 2-inch (5cm) border around the edges for your “bleacher” chips.
Tip: Warm the beans slightly in the microwave for easier spreading. -
Add the Creamy Layer:
In a separate bowl, mix 1 1/2 cups (340g) sour cream with 8 oz (225g) softened cream cheese (if using) until smooth. Carefully spread this mixture over the bean layer, covering it evenly but not mixing the layers.
Warning: Don’t rush this step—gentle hands keep layers neat! -
Spread the Salsa:
Drain any excess liquid from your salsa. Gently spoon and spread 1 1/2 cups (360g) salsa over the creamy layer. Aim for even coverage; small gaps are okay (the cheese will cover them).
Sensory Cue: You should smell the tangy salsa and see bright red peeking through. -
Make and Layer the Guacamole:
In a clean bowl, mash 3 ripe avocados with 1/4 cup (15g) cilantro, juice of 1 lime, salt, and pepper to taste. Spread the guacamole evenly over the salsa, smoothing with a spatula.
Personal Tip: Drop a little extra lime juice on top to keep the guac bright green. -
Sprinkle the Cheese:
Evenly cover the guacamole layer with 2 cups (200g) shredded cheddar cheese (or your chosen blend). Press down gently so the cheese “sticks” to the guac.
Sensory Cue: Cheese should look like a golden field—don’t skimp! -
Add the Lettuce and Veggies:
Scatter 2 cups (100g) shredded lettuce across the cheese. Top with 1 cup (150g) diced tomatoes, 1/2 cup (75g) black olives, 1/4 cup (30g) green onions, and sliced jalapeños if desired. Arrange for visual appeal—think of fans cheering in the stands!
Note: Pat tomatoes dry to avoid watery dip. -
Create the Stadium Look:
Pile tortilla chips around the outer edge of the platter to form “bleachers.” With a piping bag or zip-top bag, pipe lines of sour cream on top of the dip to mimic football field “yard lines.” Add a small tomato or olive “football” in the center for fun, if you like.
Efficiency Hack: Prep toppings while the beans cool to save time.
Troubleshooting: If your layers slide, chill the dip for 15 minutes before adding chips. If the dip looks messy, cover with a little extra lettuce and cheese—no one will know! The dip keeps well for 24 hours, but chips are best added just before serving.
Cooking Tips & Techniques
- Layer Order Matters: Always start with the beans and end with cheese and lettuce. If you swap layers, you risk soggy guacamole or runny salsa seeping through.
- Drain and Pat Veggies Dry: Salsa, tomatoes, and lettuce can all add extra moisture—nobody likes a watery dip. I always drain salsa in a sieve and pat tomatoes dry before adding.
- Use Cold Ingredients: Warm beans are easier to spread, but everything else should be chilled. This helps the dip hold its shape and makes those “stadium lines” look crisp.
- Don’t Overload the Layers: More is not always better. I once added double guacamole and the whole thing slid off the platter mid-party (lesson learned the hard way!). Stick to the measurements for stability.
- Multitasking Tip: While the beans cool, prep all your toppings. Chop veggies, shred cheese, and set out chips so assembly is a breeze.
- Consistency for Success: Use even pressure when spreading each layer. If you’re worried about mixing, drop small spoonfuls around the surface and gently connect them with a spatula.
- Test Run: If you’re making this for a big event, do a “half batch” test run the weekend before. You’ll work out any kinks—and get a snack bonus, too.
Honestly, my biggest mistake was skipping the draining step on salsa and ending up with a soupy mess. Learn from my goofs and your Seven-Layer Taco Dip Stadium Bowl will be party-ready and Pinterest-worthy every single time.
Variations & Adaptations
- Vegetarian & Vegan: Swap the dairy layers for plant-based sour cream and cheese (like Violife or Daiya). Use refried black beans for a fun twist.
- Spicy Kick: Add a layer of spicy chipotle hummus, or mix chopped pickled jalapeños into the beans. Top with hot sauce “end zones” for a little flair.
- Low-Carb & Keto: Ditch the beans and replace with seasoned ground turkey or beef. Serve with bell pepper strips instead of chips for dipping.
- Seasonal Variations: In summer, use fresh corn, diced mango, and a sprinkle of cotija cheese. In winter, add roasted sweet potatoes and pomegranate seeds for color.
- Allergen Swaps: For dairy-free, use coconut yogurt and vegan cheese. For gluten-free, double-check your taco seasoning and serve with GF chips.
- Personal Twist: I sometimes add a “hot” section by dividing the field in half, topping one side with chopped jalapeños and buffalo sauce drizzle for the spice lovers in my family. It’s always a hit (and gives people options).
Don’t be afraid to play with the layers—make it your own! If you want to add cooked chorizo, black beans, or roasted peppers, go for it. The stadium bowl is meant to be fun and customizable for everyone around your table.
Serving & Storage Suggestions
This Seven-Layer Taco Dip Stadium Bowl is best served chilled. Set it out straight from the fridge about 10–15 minutes before your guests arrive (so it’s cool but not ice-cold). Present it on your biggest platter, surrounded by sturdy tortilla chips, pita wedges, or veggie sticks. For a next-level touch, add little flags or mini footballs on toothpicks for decoration.
This dip pairs perfectly with cold drinks—think sparkling lime agua fresca, classic margaritas, or even a pitcher of sweet tea for the non-drinkers. On the side, you can serve grilled skewers, fajita bites, or a big green salad. It truly shines as the main attraction on your snack table.
Storage: Leftovers keep well for up to 2 days in the refrigerator, covered tightly with plastic wrap or in an airtight container. The guacamole layer may darken a bit, but extra lime juice helps keep it green. Don’t add chips until ready to serve—they get soggy fast (ask me how I know!).
Reheating: This dip is best enjoyed cold, but if you want to warm it up (for the bean and cheese lovers), scoop a portion into a microwave-safe bowl and heat for 30 seconds. The flavors actually get better as they sit overnight, so don’t worry if you prep it a few hours ahead.
Nutritional Information & Benefits
Here’s an estimate for one generous serving (about 1/12th of the stadium): 270 calories, 15g fat, 24g carbohydrates, 8g protein. This Seven-Layer Taco Dip Stadium Bowl is naturally gluten-free (with proper chips and seasoning), and can be made vegetarian or vegan with simple swaps.
Avocados provide heart-healthy fats and fiber, black beans offer plant protein, and all those colorful veggies add a boost of vitamins and antioxidants. If you’re watching sodium, opt for low-salt beans and homemade taco seasoning. Allergens to note: dairy (cheese, sour cream, cream cheese), avocado, and possibly gluten in some chips or seasonings. As a nutritionist friend once told me, “It’s a party dip, but with real food and real flavors—so enjoy every bite!”
Conclusion
If you want a party dish that’s big on flavor, fun, and visual wow-factor, this Seven-Layer Taco Dip Stadium Bowl is an absolute must. It’s easy enough for beginners, yet impressive enough to crown you the MVP of any gathering. I love how customizable it is—no matter your crowd’s tastes, you can tweak the layers and toppings for everyone. And honestly, every time I set this out, it feels like a celebration all on its own.
Give it a try and let your creativity run wild. If you do, I’d love to hear how you made it your own—leave a comment below, tag me in your Pinterest creations, or share your favorite stadium design. Food should be fun! Here’s to happy scooping, big smiles, and football fields you can actually eat. You’ve got this—go make your party legendary!
FAQs About Seven-Layer Taco Dip Stadium Bowl
How far in advance can I make this dip?
You can assemble the Seven-Layer Taco Dip Stadium Bowl up to 24 hours ahead. Just keep it tightly covered in the fridge and add the chips and fresh toppings right before serving for best texture.
What’s the best way to keep the guacamole from browning?
Squeeze extra lime juice over the guacamole layer and press plastic wrap directly onto its surface before chilling. This helps keep it vibrant and fresh-looking.
Can I make this dip spicy?
Absolutely! Add chopped jalapeños, a drizzle of hot sauce, or use spicy salsa for more heat. You can even divide the field into “mild” and “spicy” zones with different toppings.
What should I serve with this dip besides tortilla chips?
Try sliced bell peppers, cucumber rounds, carrot sticks, or even mini pita bread. The dip is sturdy enough for most dippers—just use something that won’t break under all those layers!
Is this recipe gluten-free?
The dip itself is naturally gluten-free, but always check your taco seasoning and chips for hidden gluten. Use certified gluten-free brands if serving to those with allergies.
Pin This Recipe!

Seven-Layer Taco Dip Stadium Bowl

This easy, crowd-pleasing Seven-Layer Taco Dip Stadium Bowl is a showstopping party centerpiece, layered with creamy beans, zesty salsa, guacamole, cheese, and fresh toppings. Perfect for game days, potlucks, and celebrations, it’s quick to assemble and endlessly customizable.
- Prep Time: 20 minutes
- Cook Time: 0 minutes
- Total Time: 20 minutes
- Yield: 12 servings 1x
- Category: Appetizer
- Cuisine: Mexican-American
Ingredients
- 2 cans (16 oz each) refried beans
- 1 packet taco seasoning (or homemade: chili powder, cumin, garlic powder, onion powder, paprika, salt)
- 1 1/2 cups sour cream (full-fat or Greek yogurt)
- 1 (8 oz) block cream cheese, softened (optional)
- 1 1/2 cups salsa (drain excess liquid)
- 3 medium ripe avocados, mashed
- 1/4 cup fresh cilantro, chopped
- Juice of 1 lime (about 2 tbsp)
- Pinch of salt and pepper
- 2 cups shredded sharp cheddar cheese (or Mexican blend)
- 2 cups shredded iceberg or Romaine lettuce
- 1 cup diced tomatoes (roma or grape, drained)
- 1/2 cup sliced black olives (optional)
- 1/4 cup sliced green onions
- 1 jalapeño, thinly sliced (optional)
- 2 bags (10 oz each) tortilla chips
- Additional sour cream for piping “yard lines”
Instructions
- In a medium mixing bowl, combine refried beans and taco seasoning. Mix until well blended. Spread evenly onto a large platter or sheet pan, forming a rectangle or oval “field” in the center, leaving a 2-inch border for chips.
- In a separate bowl, mix sour cream and softened cream cheese (if using) until smooth. Spread this mixture over the bean layer evenly.
- Drain excess liquid from salsa. Gently spoon and spread salsa over the creamy layer.
- In a clean bowl, mash avocados with cilantro, lime juice, salt, and pepper. Spread guacamole evenly over the salsa layer.
- Evenly cover the guacamole with shredded cheddar cheese. Press down gently.
- Scatter shredded lettuce across the cheese. Top with diced tomatoes, black olives, green onions, and jalapeños as desired.
- Pile tortilla chips around the outer edge of the platter to form “bleachers.” Pipe lines of sour cream on top of the dip to mimic football field “yard lines.” Add a small tomato or olive “football” in the center for decoration, if desired.
- Chill for 15 minutes if layers slide before adding chips. Serve chilled.
Notes
Drain salsa and pat tomatoes dry to avoid a watery dip. Chill ingredients (except beans) for best results. Customize layers and toppings to suit dietary needs or preferences. Add chips just before serving for best texture. For vegan or dairy-free, use plant-based sour cream and cheese. The dip keeps well for up to 2 days refrigerated (without chips).
Nutrition
- Serving Size: About 1/12th of the
- Calories: 270
- Sugar: 3
- Sodium: 550
- Fat: 15
- Saturated Fat: 7
- Carbohydrates: 24
- Fiber: 5
- Protein: 8
Keywords: taco dip, seven layer dip, stadium bowl, party appetizer, game day, Super Bowl, Mexican dip, crowd pleaser, easy recipe