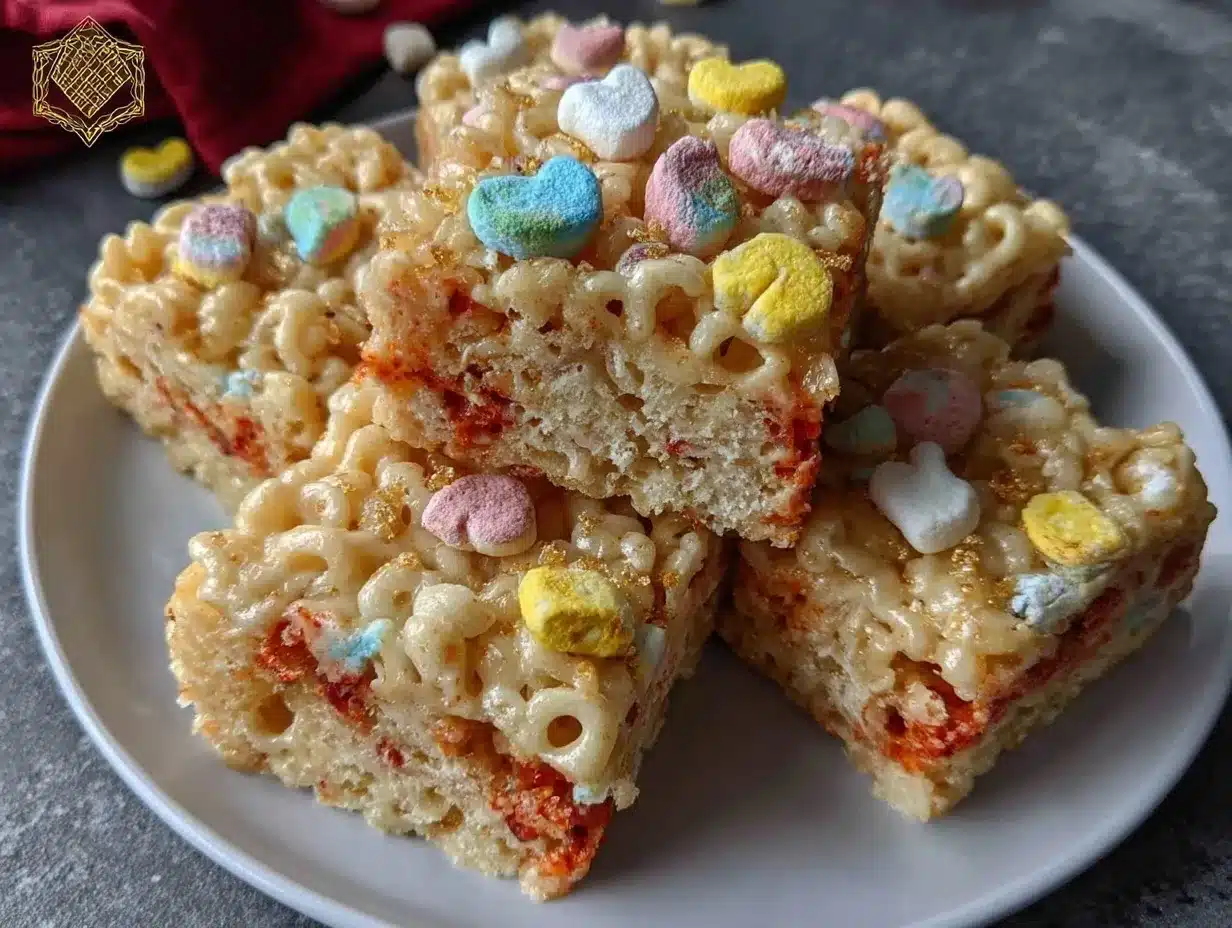
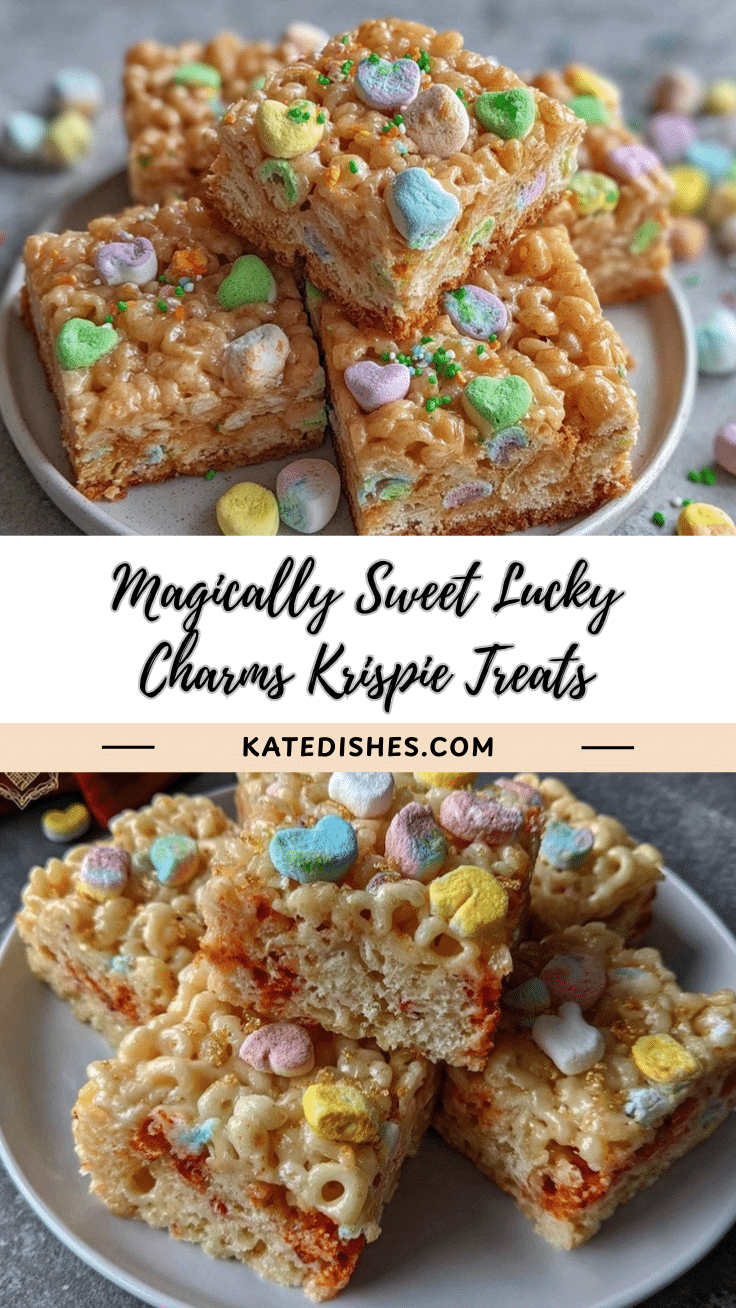
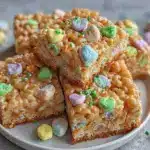
Let me tell you, the smell of melted butter mingling with sweet marshmallows and those iconic Lucky Charms marshmallow bits is enough to make anyone’s mouth water (honestly, it’s like walking into a candy store). The first time I whipped up these Lucky Charms Rice Krispie Treats, I was instantly hooked. There’s something about the rainbow colors and nostalgic cereal crunch that makes you pause, take a deep breath, and just smile because you know you’re onto something truly special.
When I was knee-high to a grasshopper, my grandma used to make Rice Krispie Treats for every family get-together. But years ago, on a rainy Saturday, I decided to experiment with Lucky Charms—trying to recreate the magic of those childhood snacks with a playful twist. What happened next? Pure, nostalgic comfort in every bite! My family couldn’t stop sneaking them off the cooling rack (and I can’t really blame them). It’s the kind of recipe that brings out everyone’s inner kid, especially when you see those bright colors peeking through each square.
These treats are dangerously easy to make and seriously addictive—perfect for potlucks, birthday parties, or just brightening up your Pinterest dessert board. Whether you need a sweet treat for your kids or a whimsical snack for a girls’ night in, this Lucky Charms Rice Krispie Treats recipe delivers. I’ve tested these more times than I’ll admit (in the name of research, of course), and they’ve become a staple for family gatherings, gifting, and, well, midnight cravings. They feel like a warm hug from your past, and you’re going to want to bookmark this one.
Why You’ll Love This Recipe
After countless batches and taste tests, I can confidently say these Lucky Charms Rice Krispie Treats are worth every sticky finger. There’s a reason they’re always the first thing to disappear at parties! Here’s what makes this recipe truly shine:
- Quick & Easy: Comes together in under 15 minutes—perfect for busy weeknights or last-minute cravings.
- Simple Ingredients: No fancy grocery runs needed. You probably have everything you need in your kitchen right now.
- Perfect for All Occasions: Great for birthday parties, school bake sales, brunch spreads, or just a cozy night at home.
- Crowd-Pleaser: Kids and adults alike can’t resist the colorful marshmallows and crispy cereal combo.
- Unbelievably Delicious: It’s the classic Rice Krispie Treat flavor you love, with a magical Lucky Charms twist. The texture is gooey, chewy, and crunchy all at once.
What sets this Lucky Charms Rice Krispie Treats recipe apart? I use a gentle folding technique to keep the marshmallows whole and vibrant—no crushed bits here. Plus, I add extra marshmallows at the end for maximum color and nostalgia. Some folks use just Lucky Charms, but I blend Rice Krispies and Lucky Charms together for the perfect balance of texture (trust me, it’s not too sweet and not too sticky).
This isn’t just another cereal treat—it’s my best version, tested and tweaked for foolproof results. Whether you want to impress guests without fuss or just need a comforting bite, these treats are your answer. They’re simple, playful, and guaranteed to make you close your eyes after that first bite, remembering childhood afternoons and happy kitchen memories. If you’re chasing comfort food that’s as easy as it is joyful, you’ve found your new favorite.
What Ingredients You Will Need
This recipe uses simple, wholesome ingredients to deliver bold flavor and that signature chewy texture without any fuss. Most of these are pantry staples, so you won’t need a special shopping trip (unless you’re out of Lucky Charms, which—let’s face it—is a real emergency in my house).
- Lucky Charms Cereal (4 cups / 100g): The star of the show! Those colorful marshmallows add crunch, color, and magic. I use the classic variety, but any seasonal version works.
- Rice Krispies Cereal (2 cups / 50g): For a perfect balance of chew and crunch. You can use store brands or the original—my family swears by Kellogg’s for the best texture.
- Mini Marshmallows (6 cups / 300g): I prefer Jet-Puffed for their extra fluffy texture. If you want more color, toss in a handful of rainbow marshmallows at the end.
- Unsalted Butter (6 tablespoons / 85g, cut into cubes): Adds richness and helps everything meld together. Salted butter works too—just skip adding extra salt.
- Vanilla Extract (1 teaspoon / 5ml): Gives a subtle, warm sweetness. Use pure vanilla for the best flavor.
- Pinch of Salt (optional): Balances the sweetness. It’s optional, but I find it makes the flavors pop just a little more.
If you’re dairy-free, swap in vegan butter. For gluten-free treats, use certified gluten-free Rice Krispies and Lucky Charms (they’re usually gluten-free, but always check the box!).
Want to add a twist? Try mixing in a handful of chocolate chips, sprinkles, or even freeze-dried fruit for extra flavor. In summer, you can swap in fresh berries (just dry them well). For a holiday vibe, toss in red and green M&Ms or peppermint bits. This Lucky Charms Rice Krispie Treats recipe is super adaptable, so whatever you’ve got in your pantry will work.
Pro tip: For maximum marshmallow magic, reserve 1 cup of Lucky Charms marshmallows to sprinkle on top before pressing the mixture into your pan. They’ll stay whole, pretty, and add that Pinterest-worthy finish everyone loves!
Equipment Needed
You don’t need fancy equipment for these Lucky Charms Rice Krispie Treats, and that’s part of the charm. Here’s what I use every time:
- Large Pot or Dutch Oven: For melting butter and marshmallows. If you only have a medium saucepan, just cut the recipe in half.
- Wooden Spoon or Silicone Spatula: A silicone spatula makes folding the cereal much easier (and cleanup is a breeze).
- 9×13-inch (23x33cm) Baking Pan: For classic squares. For thicker treats, use a 9×9-inch (23x23cm) pan.
- Nonstick Cooking Spray or Parchment Paper: Keeps treats from sticking. I prefer parchment—makes lifting out the bars a cinch.
- Measuring Cups and Spoons: For accurate ingredient amounts.
- Butter Knife or Offset Spatula: For spreading and smoothing the mixture.
If you don’t have a proper baking pan, a rimmed cookie sheet works in a pinch (just don’t spread them too thin). I’ve even used a glass casserole dish! For easy cleanup, spray your tools lightly with cooking spray before mixing—marshmallows are sticky little critters. And if you’re on a budget, dollar store pans do the trick just fine.
Preparation Method
- Prepare Your Pan: Line a 9×13-inch (23x33cm) baking pan with parchment paper or foil, leaving an overhang for easy lifting. Lightly coat with nonstick spray. (If you skip this step, you’ll be scraping sticky bits off for days.)
- Melt the Butter: In a large pot over medium heat, melt 6 tablespoons (85g) unsalted butter. Stir occasionally until it’s fully melted—should smell rich and nutty, but don’t let it brown.
- Add Marshmallows: Pour in 6 cups (300g) mini marshmallows. Stir gently until completely melted and smooth, about 3-4 minutes. (If it starts to scorch, lower the heat!) The mixture should be glossy and thick.
- Mix in Vanilla (and Salt): Stir in 1 teaspoon (5ml) vanilla extract and a pinch of salt, if using. The aroma will be dreamy—like fresh baked cookies.
- Fold in Cereals: Remove the pot from heat. Add 4 cups (100g) Lucky Charms and 2 cups (50g) Rice Krispies. Gently fold with a spatula until the cereals are evenly coated. Don’t crush the marshmallow pieces! If you want extra marshmallow magic, toss in 1 cup reserved Lucky Charms marshmallows now.
- Transfer and Press: Quickly spoon the mixture into your prepared pan. Spray your spatula (or hands) with nonstick spray, then press gently to spread the mixture evenly. Don’t press too hard—gentle pressure keeps the bars soft and chewy. Top with extra Lucky Charms marshmallows for color.
- Cool and Cut: Let the treats cool completely (about 30-40 minutes at room temperature). For speedier results, pop the pan in the fridge for 15 minutes. Lift out using the parchment overhang, then cut into squares with a sharp butter knife.
- Serve or Store: Enjoy right away, or store in an airtight container at room temperature for up to 3 days.
Troubleshooting Tips: If your treats turn out hard, you may have overcooked the marshmallows. For sticky results, spray your hands and tools with cooking spray before pressing. If the mixture is too stiff, add a handful more melted marshmallows. And if you want perfectly even bars, use an offset spatula to smooth the top before cooling.
Preparation Notes: Work fast once the cereals are mixed in—the mixture sets quickly! The colors should look vivid, and you’ll smell vanilla and sweet cereal in the air. (The hardest part is waiting for them to cool.)
Cooking Tips & Techniques
After making Lucky Charms Rice Krispie Treats way too many times, I’ve picked up some tricks for foolproof results. Here’s what I wish I’d known from the start:
- Low and Slow Heat: Melt your butter and marshmallows over medium or low heat. High heat makes marshmallows rubbery and hard—trust me, I’ve learned this the hard way!
- Don’t Overmix: When folding in the cereal, gentle is the name of the game. Overmixing breaks up the Lucky Charms marshmallows and turns the bars bland. Aim for just enough mixing to coat evenly.
- Work Quickly: The marshmallow mixture sets fast. Have your pan and toppings ready before you start melting anything.
- Spray Everything: Nonstick spray is a lifesaver—spray your spatula, hands, and pan. Sticky fingers are inevitable, but this helps a ton.
- Keep Bars Soft: Don’t pack the mixture down too tightly in the pan. Press gently for chewy results.
- Multitasking Tip: If you’re making multiple batches, melt all your marshmallows in one big pot and divide for different flavors. Saves time and dishes.
I’ve made every mistake: burnt marshmallows, rock-hard bars, crumbly squares. It’s all part of the learning curve! The biggest tip? Be patient with melting, and don’t rush the mixing. The colors should stay bright, and the bars will taste like childhood happiness. For Pinterest-perfect photos, sprinkle extra marshmallows on top—those colors pop!
Variations & Adaptations
If you want to jazz up your Lucky Charms Rice Krispie Treats, there are tons of fun ways to customize. Here are a few favorites:
- Gluten-Free Version: Use certified gluten-free Rice Krispies and Lucky Charms. The texture and flavor are just as dreamy—no one will notice the swap.
- Chocolate Lovers: Mix in 1/2 cup (85g) mini chocolate chips or drizzle melted chocolate on top before cutting. Adds a rich, decadent twist.
- Seasonal Flavors: In fall, add a sprinkle of pumpkin pie spice or swap in pumpkin-flavored marshmallows. For holidays, toss in colored M&Ms or peppermint pieces.
- Vegan Adaptation: Use vegan butter and Dandies marshmallows. The result is just as gooey and sweet, and everyone can enjoy!
- Nutty Crunch: Stir in a handful of chopped pecans or almonds for extra texture.
Don’t be afraid to play around! I once added rainbow sprinkles and a dash of cinnamon—turned out surprisingly tasty and festive. If you have nut allergies to consider, skip the nut options and stick with classic cereal. For a crispy variation, use only Lucky Charms (skip the Rice Krispies) for a bolder marshmallow punch. Whatever tweaks you try, these treats are forgiving and fun—perfect for experimenting!
Serving & Storage Suggestions
These Lucky Charms Rice Krispie Treats are best served at room temperature for maximum chewiness. I like to cut them into generous squares and pile them high on a pretty cake stand—it’s the kind of dessert that begs to be shared and admired! For parties, wrap each square in parchment and tie with a ribbon for a whimsical, giftable treat.
Pair your treats with cold milk, hot cocoa, or even a fruity punch for a true throwback snack spread. They’re also amazing alongside fresh fruit, like strawberries or grapes, for a sweet and balanced plate.
To store, place bars in an airtight container at room temperature for up to 3 days. For longer storage, wrap each square tightly in plastic wrap and freeze for up to 1 month. To thaw, leave them on the counter for about 30 minutes—they’ll taste just as fresh. If they get a little hard, microwave for 5-10 seconds to restore softness (don’t overdo it, or they’ll melt!).
Honestly, the flavors deepen after a day or two—the marshmallows meld and the bars become even chewier. If you plan to make ahead, store between layers of parchment to keep them from sticking. These Lucky Charms Rice Krispie Treats are the ultimate grab-and-go dessert for any occasion!
Nutritional Information & Benefits
Each Lucky Charms Rice Krispie Treat (based on a 24-square batch) has approximately:
- Calories: 110 per square
- Carbohydrates: 22g
- Fat: 2g
- Protein: Less than 1g
- Sugar: 12g
Lucky Charms Rice Krispie Treats are definitely a sweet treat, but they do offer a little cereal crunch and the fun of whole-grain rice. If you’re looking for lower sugar, try using unsweetened puffed rice and add mini marshmallows sparingly. For gluten-free diets, just substitute with certified gluten-free cereals. They contain dairy (butter), so be mindful of that for allergies—swap with vegan butter if needed.
From a wellness perspective, I treat these bars as a joyful snack, perfect for sharing and indulging in moderation. The cheerful colors and nostalgic taste are good for the soul—sometimes, that’s the most important benefit!
Conclusion
If you’re searching for a dessert that’s playful, nostalgic, and irresistibly easy, these Lucky Charms Rice Krispie Treats are a must-try. They bring together the best of childhood flavors with a grown-up twist—quick to make, fun to customize, and always a hit at gatherings. Whether you stick to the classic recipe or add your personal spin, you’ll end up with a treat that’s guaranteed to make people smile.
I love this recipe because it’s simple but full of happy memories. Watching my family sneak bites straight from the pan reminds me why I keep coming back to it. Don’t be shy—make these your own and share your tweaks in the comments! I’d love to hear how you make them special.
So grab a box of Lucky Charms and your favorite spatula—you’re just minutes away from a batch of magical, Pinterest-worthy bars. Share, pin, and enjoy every colorful bite!
Frequently Asked Questions
Can I make Lucky Charms Rice Krispie Treats ahead of time?
Absolutely! Make them a day or two in advance and store in an airtight container. They’ll stay soft and chewy for up to 3 days.
What if I don’t have Rice Krispies?
No problem—just use extra Lucky Charms instead. The texture will be slightly different (more marshmallow crunch), but still delicious!
Can I freeze these treats?
Yes, wrap each square tightly and freeze for up to 1 month. Thaw at room temperature for 30 minutes before eating for best texture.
How do I keep the bars from sticking?
Line your pan with parchment paper and spray your spatula and hands with nonstick spray. This makes it super easy to lift and cut the bars without sticky messes.
Are these treats gluten-free?
They can be! Just make sure to use certified gluten-free Lucky Charms and Rice Krispies. Always check the packaging to be safe.
Pin This Recipe!
Lucky Charms Rice Krispie Treats
These Lucky Charms Rice Krispie Treats are a quick, nostalgic dessert combining gooey marshmallows, crunchy Rice Krispies, and colorful Lucky Charms for a playful, crowd-pleasing treat. Perfect for parties, potlucks, or a fun snack at home.
- Prep Time: 10 minutes
- Cook Time: 5 minutes
- Total Time: 45 minutes
- Yield: 24 squares 1x
- Category: Dessert
- Cuisine: American
Ingredients
- 4 cups Lucky Charms cereal
- 2 cups Rice Krispies cereal
- 6 cups mini marshmallows
- 6 tablespoons unsalted butter, cut into cubes
- 1 teaspoon vanilla extract
- Pinch of salt (optional)
- Nonstick cooking spray or parchment paper (for pan)
Instructions
- Line a 9×13-inch baking pan with parchment paper or foil, leaving an overhang for easy lifting. Lightly coat with nonstick spray.
- In a large pot over medium heat, melt the butter, stirring occasionally until fully melted.
- Add mini marshmallows and stir gently until completely melted and smooth, about 3-4 minutes.
- Stir in vanilla extract and a pinch of salt, if using.
- Remove the pot from heat. Add Lucky Charms and Rice Krispies cereals. Gently fold with a spatula until evenly coated. Optionally, toss in 1 cup reserved Lucky Charms marshmallows now.
- Quickly spoon the mixture into the prepared pan. Spray spatula (or hands) with nonstick spray, then press gently to spread the mixture evenly. Top with extra Lucky Charms marshmallows for color.
- Let the treats cool completely (about 30-40 minutes at room temperature) or refrigerate for 15 minutes. Lift out using the parchment overhang, then cut into squares.
- Serve immediately or store in an airtight container at room temperature for up to 3 days.
Notes
For gluten-free treats, use certified gluten-free Rice Krispies and Lucky Charms. Work quickly once cereals are mixed in, as the mixture sets fast. For softer bars, do not press the mixture too firmly into the pan. Spray hands and tools with nonstick spray to prevent sticking. Add extra Lucky Charms marshmallows on top for a colorful finish.
Nutrition
- Serving Size: 1 square (1/24th of
- Calories: 110
- Sugar: 12
- Sodium: 60
- Fat: 2
- Saturated Fat: 1.5
- Carbohydrates: 22
- Fiber: 0.2
- Protein: 0.5
Keywords: Lucky Charms, Rice Krispie Treats, marshmallow bars, cereal treats, easy dessert, nostalgic, party snack, kid-friendly, no bake, potluck