Let me tell you, the scent of warm garlic and fresh herbs wafting from my oven is enough to make anyone’s mouth water. The first time I baked these cozy garlic herb dinner rolls, I was instantly hooked—the kind of moment where you pause, take a deep breath, and just smile because you know you’re onto something truly special. It was years ago, when I was knee-high to a grasshopper, helping my grandma in the kitchen for Easter dinner. She had this secret recipe for dinner rolls that everyone begged for, but I wanted to make mine a little different. After many tries (and a few sticky fingers), I landed on this version that balances buttery garlic with a fragrant herb blend that feels like a warm hug on a plate.
Honestly, my family couldn’t stop sneaking these rolls off the cooling rack (and I can’t really blame them). Whether it’s a sit-down Easter dinner or a casual spring brunch, these rolls bring that perfect cozy touch. You know what? They’re dangerously easy to make, and they’ll brighten up your Pinterest cookie board or dinner spread just as well. Perfect for potlucks, gifting, or just a sweet treat for your loved ones, this recipe has become a staple for our family holidays. I’ve tested it more times than I can count—in the name of research, of course—and it never fails to impress.
Why You’ll Love This Recipe
After countless attempts and tweaking, this cozy garlic herb dinner rolls recipe stands out for several reasons that make it your go-to for Easter or any special occasion:
- Quick & Easy: Comes together in under 2 hours, perfect for busy holiday prep or last-minute cravings.
- Simple Ingredients: No fancy grocery trips needed; you likely already have everything in your pantry and fridge.
- Perfect for Easter Feasts: These rolls complement ham, lamb, or any springtime main beautifully.
- Crowd-Pleaser: Kids and adults alike can’t get enough of the buttery garlic and fresh herb aroma.
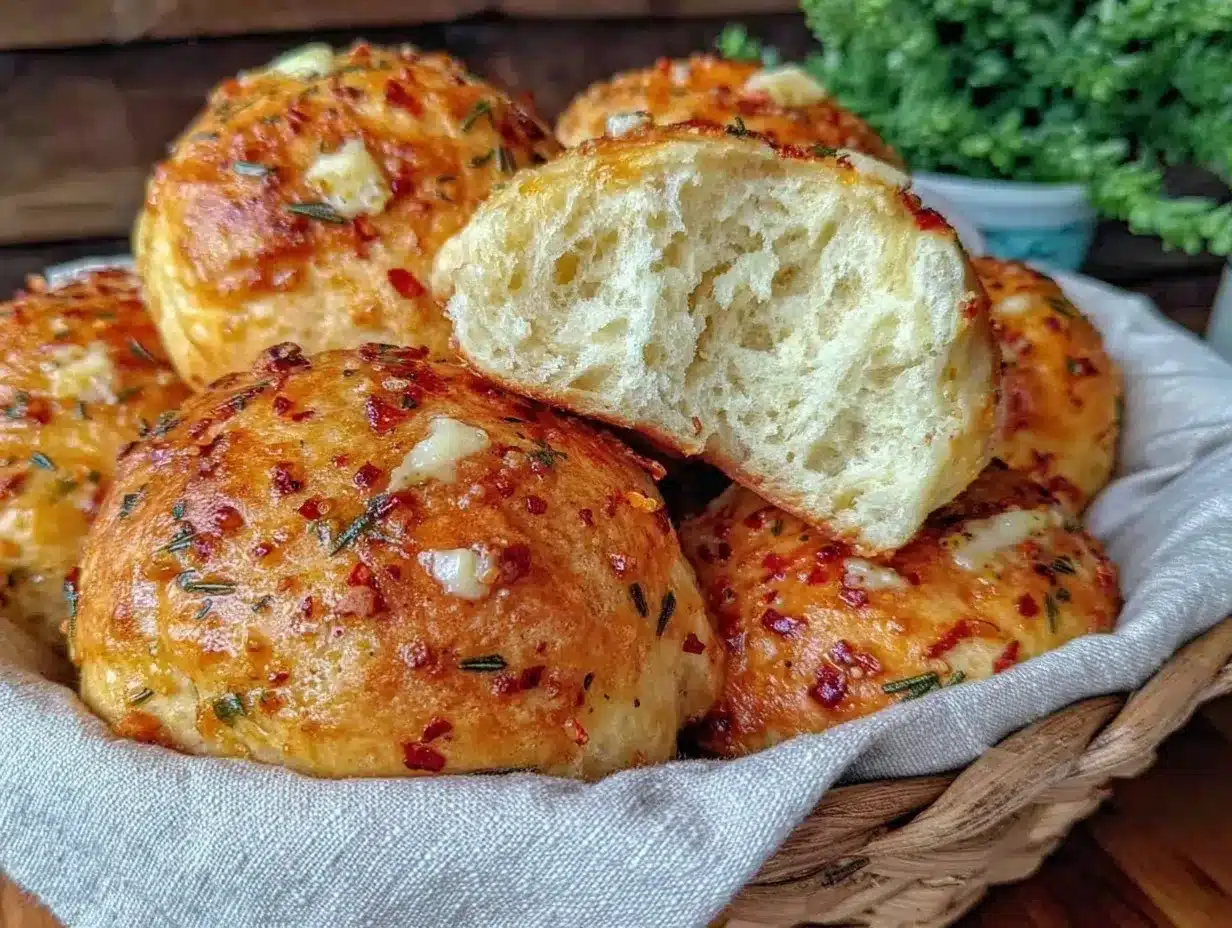
- Unbelievably Delicious: The soft, pillowy texture combined with the savory flavor combo hits all the right notes.
This isn’t just another dinner roll recipe. The magic lies in brushing the rolls with a garlic herb butter glaze right after baking, which locks in flavor and gives a golden, shiny finish. Plus, the dough is enriched just enough to be tender without being overly dense. I’ve tried swapping out herbs (rosemary, thyme, parsley), and the balance here is just right for that cozy, inviting taste that says “welcome to the table.”
Close your eyes after the first bite—you’ll get it. It’s comfort food with soul, no fuss, and a little touch of elegance. Whether you’re impressing guests or just making a simple meal special, these cozy garlic herb dinner rolls are the secret weapon you didn’t know you needed.
What Ingredients You Will Need
This recipe uses simple, wholesome ingredients to deliver bold flavor and satisfying texture without the fuss. Most are pantry staples, and you can swap a few depending on what you have on hand.
- For the Dough:
- 3 1/2 cups (440 g) all-purpose flour, plus extra for kneading (I recommend King Arthur for best texture)
- 1 packet (2 1/4 tsp / 7 g) active dry yeast
- 1 cup (240 ml) whole milk, warmed (not hot!)
- 1/4 cup (50 g) granulated sugar
- 1/4 cup (60 g) unsalted butter, melted and cooled
- 1 large egg, room temperature
- 1 tsp kosher salt
- For the Garlic Herb Butter Glaze:
- 1/4 cup (60 g) unsalted butter, melted
- 3 cloves garlic, finely minced or pressed (fresh is best for punchy flavor)
- 2 tbsp fresh parsley, finely chopped
- 1 tbsp fresh thyme leaves (or 1 tsp dried thyme)
- 1/2 tsp salt
- Optional: pinch of crushed red pepper flakes for a subtle kick
Ingredient tips: If you want a dairy-free option, swap milk with unsweetened almond milk and use a plant-based butter. For a gluten-free option, try a cup-for-cup gluten-free flour blend, but expect a slightly different texture. Fresh herbs make a big difference here—frozen herbs tend to lose that vibrant, fresh punch.
Equipment Needed
- Large mixing bowl – I like glass or stainless steel for even mixing
- Measuring cups and spoons – accuracy matters, especially with yeast
- Wooden spoon or dough whisk – easier on sticky dough than a regular spoon
- Stand mixer with dough hook (optional) – saves time and effort, but you can knead by hand
- Kitchen towel or plastic wrap – to cover the dough while it rises
- 9×13-inch baking pan or a round baking dish – for shaping and baking the rolls
- Basting brush – for applying the garlic herb butter glaze
- Cooling rack – to cool the rolls evenly and keep the bottoms from getting soggy
If you don’t have a stand mixer, no worries! Kneading by hand takes about 8-10 minutes but you’ll get a good arm workout (and more connection with the dough). For budget-friendly options, I recommend checking local thrift stores for basic baking pans and utensils that work just fine.
Preparation Method
- Activate the yeast: In a small bowl, combine the warm milk (about 110°F/43°C) with the sugar and yeast. Stir gently and let it sit for 5-10 minutes until foamy and bubbly. If it doesn’t foam, your yeast might be dead—start over with fresh yeast.
- Mix the dough: In a large bowl or mixer, combine the flour and salt. Add the melted butter, egg, and the yeast mixture. Stir until the dough starts to pull together.
- Knead the dough: Turn the dough out onto a floured surface and knead for about 8-10 minutes until smooth and elastic. Alternatively, use a stand mixer fitted with a dough hook on medium speed for 5-6 minutes.
- First rise: Place the dough in a lightly greased bowl, cover with a kitchen towel or plastic wrap, and let it rise in a warm spot for about 1 hour, or until doubled in size. If your kitchen is chilly, try preheating the oven to 200°F (93°C) for a minute, then turn it off and place the dough inside to rise.
- Shape the rolls: Punch down the dough gently to release air. Divide the dough into 12 equal pieces (about 70 grams / 2.5 oz each). Roll each piece into a smooth ball and place them evenly spaced in your greased baking pan.
- Second rise: Cover the shaped rolls with a clean towel and let them rise for 30-40 minutes until puffy.
- Preheat the oven: While the rolls rise, preheat your oven to 375°F (190°C).
- Bake: Bake the rolls for 18-22 minutes, or until golden brown on top and cooked through. The internal temperature should reach about 190°F (88°C) if you want to be precise.
- Prepare the garlic herb butter glaze: While the rolls bake, combine melted butter, minced garlic, chopped herbs, salt, and red pepper flakes in a small bowl. Let it sit to infuse flavors.
- Glaze and serve: As soon as the rolls come out of the oven, brush them generously with the garlic herb butter glaze. Let the butter soak in for a few minutes before serving warm.
Pro tip: If your rolls brown too quickly, tent them loosely with foil halfway through baking. Also, avoid skipping the second rise; it makes the difference between dense bread and those soft, fluffy rolls you crave.
Cooking Tips & Techniques
Getting dinner rolls just right takes a little finesse, but here’s what I’ve learned along the way:
- Yeast temperature is key: Too hot kills the yeast; too cold slows it down. Aim for warm milk around 110°F (43°C). Feel free to use a thermometer—trust me, it’s worth it.
- Kneading matters: Proper kneading develops gluten, giving rolls that perfect chew. If you’re new to kneading, look for the “windowpane test” — stretch a small dough piece; if it’s thin and translucent without tearing, you’re golden.
- Don’t rush the rises: Letting the dough double and then puff up again makes all the difference. You’ll notice the dough feels bouncy and airy after each rise.
- Brush with butter early and late: I sometimes brush a thin layer of plain melted butter on the rolls before baking to get a softer crust, then finish with the garlic herb butter right out of the oven for maximum flavor.
- Multitasking tip: While the dough rises, prep your glaze and clean up the kitchen—makes the whole process smoother.
- Watch baking time: Every oven’s different. Start checking rolls at 18 minutes to avoid over-baking and dryness.
Honestly, the first time I tried skipping the second rise, the rolls turned out flat and heavy—I learned the hard way! Taking the extra time pays off big.
Variations & Adaptations
One of the best things about this cozy garlic herb dinner rolls recipe is how easy it is to tweak based on your tastes and dietary needs:
- Herb swaps: Use rosemary instead of thyme for a piney aroma, or add chives for a subtle onion note.
- Cheesy twist: Fold in 1/2 cup (50 g) shredded Parmesan or cheddar into the dough for a richer flavor.
- Whole wheat version: Replace half the flour with whole wheat for a nuttier taste and more fiber.
- Garlic-free option: If you’re not a garlic fan, try an herbed butter with rosemary and lemon zest instead.
- Dairy-free adaptation: Use coconut oil or vegan butter and plant-based milk.
- Cooking method: You can bake these on a baking sheet instead of a pan for more crusty edges, or try a cast-iron skillet for even browning.
Personally, I once added a bit of caramelized onion to the dough for a sweet-savory surprise—delicious, but a bit messy to handle! Feel free to experiment and make these rolls your own.
Serving & Storage Suggestions
Serve these cozy garlic herb dinner rolls warm, right out of the oven, with an extra brush of garlic herb butter to keep them shiny and irresistible. They pair beautifully with ham, roasted lamb, or a hearty Easter soup. A glass of crisp white wine or sparkling water with lemon rounds out the meal nicely.
Leftovers? Wrap cooled rolls tightly in plastic wrap or store in an airtight container. They’ll keep fresh at room temperature for 1-2 days or in the fridge for up to 5 days (though the fridge tends to dry them out a bit). To freeze, place rolls in a freezer-safe bag for up to 3 months.
For reheating, pop them in a 350°F (175°C) oven for 10 minutes, wrapped in foil to avoid drying out. You can also microwave for 15-20 seconds, but I prefer the oven method because it refreshes that crisp crust. Flavors actually deepen after a day as the herbs infuse the dough overnight, so if you can wait, that’s even better.
Nutritional Information & Benefits
Each cozy garlic herb dinner roll (about 70g) contains roughly 180-210 calories, with 6-8 grams of fat (mostly from butter), 25-28 grams of carbs, and 4-5 grams of protein. They’re not a diet food, but hey, it’s a special occasion!
Garlic is well-known for its immune-boosting properties and anti-inflammatory benefits, while fresh herbs add antioxidants and vitamins without any calories. Using whole milk and butter adds richness and calcium, but you can always tweak ingredients for lighter versions.
For those watching gluten, swap in gluten-free flour blends, and for dairy-sensitive folks, plant-based milk and butter alternatives work well. Just remember, the magic is in the freshness of the ingredients and that loving technique you bring to the kitchen.
Conclusion
Cozy garlic herb dinner rolls are one of those recipes that feel like a hug from the inside out. They bring warmth and a little bit of magic to your Easter feast or any meal that calls for comfort and a touch of homemade love. I love how adaptable they are—you can make them simple or dress them up with cheeses and herbs, but the core recipe remains a winner every single time.
Give this recipe a try, and don’t be shy about customizing it to your family’s tastes. I’d love to hear how yours turn out or any tweaks you make—drop a comment or share your photos! Trust me, once you bake these cozy garlic herb dinner rolls, you’re going to want to bookmark this one for every holiday and cozy night in.
FAQs About Cozy Garlic Herb Dinner Rolls
Can I make these rolls ahead of time?
Yes! You can prepare the dough and let it rise in the fridge overnight, then shape and bake the rolls the next day. Just bring dough to room temperature before shaping.
What if I don’t have fresh herbs?
Dried herbs work in a pinch—use about one-third the amount of fresh herbs. The flavor won’t be as vibrant but still tasty.
How do I know if my yeast is still good?
If your yeast doesn’t foam after being mixed with warm milk and sugar for 10 minutes, it’s likely expired. Always check the expiration date and store yeast in a cool, dry place.
Can I freeze the rolls after baking?
Absolutely! Let rolls cool completely, then freeze in an airtight bag up to 3 months. Reheat by warming in the oven.
Why are my rolls dense and not fluffy?
Common reasons include not kneading enough, using water that’s too hot or cold with the yeast, or rushing the rising times. Make sure to follow the temperature guidelines and give the dough time to double in size.
Pin This Recipe!
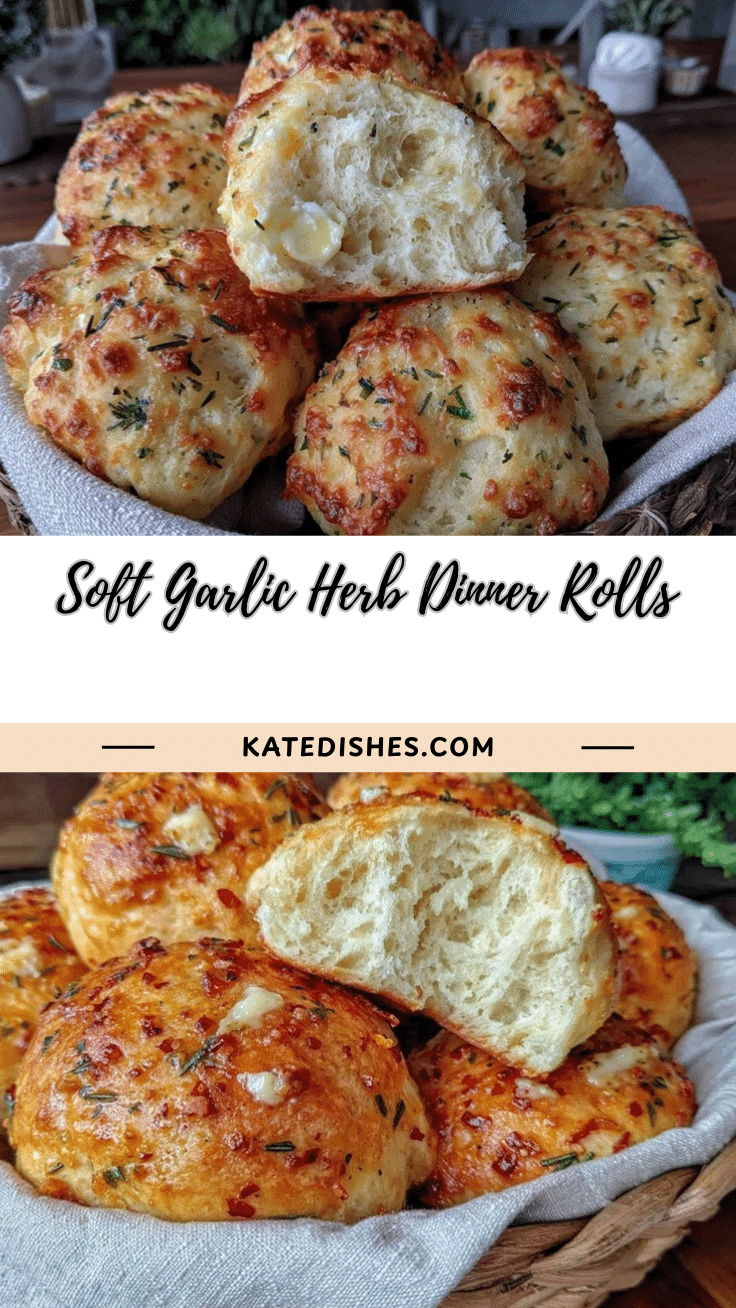
Cozy Garlic Herb Dinner Rolls

Soft, buttery dinner rolls infused with garlic and fresh herbs, perfect for Easter or any special occasion. These easy homemade rolls feature a garlic herb butter glaze that locks in flavor and gives a golden finish.
- Prep Time: 20 minutes
- Cook Time: 20 minutes
- Total Time: 1 hour 50 minutes
- Yield: 12 rolls 1x
- Category: Bread
- Cuisine: American
Ingredients
- 3 1/2 cups (440 g) all-purpose flour, plus extra for kneading
- 1 packet (2 1/4 tsp / 7 g) active dry yeast
- 1 cup (240 ml) whole milk, warmed (about 110°F / 43°C)
- 1/4 cup (50 g) granulated sugar
- 1/4 cup (60 g) unsalted butter, melted and cooled
- 1 large egg, room temperature
- 1 tsp kosher salt
- For the Garlic Herb Butter Glaze:
- 1/4 cup (60 g) unsalted butter, melted
- 3 cloves garlic, finely minced or pressed
- 2 tbsp fresh parsley, finely chopped
- 1 tbsp fresh thyme leaves (or 1 tsp dried thyme)
- 1/2 tsp salt
- Optional: pinch of crushed red pepper flakes
Instructions
- Activate the yeast: In a small bowl, combine the warm milk (about 110°F/43°C) with the sugar and yeast. Stir gently and let it sit for 5-10 minutes until foamy and bubbly.
- Mix the dough: In a large bowl or mixer, combine the flour and salt. Add the melted butter, egg, and the yeast mixture. Stir until the dough starts to pull together.
- Knead the dough: Turn the dough out onto a floured surface and knead for about 8-10 minutes until smooth and elastic. Alternatively, use a stand mixer fitted with a dough hook on medium speed for 5-6 minutes.
- First rise: Place the dough in a lightly greased bowl, cover with a kitchen towel or plastic wrap, and let it rise in a warm spot for about 1 hour, or until doubled in size.
- Shape the rolls: Punch down the dough gently to release air. Divide the dough into 12 equal pieces (about 70 grams / 2.5 oz each). Roll each piece into a smooth ball and place them evenly spaced in your greased baking pan.
- Second rise: Cover the shaped rolls with a clean towel and let them rise for 30-40 minutes until puffy.
- Preheat the oven to 375°F (190°C).
- Bake the rolls for 18-22 minutes, or until golden brown on top and cooked through. The internal temperature should reach about 190°F (88°C).
- Prepare the garlic herb butter glaze: While the rolls bake, combine melted butter, minced garlic, chopped herbs, salt, and red pepper flakes in a small bowl. Let it sit to infuse flavors.
- Glaze and serve: As soon as the rolls come out of the oven, brush them generously with the garlic herb butter glaze. Let the butter soak in for a few minutes before serving warm.
Notes
If rolls brown too quickly, tent loosely with foil halfway through baking. Avoid skipping the second rise for soft, fluffy rolls. Use fresh herbs for best flavor. For dairy-free, swap milk and butter with plant-based alternatives. Gluten-free flour can be used but expect different texture.
Nutrition
- Serving Size: 1 roll (about 70 g)
- Calories: 195
- Sugar: 4
- Sodium: 300
- Fat: 7
- Saturated Fat: 4
- Carbohydrates: 27
- Fiber: 1
- Protein: 5
Keywords: garlic herb dinner rolls, homemade dinner rolls, Easter rolls, garlic butter rolls, soft dinner rolls, herb rolls, easy bread recipe