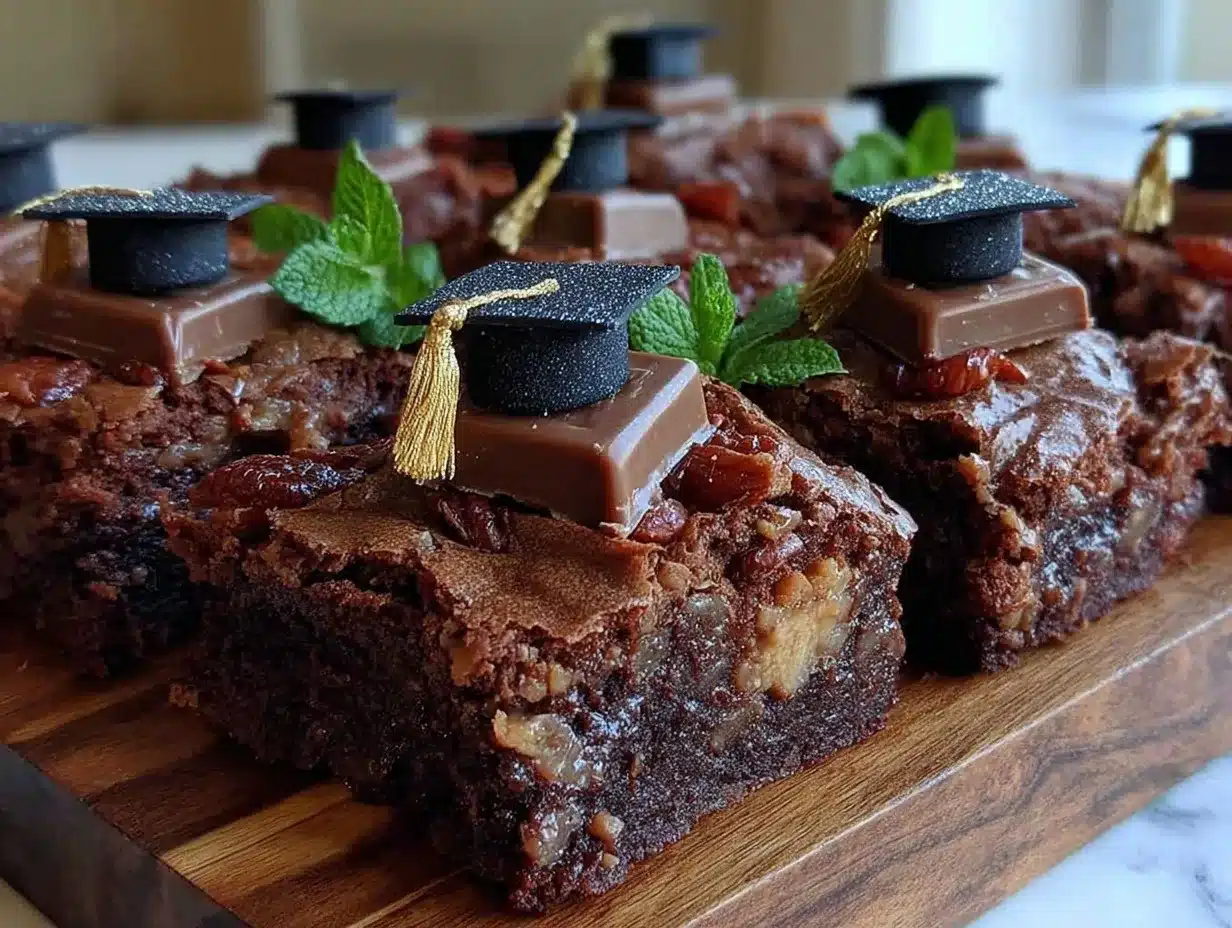
“You won’t believe how I ended up making candy bar brownie graduation caps,” my friend Lisa said as she handed me one at her daughter’s party last spring. Honestly, I wasn’t expecting much from this last-minute treat, but the moment I bit into that rich, fudgy brownie topped with a perfectly balanced candy bar and a little chocolate tassel, I was hooked. The sweet, dense texture combined with the crunch and creaminess of the candy bar was just brilliant.
It all started on a chaotic Saturday afternoon. I was supposed to bring something simple to a graduation celebration, but I forgot to grab the cupcakes I had planned. Running out of time and ingredients, I glanced over at the candy bars on the counter and thought, “Why not?” Mixing a quick batch of brownie batter and pairing it with those candy bars, I crafted these fun, cap-shaped desserts that stole the show.
Maybe you’ve been there — that moment when you have to whip up something impressive but have only a handful of ingredients and limited time. These candy bar brownie graduation caps are exactly that kind of recipe: surprisingly easy, festive, and downright delicious. Plus, they bring a playful touch to any celebration, especially when you want to honor your grad with something a little extra special.
So, let me tell you why these treats have stuck around in my kitchen rotation ever since that hectic day. They’re not just brownies; they’re a bit of creativity, a touch of nostalgia, and a whole lot of fun packed into a bite-sized celebration. Perfect for anyone who loves a sweet treat with a twist—and who doesn’t?
Why You’ll Love This Recipe
There’s something truly satisfying about combining classic brownie goodness with the playful look of a graduation cap. This candy bar brownie graduation caps recipe is a winner for lots of reasons, and here’s why I keep coming back to it:
- Quick & Easy: Ready in under an hour from start to finish, these treats come together fast—no fancy baking skills needed.
- Simple Ingredients: You probably already have most of what you need in your pantry and fridge—brownie mix, candy bars, and a little chocolate for the tassels.
- Perfect for Celebrations: Whether it’s graduation, birthdays, or any special occasion, these are crowd-pleasers that look festive and fun.
- Crowd-Pleaser: Kids and adults rave about the combination of fudgy brownie and the crunchy candy bar topping—it’s a real hit.
- Unbelievably Delicious: The texture combo alone makes you want to close your eyes after the first bite—dense, chewy brownies with a sweet, crunchy crown.
This isn’t just another brownie recipe. The trick lies in using a rich, fudgy batter that holds up well under the candy bar and a bit of melted chocolate “glue” to keep everything together. It’s like making dessert and decoration in one go. Honestly, the first time I tried it, I was skeptical about the candy bar holding up, but it worked like a charm.
Plus, these caps add a little nostalgic flair that reminds me of those school celebrations, and I bet they’ll bring a smile to your grad’s face too. Whether you’re a seasoned baker or just want a fuss-free treat that looks impressive, this recipe has your back.
What Ingredients You Will Need
This recipe uses simple, wholesome ingredients that combine to deliver bold flavor and a satisfying texture without the fuss. Most are pantry staples, with the candy bar topping adding a playful touch.
- Brownie Batter:
- 1 box brownie mix (about 18 oz / 510 g) – I recommend Ghirardelli for the best fudgy texture
- 2 large eggs, room temperature
- 1/3 cup vegetable oil (or melted butter for richer flavor)
- 1/4 cup water
- Candy Bar Caps:
- 12 fun-size candy bars, unwrapped (Snickers, Milky Way, or your favorite chewy bars work great)
- Chocolate Tassels:
- 1/2 cup semi-sweet chocolate chips or melting chocolate
- 1 tsp vegetable shortening or coconut oil (optional, for smooth melting)
Ingredient Tips: Choose candy bars that aren’t too hard or crumbly; chewy bars with caramel or nougat hold better on the brownies. If you’re avoiding dairy, look for dairy-free brownie mixes and vegan chocolate chips. For a gluten-free version, you can use a gluten-free brownie mix, and almond or coconut flour based options work nicely.
Equipment Needed
- 9×13-inch (23×33 cm) baking pan – a standard size that gives you perfect brownie thickness
- Mixing bowls – one medium for batter, one small for melting chocolate
- Whisk or spoon for mixing batter
- Microwave-safe bowl or double boiler – for melting chocolate smoothly
- Offset spatula or butter knife – handy for spreading batter evenly
- Parchment paper or non-stick spray – helps with easy removal of brownies
- Toothpick or skewer – for creating little holes in the candy bar to attach tassels
If you don’t have a 9×13 pan, an 8×8 works but your brownies will be thicker and might need a little extra baking time. For melting chocolate, a microwave is easiest, but use short bursts to avoid burning. I always keep a silicone spatula around; it’s perfect for scraping every last bit of batter or chocolate.
Preparation Method
- Preheat your oven to 350°F (175°C). Line your 9×13-inch pan with parchment paper or grease it well to prevent sticking. This little prep step saves you from a baking mess later.
- Mix the brownie batter: In a medium bowl, combine the brownie mix, 2 eggs, 1/3 cup vegetable oil, and 1/4 cup water. Stir gently until just combined—don’t overmix or your brownies might get tough. The batter should be thick and glossy.
- Pour batter into pan: Spread the batter evenly using an offset spatula or the back of a spoon. Smooth it out to the edges so your brownies bake uniformly.
- Bake for 25-30 minutes: Check at 25 minutes by inserting a toothpick into the center; it should come out with a few moist crumbs but not wet batter. Don’t overbake—these brownies are best fudgy.
- Cool completely: Let the brownies cool in the pan on a wire rack for at least 45 minutes. This step is crucial; warm brownies won’t hold the candy bar caps well.
- Cut brownies into squares: Aim for 12 equal pieces, about 2×2 inches (5×5 cm) each. Use a sharp knife for clean edges.
- Prepare the chocolate tassels: Melt the chocolate chips with the shortening in a microwave-safe bowl in 20-second bursts, stirring after each until smooth. If you prefer, use a double boiler.
- Attach candy bars: Place one fun-size candy bar on top of each brownie square. Using a small spoon or piping bag, dab melted chocolate around the edges to “glue” the candy bar in place.
- Make tassels: Use a toothpick dipped in melted chocolate to draw a small circle or dot on the center of each candy bar for the “button” of the cap. Then, pipe a short chocolate “string” dangling from the button to mimic a graduation tassel. This is where your creativity shines!
- Let set: Place the trays in the fridge for about 15 minutes to let the chocolate harden. Once set, your perfect candy bar brownie graduation caps are ready to impress.
Pro tip: If you want cleaner cuts for the tassels, chill the melted chocolate briefly before piping. And if your candy bars start to slip, a quick dab of extra melted chocolate will hold them firm.
Cooking Tips & Techniques
Here are some insights I learned the hard way while perfecting this recipe:
- Don’t skip cooling: Trying to top warm brownies with candy bars will cause melting and sliding. Patience is key here.
- Use a sharp knife: Clean cuts make your brownie squares look professional. Wipe your knife between cuts to avoid crumb buildup.
- Chocolate melting tips: Melt chocolate slowly in short bursts in the microwave or over simmering water. Burnt chocolate tastes bitter and won’t set right.
- Keep tassels simple: If piping isn’t your thing, you can also use thin licorice strings or edible glitter for decoration.
- Multitasking: While brownies bake and cool, prep your candy bars and melting chocolate to save time. It’s easier than it sounds!
I once tried making the tassels out of fondant—too fiddly and time-consuming. Sticking to melted chocolate keeps it quick and tasty. Also, if your candy bars are too thick, try slicing them in half lengthwise for a lighter cap.
Variations & Adaptations
Because celebrations come in all shapes and sizes, here are some ideas to make these candy bar brownie caps your own:
- Dietary swaps: Use gluten-free brownie mix and dairy-free chocolate to make this allergy-friendly. You can also swap eggs for flax eggs if vegan.
- Seasonal flavors: Add a teaspoon of peppermint extract during winter or swirl in a bit of peanut butter for extra richness.
- Alternative toppings: Instead of candy bars, try mini cookies or chocolate-covered pretzels for a crunchy cap.
- Creative tassels: Use colorful sprinkles or edible gold dust to jazz up the tassels for a fancy touch.
- Personalized messages: Write names or graduation years on the candy bars with white chocolate for a customized gift.
I tried a batch with peanut butter cups once, and let me tell you—the salty-sweet combo was next-level. Feel free to experiment and find what your crowd loves best.
Serving & Storage Suggestions
These candy bar brownie graduation caps are best served at room temperature so the flavors shine and the texture is just right. Arrange them on a festive platter or in cupcake liners for easy grab-and-go fun.
Pair these treats with a cold glass of milk, coffee, or even a sparkling soda for that perfect party vibe. They also make cute additions to dessert tables or gift boxes.
Store leftovers in an airtight container at room temperature for up to 3 days or in the fridge for up to a week. If you refrigerate, let them sit out for 15 minutes before serving to soften slightly.
For longer storage, freeze them (without the tassels) wrapped tightly in plastic wrap and foil for up to 2 months. Thaw overnight in the fridge and add fresh melted chocolate tassels before serving.
Over time, these brownies mellow and the candy bars soften a little, which some folks prefer. It’s all about what texture you enjoy most!
Nutritional Information & Benefits
Each candy bar brownie graduation cap contains approximately:
| Nutrient | Amount (per serving) |
|---|---|
| Calories | 280-320 kcal |
| Fat | 15-18 g |
| Saturated Fat | 7-9 g |
| Carbohydrates | 35-40 g |
| Sugar | 25-30 g |
| Protein | 3-5 g |
While these are definitely a treat, using quality dark or semi-sweet chocolate chips adds antioxidants. Plus, the eggs and chocolate provide small amounts of protein. If you want a lighter option, try swapping half the oil for applesauce in the batter.
Note: This recipe contains gluten (unless using gluten-free mix), dairy, and eggs. Perfect for celebrations where you want indulgence paired with a little homemade love.
Conclusion
These candy bar brownie graduation caps are proof that you can make something fun, festive, and delicious without hours in the kitchen or fancy ingredients. They bring that perfect balance of fudgy brownie, sweet candy crunch, and a playful graduation twist that makes celebrations feel a bit more special.
Honestly, I love how customizable they are—you can easily switch up the candy bars, add creative decorations, or tweak the batter to suit your taste or dietary needs. It’s a recipe that invites you to make it your own.
If you give this recipe a try, I’d love to hear what candy bars you pick or how you decorate your caps. Drop your thoughts and photos in the comments below—you know how much I enjoy seeing your kitchen wins! Here’s to sweet celebrations and delicious memories.
FAQs
Can I make these candy bar brownie graduation caps ahead of time?
Yes! You can bake the brownies a day or two in advance, then add the candy bars and tassels just before serving to keep everything fresh and neat.
What if I don’t have fun-size candy bars?
Regular-sized candy bars can be cut into smaller pieces or halves to fit the brownies. Just make sure they’re not too big and heavy to stay in place.
Can I use homemade brownie batter instead of a mix?
Absolutely! Any fudgy brownie recipe works well. Just make sure the brownies are cool and firm enough to support the candy bar topping.
How do I store leftovers so they stay fresh?
Store in an airtight container at room temperature for 2-3 days or in the fridge for up to a week. Let refrigerated brownies come to room temp before serving.
What are some easy ways to decorate the tassels if I’m not good at piping chocolate?
You can use thin licorice strings, edible glitter, or small candy sprinkles to mimic tassels. Even a simple dot of melted chocolate with a toothpick works well and looks charming.
Pin This Recipe!
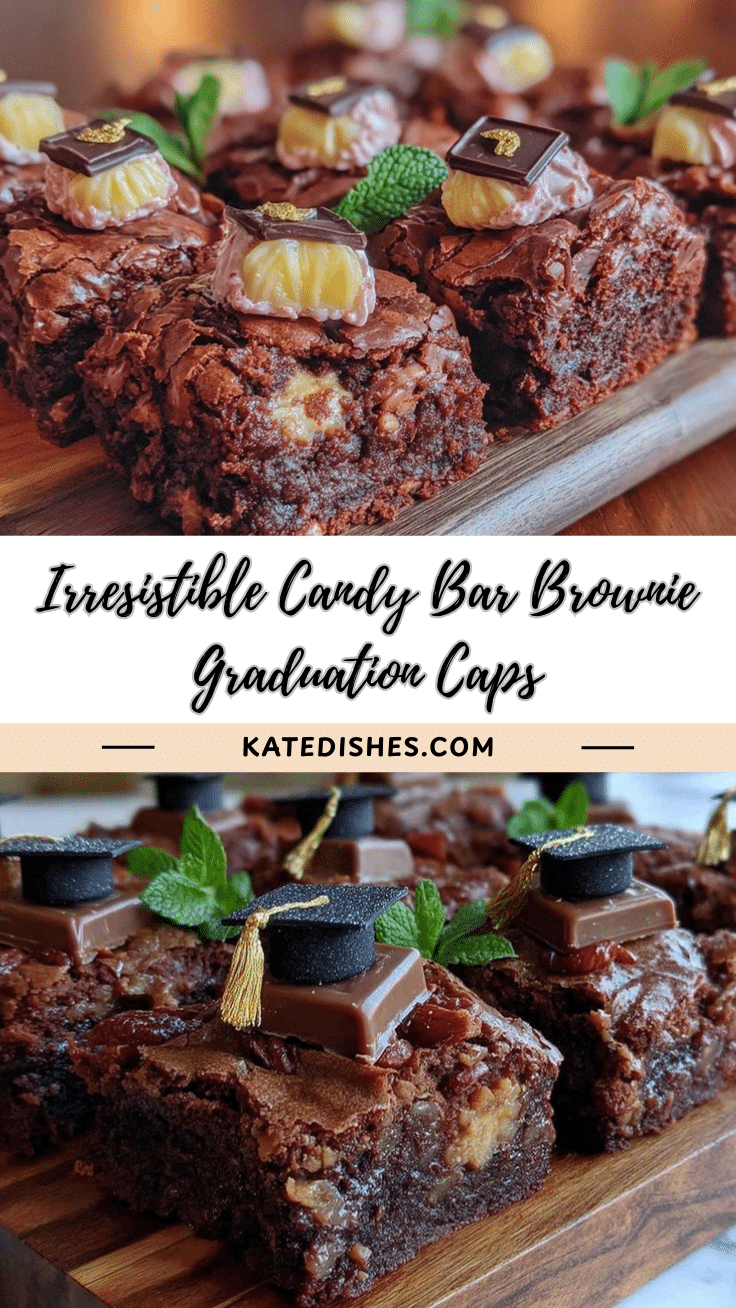
Perfect Candy Bar Brownie Graduation Caps Easy Recipe for Celebrations
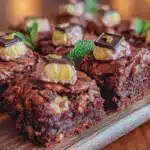
These candy bar brownie graduation caps combine rich, fudgy brownies with fun-size candy bars and chocolate tassels for a festive and easy-to-make celebration treat.
- Prep Time: 15 minutes
- Cook Time: 30 minutes
- Total Time: 1 hour
- Yield: 12 servings 1x
- Category: Dessert
- Cuisine: American
Ingredients
- 1 box brownie mix (about 18 oz / 510 g)
- 2 large eggs, room temperature
- 1/3 cup vegetable oil (or melted butter for richer flavor)
- 1/4 cup water
- 12 fun-size candy bars, unwrapped (Snickers, Milky Way, or favorite chewy bars)
- 1/2 cup semi-sweet chocolate chips or melting chocolate
- 1 tsp vegetable shortening or coconut oil (optional, for smooth melting)
Instructions
- Preheat your oven to 350°F (175°C). Line your 9×13-inch pan with parchment paper or grease it well.
- In a medium bowl, combine the brownie mix, 2 eggs, 1/3 cup vegetable oil, and 1/4 cup water. Stir gently until just combined.
- Pour batter into pan and spread evenly using an offset spatula or the back of a spoon.
- Bake for 25-30 minutes. Check at 25 minutes by inserting a toothpick into the center; it should come out with a few moist crumbs but not wet batter.
- Let the brownies cool completely in the pan on a wire rack for at least 45 minutes.
- Cut brownies into 12 equal squares, about 2×2 inches each.
- Melt the chocolate chips with the shortening in a microwave-safe bowl in 20-second bursts, stirring after each until smooth.
- Place one fun-size candy bar on top of each brownie square. Dab melted chocolate around the edges to glue the candy bar in place.
- Use a toothpick dipped in melted chocolate to draw a small circle on the center of each candy bar for the ‘button’ of the cap, then pipe a short chocolate ‘string’ dangling from the button to mimic a tassel.
- Place the trays in the fridge for about 15 minutes to let the chocolate harden before serving.
Notes
Cool brownies completely before adding candy bars to prevent melting and sliding. Use a sharp knife for clean cuts. Melt chocolate slowly in short bursts to avoid burning. Tassels can be decorated with licorice strings or edible glitter if piping is difficult. For thicker brownies, an 8×8 pan can be used but may require longer baking time.
Nutrition
- Serving Size: 1 brownie cap (appro
- Calories: 280320
- Sugar: 2530
- Fat: 1518
- Saturated Fat: 79
- Carbohydrates: 3540
- Protein: 35
Keywords: brownies, candy bar, graduation caps, easy dessert, celebration treats, fudgy brownies, chocolate tassels