“You wouldn’t believe it,” my plumber chuckled as he wiped his hands on an old rag, “but my grandma swore by this coconut cream pie.” I was halfway through fixing a leaky faucet when he started sharing the secret behind his family’s favorite dessert—except it wasn’t a pie at all. It was these bars, creamy, rich, with a toasted coconut topping that made you stop mid-bite and savor every crumb.
Honestly, I wasn’t expecting to learn about a killer dessert from a guy who’s all about pipes and wrenches, but there I was, scribbling down his recipe on a crumpled receipt. I tried it that weekend, and you know that feeling when something just clicks? The texture was silky, the crust buttery with a hint of salt, and that toasted coconut on top added a crunch that felt like a hug after a long day.
Maybe you’ve been there—scouring the internet for a coconut treat that doesn’t feel like a calorie bomb but still tastes like you’re indulging in something special. These Creamy Coconut Cream Pie Bars have stuck with me ever since. They’re the kind of dessert that feels homemade, even if you mess up the first batch (which I did—forgot the vanilla one time, and it was still pretty darn good!).
So, if you’re looking for a dessert that’s easy to whip up, full of tropical flavor, and perfect for sharing (or not), these bars might just become your new go-to. Let me tell you, once you try them, you’ll understand why I keep coming back to this recipe, despite all the fancy ones I’ve tested since.
Why You’ll Love This Creamy Coconut Cream Pie Bars Recipe
Having tested this recipe multiple times—sometimes with friends hovering, eager for a taste—I can say it’s a keeper. It’s not just the taste; it’s how the recipe fits into real life. Here’s why it stands out:
- Quick & Easy: Comes together in under 45 minutes, perfect for those last-minute dessert emergencies or weekend treats.
- Simple Ingredients: No complicated grocery runs—most are kitchen staples, plus a can of good-quality coconut milk.
- Perfect for Gatherings: Whether it’s brunch with friends or a casual potluck, these bars always get raves.
- Crowd-Pleaser: Kids, adults, coconut skeptics alike—everyone’s sneaking an extra piece!
- Unbelievably Delicious: That creamy filling with a toasted coconut crunch? Pure comfort.
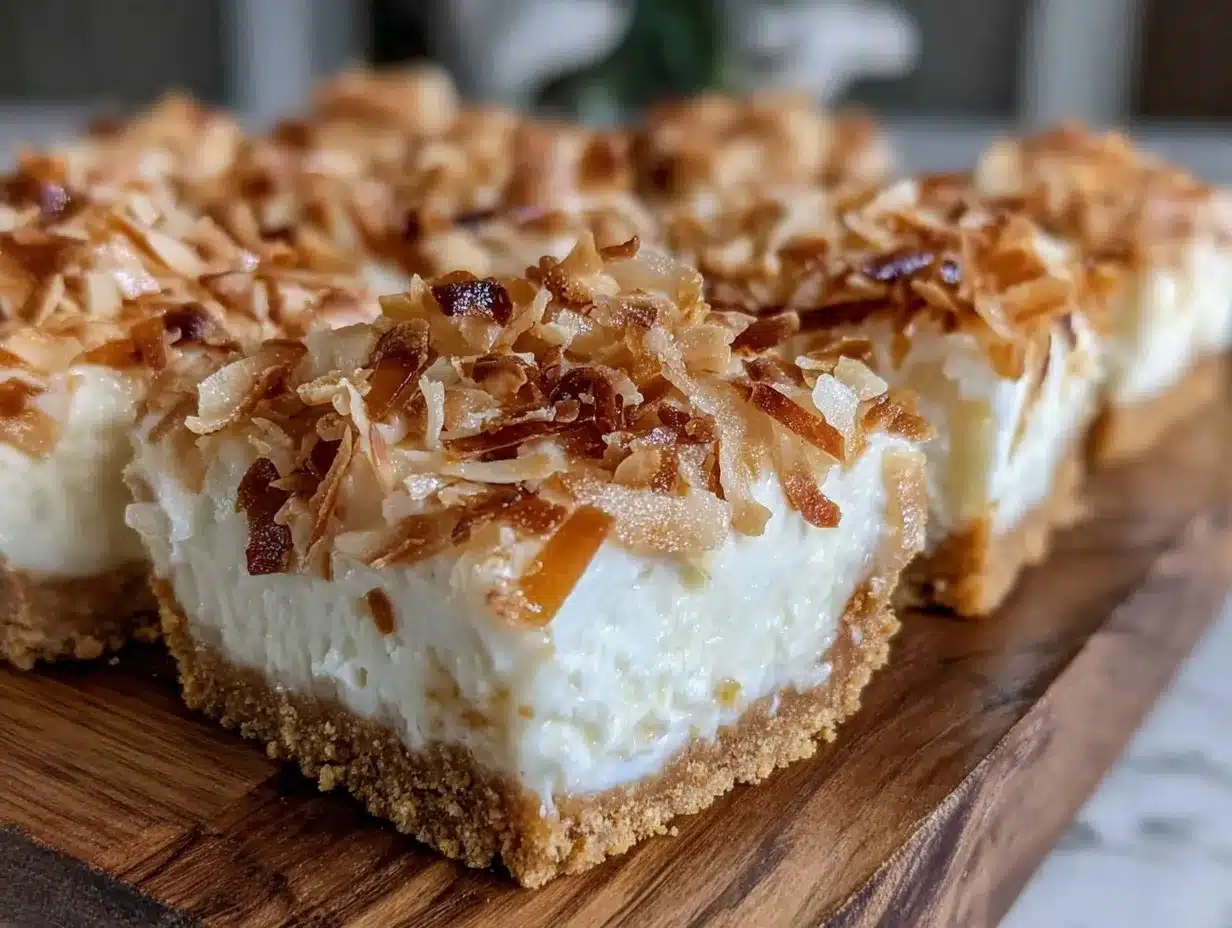
What makes these bars different? It’s the texture contrast—silky custard meets buttery crust topped with perfectly toasted coconut flakes. Plus, a subtle hint of vanilla and a pinch of salt brings everything together just right. I’ve seen other recipes call for complicated pastry techniques or obscure ingredients, but this one keeps it honest and approachable without skimping on flavor.
Honestly, after the first bite, you might just close your eyes and savor that tropical goodness. It’s comfort food that doesn’t feel heavy, and you can trust me on this—I’ve made plenty of coconut desserts that ended up too cloying or too dry. This recipe balances it all, making it a standout whenever it hits the table.
What Ingredients You Will Need
This recipe uses simple, wholesome ingredients to deliver bold flavor and satisfying texture without the fuss. Most are pantry staples, and substitutions are easy if needed.
- For the Crust:
- 1 ½ cups all-purpose flour (I prefer King Arthur for consistent texture)
- ½ cup powdered sugar
- ½ teaspoon salt
- ½ cup unsalted butter, cold and cubed (helps create a flaky crust)
- For the Coconut Cream Filling:
- 1 can (13.5 oz / 400 ml) full-fat coconut milk (shake well before opening)
- ¾ cup granulated sugar
- 3 large egg yolks, room temperature
- ¼ cup cornstarch
- 2 tablespoons unsalted butter, softened
- 1 ½ teaspoons pure vanilla extract (look for Nielsen-Massey for best flavor)
- Pinch of salt
- For the Toasted Coconut Topping:
- 1 cup sweetened shredded coconut (can swap with unsweetened if you prefer less sugar)
- Optional: 1 tablespoon powdered sugar for dusting
Ingredient Tips: Use fresh eggs and good-quality butter for best results. If you’re dairy-free, swap butter with a plant-based alternative and verify the coconut milk is unsweetened and pure. For gluten-free, almond flour crust is a tasty alternative but changes the texture slightly.
Equipment Needed
- 9×9-inch (23×23 cm) square baking pan – I like using a glass pan for even baking, but metal works too.
- Mixing bowls – a couple of medium sizes for crust and filling.
- Whisk and rubber spatula – for smooth mixing and scraping every bit.
- Medium saucepan – for cooking the coconut cream filling gently.
- Measuring cups and spoons – precise measurements matter here.
- Electric mixer (optional) – helps whisk the filling faster but not mandatory.
- Cooling rack – to let the bars chill properly after baking.
If you don’t have a square pan, a similarly sized round pan or baking dish will do; just adjust cooking time slightly. I once used a smaller pan and ended up with thicker bars—which was a happy accident but required extra chilling time.
Preparation Method
- Preheat the Oven and Prepare the Crust (10 minutes)
Set your oven to 350°F (175°C). Line the 9×9-inch pan with parchment paper, leaving some overhang for easy lifting later. In a bowl, whisk together flour, powdered sugar, and salt. - Cut in the Butter (5 minutes)
Add the cold, cubed butter to the dry ingredients. Using your fingers or a pastry cutter, work the butter into the flour until it resembles coarse crumbs. Press the mixture evenly into the bottom of the pan to form the crust. - Bake the Crust (15 minutes)
Pop the pan in the oven and bake until the edges are golden but the center is still pale—about 15 minutes. Remove and let cool slightly while preparing the filling. - Make the Coconut Cream Filling (20 minutes)
In a medium saucepan, whisk together sugar, cornstarch, and a pinch of salt. Slowly pour in the coconut milk, whisking to avoid lumps. Place over medium heat, stirring constantly until the mixture thickens and starts to bubble—about 5-7 minutes. - Temper the Egg Yolks (5 minutes)
In a separate bowl, lightly beat the egg yolks. Gradually add a few spoonfuls of the hot coconut mixture into the yolks while whisking to prevent curdling. Then, pour the yolk mixture back into the saucepan, whisking constantly. Cook for another 2 minutes until thick and creamy. - Finish the Filling (2 minutes)
Remove from heat and stir in softened butter and vanilla extract until smooth and glossy. Pour the filling over the cooled crust and spread evenly. - Toast the Coconut Topping (5-7 minutes)
Place shredded coconut on a baking sheet in a single layer. Toast under the broiler or in the oven at 350°F (175°C) until golden brown, watching carefully to avoid burning. Sprinkle toasted coconut evenly over the filling. - Chill the Bars (at least 3 hours)
Refrigerate until the filling is set and firm, preferably overnight. Use the parchment overhang to lift out the bars and cut into squares. Serve chilled.
Pro Tip: If you see any coconut burning during toasting, quickly remove and stir; even heat distribution prevents bitter spots. Also, chilling the bars fully makes slicing neat and satisfying.
Cooking Tips & Techniques for Perfect Bars
Creamy Coconut Cream Pie Bars might look fancy, but they’re pretty forgiving if you keep a few things in mind. Here’s what I’ve learned the hard way:
- Don’t Rush the Filling: Stirring constantly while cooking the custard is key to avoid lumps or burning. Low and steady wins this race.
- Temper the Eggs Carefully: Adding hot liquid to egg yolks too fast causes scrambling; go slow and whisk vigorously.
- Butter Temperature: Softened butter blends better into the filling, giving it that velvety texture.
- Crust Thickness: Pressing the crust evenly ensures even baking and prevents sogginess. I usually use the bottom of a glass to smooth it out.
- Toast Coconut with Attention: Coconut can go from golden to burnt in seconds. Keep the broiler door cracked and eyes peeled.
- Multitasking: While the crust bakes, prep your filling ingredients to save time. It helps if you set up your workstation before starting.
One time, I got distracted by a phone call and nearly let the filling scorch — lesson learned: stay in the kitchen when it’s cooking!
Variations & Adaptations to Try
If you’re feeling adventurous or need to tweak based on dietary needs, here are some fun options:
- Gluten-Free Version: Swap the all-purpose flour for a gluten-free blend or almond flour. The texture will be slightly different but just as tasty.
- Dairy-Free Adaptation: Use coconut oil instead of butter in the crust and a plant-based butter alternative in the filling.
- Chocolate Coconut Bars: Add a thin layer of melted dark chocolate on the crust before pouring the filling for a decadent twist.
- Fresh Fruit Topping: Scatter sliced strawberries or kiwi over the coconut topping before chilling for a fresh contrast.
- Less Sweet Option: Reduce sugar by a quarter and add a pinch of cinnamon or nutmeg for warmth.
I once tried adding a drizzle of passion fruit syrup on top, and it gave a tangy brightness that balanced the sweetness beautifully. Feel free to experiment—that’s part of the fun!
Serving & Storage Suggestions
These bars are best served chilled, straight from the fridge. The creamy filling firms up nicely, and the toasted coconut stays crisp. For a special touch, dust a little powdered sugar just before serving.
Pair these bars with a cup of strong coffee or a light tropical tea to complement the coconut flavor. They also make a lovely finish to a summer barbecue or casual dinner.
To store, cover leftovers tightly with plastic wrap or transfer to an airtight container. Keep refrigerated for up to 4 days. You can freeze the bars for up to 2 months; thaw overnight in the fridge before serving.
Reheating isn’t necessary, but if you prefer a softer texture, leave them at room temperature for 20 minutes before enjoying. Over time, the flavors meld beautifully, making them even more irresistible the next day.
Nutritional Information & Benefits
Per serving (based on 16 bars): approximately 210 calories, 12g fat, 25g carbohydrates, 2g protein.
Coconut milk provides healthy medium-chain triglycerides (MCTs), known for quick energy and potential metabolism benefits. The butter adds richness, but swapping for plant-based options can lower saturated fat.
This dessert is naturally gluten-containing unless adapted. It’s free from nuts (unless you add almond flour) and can be made dairy-free. The recipe balances indulgence with wholesome ingredients, making it a sweet treat you can feel good about occasionally.
Personally, I appreciate that I can offer something homemade and satisfying without resorting to overly processed mixes or artificial flavors. It’s a slice of tropical comfort that feels a little like a mini-vacation on a plate.
Conclusion
This Creamy Coconut Cream Pie Bars recipe has become a favorite for good reason. It strikes that perfect note between creamy and crunchy, sweet but not overwhelming, simple to make but impressive to serve.
Feel free to tweak it to your taste—maybe a little more coconut, less sugar, or a splash of lime zest for a zing. That’s the joy of homemade desserts: making them your own.
For me, it’s the memories tied to that unexpected conversation with my plumber and the cozy kitchen moments that followed. I hope you find a similar kind of joy when you make these bars.
Give the recipe a try, share your thoughts or twists in the comments, and don’t be shy about passing it on. After all, good food tastes even better when it’s shared.
Happy baking—and may your kitchen be filled with the sweet smell of toasted coconut soon!
Frequently Asked Questions
Can I use shredded unsweetened coconut instead of sweetened?
Yes, you can! The bars will be less sweet, so you might want to add a bit more sugar to the filling or sprinkle a little powdered sugar on top.
How long can I store these coconut cream pie bars?
Stored in an airtight container in the fridge, they stay fresh for up to 4 days. For longer storage, freeze for up to 2 months.
Is it possible to make these bars vegan?
Absolutely! Use plant-based butter and substitute the eggs with cornstarch or a commercial egg replacer. The texture will be slightly different but still delicious.
Can I prepare the bars ahead of time for a party?
Definitely! These bars taste even better after chilling overnight, making them perfect for prepping a day ahead.
What’s the best way to cut the bars without them falling apart?
Use a sharp knife warmed in hot water and wiped dry before slicing. Chill the bars thoroughly to help them hold their shape.
Pin This Recipe!
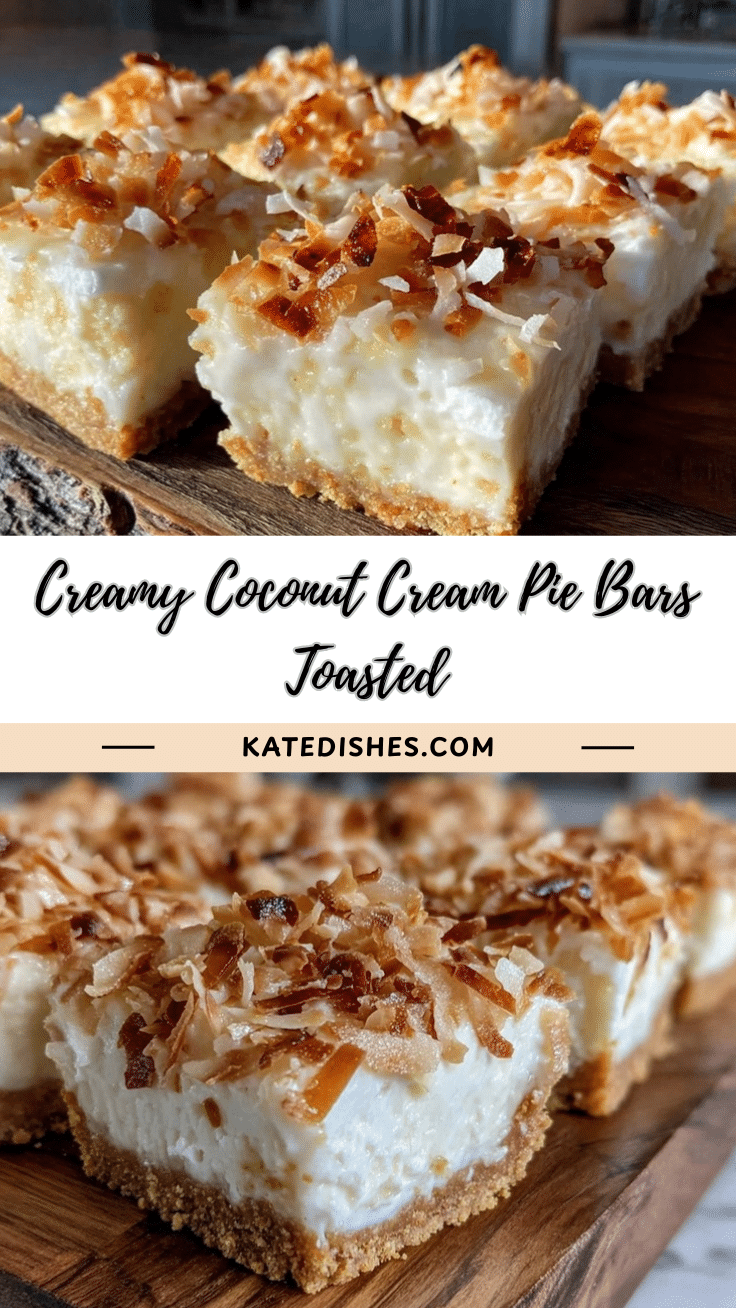
Creamy Coconut Cream Pie Bars
These creamy coconut cream pie bars feature a silky custard filling, a buttery flaky crust, and a crunchy toasted coconut topping, perfect for an easy homemade tropical dessert.
- Prep Time: 15 minutes
- Cook Time: 30 minutes
- Total Time: 3 hours 45 minutes
- Yield: 16 bars 1x
- Category: Dessert
- Cuisine: American
Ingredients
- 1 ½ cups all-purpose flour
- ½ cup powdered sugar
- ½ teaspoon salt
- ½ cup unsalted butter, cold and cubed
- 1 can (13.5 oz / 400 ml) full-fat coconut milk
- ¾ cup granulated sugar
- 3 large egg yolks, room temperature
- ¼ cup cornstarch
- 2 tablespoons unsalted butter, softened
- 1 ½ teaspoons pure vanilla extract
- Pinch of salt
- 1 cup sweetened shredded coconut
- Optional: 1 tablespoon powdered sugar for dusting
Instructions
- Preheat oven to 350°F (175°C). Line a 9×9-inch baking pan with parchment paper, leaving overhang for easy lifting. In a bowl, whisk together flour, powdered sugar, and salt.
- Add cold, cubed butter to dry ingredients. Work butter into flour with fingers or pastry cutter until mixture resembles coarse crumbs. Press evenly into bottom of pan to form crust.
- Bake crust for about 15 minutes until edges are golden but center is still pale. Remove and let cool slightly.
- In a medium saucepan, whisk together sugar, cornstarch, and a pinch of salt. Slowly pour in coconut milk while whisking to avoid lumps. Cook over medium heat, stirring constantly until thickened and bubbling, about 5-7 minutes.
- Lightly beat egg yolks in a separate bowl. Gradually add a few spoonfuls of hot coconut mixture to yolks while whisking to temper. Pour yolk mixture back into saucepan and cook for another 2 minutes until thick and creamy.
- Remove from heat and stir in softened butter and vanilla extract until smooth and glossy. Pour filling over cooled crust and spread evenly.
- Place shredded coconut on a baking sheet in a single layer. Toast under broiler or in oven at 350°F (175°C) until golden brown, about 5-7 minutes, watching carefully to avoid burning.
- Sprinkle toasted coconut evenly over filling.
- Refrigerate bars for at least 3 hours or preferably overnight until filling is set and firm.
- Use parchment overhang to lift bars from pan and cut into squares. Serve chilled.
Notes
Stir custard constantly to avoid lumps or burning. Temper eggs slowly to prevent scrambling. Use softened butter for smooth filling texture. Toast coconut carefully to avoid burning. Chill bars fully before slicing for neat cuts. Can substitute almond flour for gluten-free crust and plant-based butter for dairy-free version.
Nutrition
- Serving Size: 1 bar (if 16 bars to
- Calories: 210
- Fat: 12
- Carbohydrates: 25
- Protein: 2
Keywords: coconut cream pie bars, toasted coconut, creamy dessert, easy coconut bars, homemade dessert, tropical dessert