“I never thought a simple cookie could stop me in my tracks until last spring’s garden party,” my friend Jenna said one sunny afternoon. She was holding one of those charming spring bunny-shaped sugar cookies, delicately iced with pastel pinks and soft whites. Honestly, it was the kind of treat that made the kids squeal and the adults smile like they’d just found a secret slice of happiness. I mean, you know that feeling when a little detail—like a perfectly piped ear or a tiny sugar pearl eye—turns a simple cookie into a moment worth savoring?
And here’s the kicker: this recipe almost didn’t happen. I was rushing to bake something festive for a last-minute get-together and grabbed the wrong cookie cutter. I meant to make hearts but ended up with bunnies instead. I figured, “Why not lean into it?” The result? These adorable, charming spring bunny-shaped sugar cookies with delicate icing that stole the spotlight. There was some flour on the floor, a cracked mixing bowl (don’t ask), and a late-night icing mishap. But what stayed with me was how these cookies brought a touch of whimsy and warmth to the table.
Maybe you’ve been there—scrambling to put something sweet together, hoping it looks as good as it tastes. Well, these cookies are your answer. They’re not just treats; they’re little parcels of joy, perfect for springtime celebrations, Easter brunches, or just a sunny afternoon treat. So, if you’ve ever wanted to impress your friends with a homemade cookie that looks like it came from a boutique bakery, this recipe is definitely for you.
Why You’ll Love This Recipe
Trust me, after testing dozens of sugar cookie recipes and icing techniques, this one stands out for several reasons:
- Quick & Easy: Comes together in about 45 minutes, perfect for busy spring afternoons or last-minute gatherings.
- Simple Ingredients: Uses pantry staples you probably already have—no fancy or hard-to-find items needed.
- Perfect for Spring Celebrations: Whether it’s Easter, a garden party, or a casual brunch, these cookies fit right in.
- Crowd-Pleaser: Kids love the cute bunny shapes and delicate icing, and adults appreciate the balanced sweetness and buttery texture.
- Unbelievably Delicious: The cookies have a tender crumb with just the right amount of sweetness, while the icing adds a smooth, melt-in-your-mouth finish.
What really sets this recipe apart is the icing technique. Instead of thick, overly sweet frosting, the delicate royal icing dries smooth and shiny, allowing the bunny shapes to shine without overpowering the cookie’s buttery flavor. Plus, the dough is easy to roll and cut without sticking or cracking, which means less stress and more fun decorating. Honestly, it’s the kind of recipe that makes you pause and smile after the first bite—and maybe sneak a second one before anyone notices.
What Ingredients You Will Need
This recipe uses simple, wholesome ingredients to deliver bold flavor and satisfying texture without the fuss. Most are pantry staples, but I’ll share a few tips to get the best results.
- For the Sugar Cookies:
- All-purpose flour, 2 ¾ cups (345 grams) – Use a good quality brand like King Arthur Flour for consistent texture.
- Baking powder, 1 teaspoon – Helps the cookies rise just enough.
- Salt, ½ teaspoon – Balances sweetness.
- Unsalted butter, 1 cup (226 grams), softened – Room temperature for easy mixing; Kerrygold adds lovely richness.
- Granulated sugar, 1 cup (200 grams) – Provides sweetness and crisp edges.
- Large egg, 1 – At room temperature to blend smoothly.
- Vanilla extract, 1 teaspoon – Real vanilla gives the best flavor punch.
- For the Delicate Royal Icing:
- Powdered sugar, 2 cups (240 grams), sifted – Avoid lumps for smooth icing.
- Egg white powder, 2 tablespoons, mixed with 3 tablespoons water – A safer alternative to raw egg whites.
- Lemon juice, 1 teaspoon – Adds a slight tang and helps the icing dry glossy.
- Food coloring (optional) – Soft pastels like pale pink, mint green, and baby blue work beautifully for spring themes.
For substitutions: You can swap all-purpose flour with a gluten-free blend (one-to-one replacement) if needed, and use dairy-free margarine for a vegan-friendly version (though texture may vary slightly). For the icing, if you prefer not to use egg white powder, you can try meringue powder instead—it’s what I used for years before switching.
Equipment Needed
- Mixing bowls – At least two, medium and large size.
- Electric mixer – Handheld or stand mixer makes creaming butter and sugar a breeze.
- Rolling pin – A 12-inch pin works well; lightly flour to prevent sticking.
- Bunny-shaped cookie cutter – About 3-4 inches tall; if you don’t have one, a small rabbit stencil works too.
- Baking sheets – Non-stick or lined with parchment paper for easy cleanup.
- Cooling racks – To let cookies cool evenly without sogginess.
- Piping bags and tips – Small round tips (#1 or #2) for delicate icing details; disposable bags make cleanup easy.
- Sifter – For powdered sugar and flour, helps avoid lumps in dough and icing.
If you don’t own a mixer, hand-whisking works but requires more elbow grease. I’ve used everything from plastic rolling pins to wooden ones, and honestly, either does the job if you’re careful. For piping, practice on parchment before decorating cookies to feel the pressure and flow. I once tried using a zip-top bag with a snipped corner—it worked in a pinch, but the control wasn’t quite there.
Preparation Method
- Prepare the Dough (15 minutes): In a medium bowl, whisk together 2 ¾ cups (345 grams) of all-purpose flour, 1 teaspoon baking powder, and ½ teaspoon salt. Set aside. In a large bowl, beat 1 cup (226 grams) softened unsalted butter with 1 cup (200 grams) granulated sugar until fluffy—about 3 minutes with an electric mixer on medium speed. Scrape down the sides as needed.
- Add 1 large room-temperature egg and 1 teaspoon vanilla extract to the butter mixture. Beat until combined, about 1 minute.
- Gradually add the flour mixture, mixing on low speed until just combined. The dough should hold together but not be sticky. If it feels too soft, chill for 10 minutes.
- Chill the Dough (at least 1 hour): Wrap the dough in plastic wrap and refrigerate. This step is key to prevent spreading and to help the dough roll smoothly. If you’re short on time, 30 minutes helps too.
- Preheat the Oven and Prepare Baking Sheets (10 minutes): Preheat your oven to 350°F (175°C). Line baking sheets with parchment paper or silicone mats.
- Roll and Cut the Cookies (15 minutes): Lightly flour your work surface and rolling pin. Roll chilled dough to about ¼-inch (6 mm) thickness. Use your bunny-shaped cookie cutter to cut shapes, transferring them carefully to the baking sheets. Try to keep them about 1 inch (2.5 cm) apart.
- Bake (8-10 minutes): Place baking sheets in the oven and bake for 8 to 10 minutes, until edges are just golden. Keep a close eye—overbaking dries them out. The centers may look slightly soft but will firm while cooling.
- Cool Completely (20 minutes): Let cookies cool on baking sheets for 5 minutes, then transfer to wire racks to cool fully before icing.
- Prepare the Royal Icing (10 minutes): In a bowl, combine 2 cups (240 grams) sifted powdered sugar with egg white powder mixed with 3 tablespoons water, and 1 teaspoon lemon juice. Beat until shiny and thick but still pipeable. Add food coloring if desired and mix gently.
- Decorate (variable): Fill piping bags fitted with small round tips and gently outline the bunny shapes first. Let outlines set for 10 minutes, then flood the interiors with thinned icing if you want a smooth finish. Use a toothpick to spread evenly. Allow icing to dry for at least 2 hours at room temperature.
Tip: If your icing is too thick to flow, add water a few drops at a time. Too thin? Add more powdered sugar. And don’t rush the drying—trust me, patience pays off with smooth, crack-free icing. One time, I tried rushing it with a hairdryer, and let’s just say the results were… less than charming.
Cooking Tips & Techniques
Here are a few tricks I picked up making these charming spring bunny-shaped sugar cookies over the years:
- Chill the dough well: It makes rolling easier and keeps the cookies from spreading too much. I usually prepare the dough the night before.
- Use parchment paper for rolling: Roll the dough between two sheets to avoid extra flour, which can toughen cookies.
- Don’t overbake: The cookies firm up as they cool. Pull them out when edges are lightly golden to keep them tender.
- Practice piping on parchment: It helps you get comfortable with the icing flow and pressure before decorating.
- Thin your icing for flooding: The right consistency is like honey but slightly runnier. Use a toothpick to spread evenly and pop air bubbles.
- Work in small batches: Royal icing dries fast, so only mix what you can use in 20–30 minutes.
- Keep cookies cool before icing: Warm cookies can melt the icing and cause colors to run.
I once tried skipping the chilling step—big mistake. The dough was sticky, and the shapes lost definition. Also, sharp edges on cookie cutters help get crisp bunny shapes, so consider investing in quality cutters. And don’t forget to have fun; a little uneven icing adds charm and personality!
Variations & Adaptations
Want to mix it up? Here are some ways to customize these charming spring bunny-shaped sugar cookies:
- Flavor Variations: Add 1 teaspoon almond extract or lemon zest to the dough for a subtle twist.
- Colorful Icing: Use natural food colorings like beet juice powder for pink or spirulina powder for green for a healthier option.
- Gluten-Free Option: Substitute the all-purpose flour with a gluten-free flour blend. The texture will be slightly different, but still delicious.
- Vegan Version: Replace butter with coconut oil and egg with flaxseed “egg” (1 tbsp ground flax + 3 tbsp water). Royal icing can be swapped for a simple glaze made with powdered sugar and plant milk.
- Seasonal Shapes: Swap bunny cutters for flowers, butterflies, or eggs to match different springtime occasions.
Personally, I tried adding a tiny sprinkle of edible glitter on the icing for a party once—it was a hit! Just be sure to use food-safe glitter. Also, if you’re short on time, you can skip the flooding step and just pipe outlines and simple dots for a rustic look.
Serving & Storage Suggestions
These charming spring bunny-shaped sugar cookies are best served at room temperature, making their delicate icing shine without melting or cracking. Arrange them on a pastel-colored platter or nestle them in a basket lined with a linen napkin for an inviting presentation.
Pair them with a light tea—like chamomile or green tea—or a mild coffee for a delightful afternoon treat. They also make a whimsical addition to an Easter brunch spread alongside fresh fruit and light pastries.
To store, place the cookies in an airtight container at room temperature for up to 5 days. If your kitchen is warm, refrigerate them to keep the icing firm, but bring the cookies back to room temp before serving to enjoy their full flavor.
For longer storage, freeze the un-iced cookies in a single layer on a baking sheet, then transfer to a freezer-safe container or bag for up to 3 months. Thaw completely before icing.
One neat tip: the flavors mellow and blend beautifully if you let iced cookies rest overnight, making them even more enjoyable the next day. Just be careful when stacking—they’re delicate!
Nutritional Information & Benefits
Each charming spring bunny-shaped sugar cookie contains approximately:
| Calories | Fat | Carbohydrates | Protein | Sugar |
|---|---|---|---|---|
| 120 kcal | 6 g | 16 g | 1 g | 10 g |
The cookies provide a quick energy boost and a comforting treat without going overboard. Using real butter adds some healthy fats, and the vanilla extract offers antioxidants. If you opt for natural food colorings in the icing, you add subtle nutrients without synthetic additives.
For dietary considerations, these cookies can be made gluten-free or vegan with the substitutions mentioned earlier. They do contain sugar and butter, so enjoy in moderation as part of a balanced diet.
From my wellness perspective, baking these cookies is a joyful ritual—taking time to create something by hand, sharing it with loved ones, and savoring a sweet moment. That kind of mindful cooking feeds more than just the body.
Conclusion
So, there you have it: a recipe that’s more than just sugar and flour. These charming spring bunny-shaped sugar cookies with delicate icing are little bundles of joy that bring smiles and warmth to any occasion. Whether you’re decorating with kids, surprising friends, or just craving a sweet project, this recipe makes it easy and fun.
Feel free to tweak the flavors, colors, and shapes to make it truly yours. I love how these cookies remind me of spring’s gentle beauty and the simple pleasures in life—plus, they taste fantastic!
If you give this recipe a try, drop a comment to let me know how it went or share your own creative twists. Baking is better when we share the love and learn from each other. Happy baking, and may your kitchen be filled with the sweet scent of spring!
FAQs
Can I make the dough ahead of time?
Yes! The dough can be chilled in the fridge for up to 3 days wrapped tightly, or frozen for up to 1 month. Just thaw overnight in the fridge before rolling.
Why is my royal icing cracking?
Cracking usually happens if the icing is too thick or dries too quickly. Try thinning it slightly with water and avoid applying thick layers. Also, keep cookies at room temperature while drying.
Can I use fresh egg whites instead of egg white powder?
You can, but fresh egg whites carry a slight risk of salmonella. If you choose to use them, ensure they’re pasteurized and handle with care.
How do I prevent cookies from spreading too much?
Chilling the dough well before baking and using precise measurements helps. Also, don’t overwork the dough, and bake at the correct temperature (350°F/175°C).
What’s the best way to store decorated cookies?
Keep them in an airtight container at room temp for up to 5 days. If it’s warm, refrigerate but bring to room temp before serving. Avoid stacking unless cookies are completely dry.
Pin This Recipe!

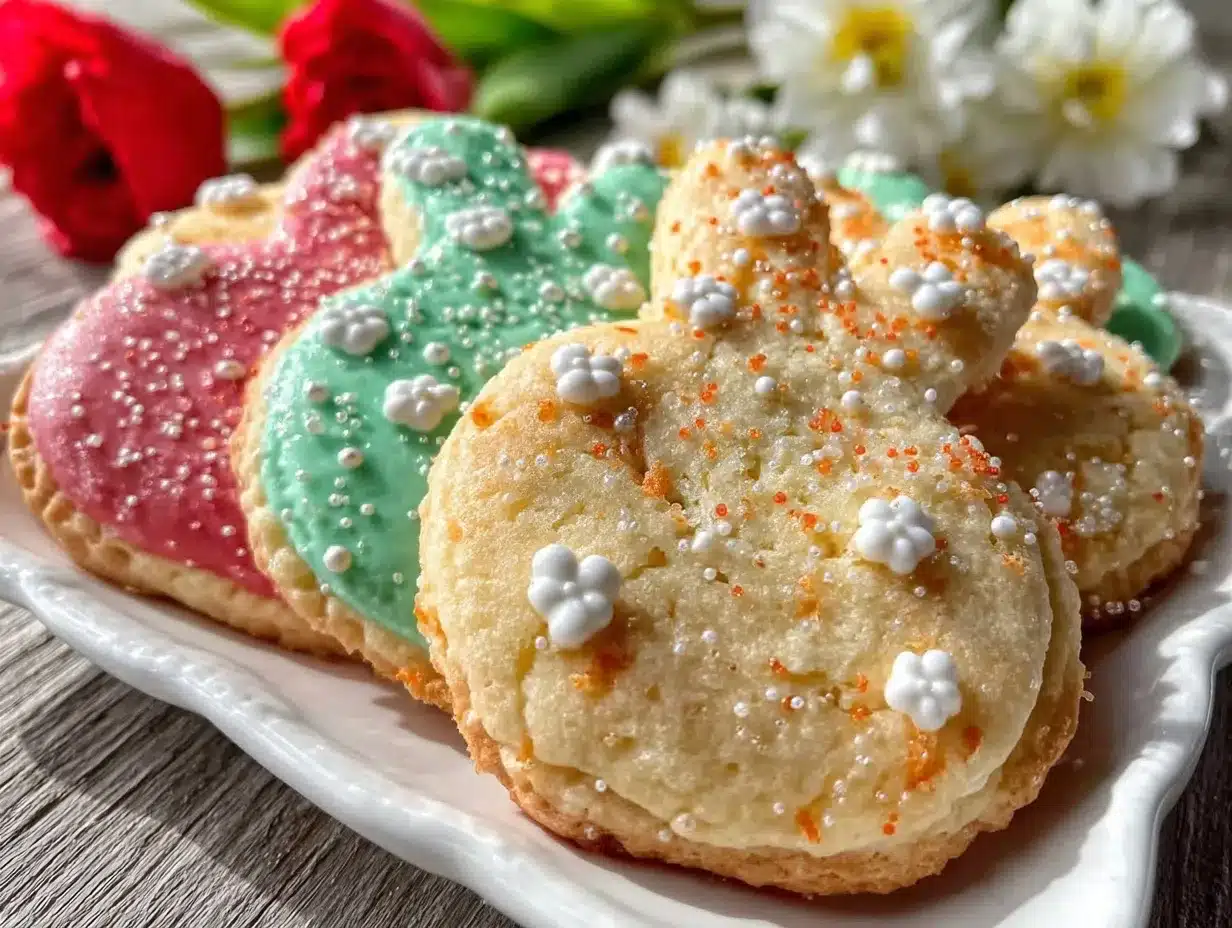
Charming Spring Bunny-Shaped Sugar Cookies Easy Homemade Recipe with Delicate Icing

These charming spring bunny-shaped sugar cookies feature a tender crumb and delicate royal icing, perfect for spring celebrations, Easter brunches, or a sunny afternoon treat.
- Prep Time: 30 minutes
- Cook Time: 10 minutes
- Total Time: 1 hour 40 minutes
- Yield: 24 cookies 1x
- Category: Dessert
- Cuisine: American
Ingredients
- 2 ¾ cups (345 grams) all-purpose flour
- 1 teaspoon baking powder
- ½ teaspoon salt
- 1 cup (226 grams) unsalted butter, softened
- 1 cup (200 grams) granulated sugar
- 1 large egg, room temperature
- 1 teaspoon vanilla extract
- 2 cups (240 grams) powdered sugar, sifted
- 2 tablespoons egg white powder mixed with 3 tablespoons water
- 1 teaspoon lemon juice
- Food coloring (optional, soft pastels like pale pink, mint green, baby blue)
Instructions
- In a medium bowl, whisk together flour, baking powder, and salt. Set aside.
- In a large bowl, beat softened butter with granulated sugar until fluffy, about 3 minutes using an electric mixer on medium speed. Scrape down sides as needed.
- Add the egg and vanilla extract to the butter mixture and beat until combined, about 1 minute.
- Gradually add the flour mixture, mixing on low speed until just combined. Dough should hold together but not be sticky. Chill for 10 minutes if too soft.
- Wrap dough in plastic wrap and refrigerate for at least 1 hour (30 minutes minimum).
- Preheat oven to 350°F (175°C). Line baking sheets with parchment paper or silicone mats.
- Lightly flour work surface and rolling pin. Roll chilled dough to about ¼-inch (6 mm) thickness.
- Use bunny-shaped cookie cutter to cut shapes and transfer to baking sheets about 1 inch apart.
- Bake for 8 to 10 minutes until edges are lightly golden. Remove and let cool on baking sheets for 5 minutes, then transfer to wire racks to cool completely.
- Prepare royal icing by combining powdered sugar, egg white powder mixture, and lemon juice. Beat until shiny and thick but pipeable. Add food coloring if desired.
- Fill piping bags with small round tips and outline bunny shapes. Let outlines set for 10 minutes.
- Flood interiors with thinned icing if desired, using a toothpick to spread evenly. Allow icing to dry at least 2 hours at room temperature.
Notes
Chill dough well to prevent spreading and make rolling easier. Use parchment paper for rolling to avoid extra flour. Do not overbake; cookies firm as they cool. Practice piping on parchment before decorating. Thin icing for flooding to honey-like consistency. Work in small batches with royal icing as it dries fast. Keep cookies cool before icing to prevent melting. For vegan version, substitute butter with coconut oil and egg with flaxseed egg; use simple glaze instead of royal icing. For gluten-free, use a one-to-one gluten-free flour blend.
Nutrition
- Serving Size: 1 cookie
- Calories: 120
- Sugar: 10
- Fat: 6
- Carbohydrates: 16
- Protein: 1
Keywords: spring cookies, bunny sugar cookies, royal icing cookies, Easter cookies, homemade sugar cookies, delicate icing, spring baking