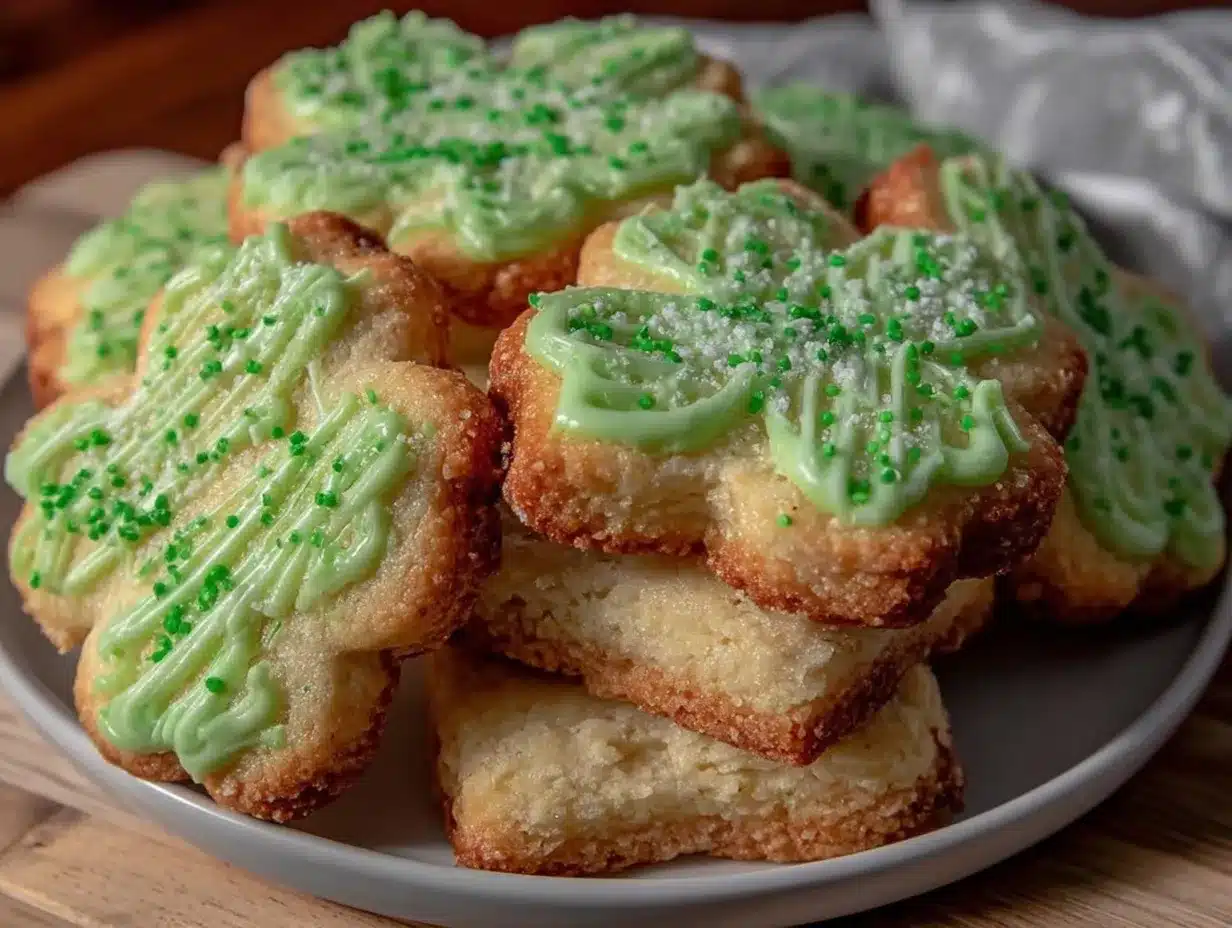
Picture this: the kitchen is filled with the sweet scent of vanilla and butter, the kind that drifts down the hall and gets everyone peeking around the corner. The sound of kids giggling, green sprinkles flying everywhere, and a tray of perfectly baked shamrock sugar cookies cooling on the counter—yep, that’s how my St. Patrick’s Day usually kicks off (and honestly, it’s the highlight of March for me). The first time I pulled these shamrock sugar cookies out of the oven, I caught myself just staring at them, grinning like a fool. It was one of those moments where you pause, take a deep breath, and just know you’ve found something special.
Years ago, when I was knee-high to a grasshopper, my grandma used to whip up a batch of sugar cookies for every holiday. But when I tried to recreate them for St. Patrick’s Day, I wanted something that felt festive and new—so I grabbed a shamrock cookie cutter, experimented with a few royal icing recipes (spoiler: not all of them work), and finally landed on the perfect green royal icing. Now, every March, these cookies are the first thing my kids ask for. My family can’t keep their hands off them, sneaking little bites before I’ve even finished the icing. And, you know what, I can’t blame them!
What I love most is that these cookies aren’t just cute—they’re dangerously easy to make. They’re the kind of treat you bring to a class party, set on the table for a St. Patrick’s Day brunch, or gift to friends and neighbors “just because.” They brighten up any Pinterest board and, let’s face it, they’re almost too pretty to eat (almost). I’ve tested this shamrock sugar cookies recipe more times than I can count, all in the name of research, of course. It’s become a staple for family gatherings, teacher gifts, and, honestly, any excuse I can find. If you’re looking for a cookie that feels like a warm hug and adds a pop of color to your holiday table, you’re going to want to bookmark this one.
Why You’ll Love This Shamrock Sugar Cookies Recipe
I’ve been making sugar cookies for decades—through bake sales, classroom parties, and late-night cravings—and let me tell you, these shamrock sugar cookies with green royal icing truly hold their own. Here’s why they’ll win over your heart (and your taste buds):
- Quick & Easy: You can whip up this dough in under 15 minutes, and the cookies bake in less than 10. Last-minute St. Patrick’s Day treat? No problem.
- Simple Ingredients: Nothing fancy here—just butter, sugar, flour, and a handful of pantry basics. You probably have everything right now.
- Perfect for St. Patrick’s Day: These are the ultimate festive treat for classroom parties, office potlucks, or just a little green fun at home.
- Crowd-Pleaser: I’ve never seen a batch last more than a day. Kids and adults both love the buttery crunch and smooth royal icing.
- Unbelievably Delicious: The texture is spot-on—crisp edges, slightly chewy center, and that royal icing crackle on top. Pure nostalgia with a modern twist.
What really sets this shamrock sugar cookies recipe apart? It’s the way the dough holds its shape—no spreading or funky edges—so your shamrocks come out looking like actual clovers, not blobs. The royal icing recipe is my own blend, tested through dozens of batches, so it’s bright, glossy, and dries to a perfect finish without being rock-hard (or tooth-shatteringly sweet). I use a little almond extract for depth, but you can skip it if you’re baking for nut-free friends.
It’s not just another sugar cookie recipe—this one is the best because it’s reliable, fun to decorate, and a total showstopper on any holiday table. It’s comfort food with a festive twist, and every bite makes you feel like you’re celebrating something a little extra. Whether you’re trying to impress a crowd or just sneak a cookie with your afternoon coffee, these shamrock sugar cookies fit the bill. They’re the kind of treat that makes you close your eyes and smile after the first bite—just trust me on this.
What Ingredients You Will Need
This shamrock sugar cookies recipe keeps things simple and classic, letting the flavors (and the festive look) shine. Here’s what you’ll need for both the cookies and that gorgeous green royal icing:
For the Shamrock Sugar Cookies:
- All-purpose flour (2 3/4 cups / 345g) – The backbone of your cookie; use a trusted brand like King Arthur for consistent results.
- Unsalted butter, room temperature (1 cup / 226g) – Adds richness and helps with that dreamy texture.
- Granulated sugar (1 cup / 200g) – For the classic sweet bite.
- Large egg, room temperature (1) – Binds everything together and adds a bit of chew.
- Pure vanilla extract (2 tsp / 10ml) – For that classic sugar cookie aroma and flavor (I love using Nielsen-Massey, but any pure vanilla works).
- Almond extract (1/2 tsp / 2.5ml, optional) – Adds a subtle bakery flavor; skip if nut allergies are a concern.
- Baking powder (1/2 tsp / 2g) – Helps the cookies puff just enough without losing shape.
- Salt (1/2 tsp / 3g) – Balances the sweetness.
For the Green Royal Icing:
- Powdered sugar (4 cups / 480g) – The base for that glossy, smooth icing.
- Egg whites or meringue powder (3 large egg whites or 3 tbsp meringue powder + 6 tbsp water) – Gives the icing its structure; meringue powder is my go-to for safety and consistency.
- Vanilla extract (1 tsp / 5ml) – For a hint of flavor.
- Gel food coloring (Green) – Gel works best for bold color without watering down the icing. I recommend AmeriColor or Wilton brands.
- Water (as needed) – To get the icing just the right consistency for piping and flooding.
Optional Toppings:
- Green sanding sugar – Adds sparkle and crunch.
- Gold sprinkles – For that “pot of gold” touch (totally optional but super cute).
If you need a gluten-free version, swap the all-purpose flour for a 1:1 gluten-free blend—I’ve tested Bob’s Red Mill with great results. Dairy-free? Use a good-quality vegan butter (like Earth Balance). If you’re out of almond extract, just double the vanilla. And if you want to play with flavors, a touch of lemon or orange zest in the dough is lovely for spring.
Equipment Needed
You don’t need a full bakery’s arsenal to make these shamrock sugar cookies—just a few kitchen basics and a couple of fun tools:
- Mixing bowls – One large for the dough, one medium for the icing.
- Electric mixer (hand or stand) – Makes creaming butter and sugar a breeze. I’ve used both; hand mixers are more budget-friendly and work just fine.
- Measuring cups and spoons – Accuracy matters, especially for baking.
- Shamrock cookie cutter – The star of the show! Any size works, but 2-3” gives the best balance of cute and sturdy.
- Rolling pin – For even dough thickness; if you don’t have one, a wine bottle (cleaned!) works in a pinch.
- Baking sheet – Line with parchment for easy cleanup.
- Parchment paper or silicone baking mat – Keeps cookies from sticking and helps with even baking.
- Wire cooling rack – For setting the cookies so they cool evenly and don’t get soggy bottoms.
- Piping bags and small round tips – For decorating. If you don’t have piping bags, a sturdy zip-top bag with the corner snipped off works, too.
- Toothpicks or scribe tool – For spreading icing into corners and popping air bubbles.
Pro tip: If your rolling pin tends to stick, dust it with a little flour or use parchment paper on top of the dough. I keep an extra baking sheet on hand so I can rotate trays for quicker batches. And if you’re short on space, let cookies cool on the parchment right on your countertop—no wire rack needed, though it helps with airflow.
How to Make Shamrock Sugar Cookies with Green Royal Icing
-
Make the Sugar Cookie Dough:
In a large mixing bowl, beat 1 cup (226g) unsalted butter and 1 cup (200g) granulated sugar together on medium speed for 2-3 minutes, until pale and fluffy. Scrape down the bowl as needed—you want every bit mixed in.
Add 1 large egg, 2 tsp (10ml) vanilla extract, and 1/2 tsp (2.5ml) almond extract (if using). Beat again until smooth, about 1 minute.
In a separate bowl, whisk together 2 3/4 cups (345g) all-purpose flour, 1/2 tsp (2g) baking powder, and 1/2 tsp (3g) salt.
Gradually add the dry ingredients to the wet, mixing at low speed just until the dough starts to pull away from the sides. Don’t overmix or your cookies will be tough! The dough should be soft but not sticky. -
Chill the Dough:
Shape the dough into a flat disc, wrap in plastic, and chill for at least 1 hour (up to 2 days). This step keeps your shamrock shapes sharp. If you skip chilling, your cookies might spread and lose their design. -
Roll and Cut:
Preheat oven to 350°F (175°C). Line two baking sheets with parchment.
Roll dough out on a lightly floured surface to about 1/4 inch (6mm) thickness. If the dough cracks, let it warm up for a few minutes. Cut out shamrock shapes using your cookie cutter, and place them 1 inch apart on prepared baking sheets.
Gather scraps, re-roll, and keep cutting until all dough is used. -
Bake:
Bake cookies for 8-10 minutes, just until the edges are set and barely golden. Watch closely! Sugar cookies can go from perfect to overbaked in a snap. If your oven runs hot, check at 7 minutes.
Let cookies cool on the sheet for 5 minutes, then transfer to a wire rack to cool completely before icing. -
Make the Green Royal Icing:
In a clean bowl, combine 4 cups (480g) powdered sugar, 3 tbsp meringue powder (or 3 egg whites), 6 tbsp water, and 1 tsp (5ml) vanilla extract. Beat on low, then increase to medium-high for 5-7 minutes until stiff peaks form.
Add green gel food coloring until you reach your desired shade (start with a little; you can always add more). For “flood” icing, thin with a bit of water—a few drops at a time—until it flows like honey. For outlining, keep it thicker. -
Decorate:
Fill a piping bag with thick icing and outline each shamrock. Immediately fill with flood-consistency icing, using a toothpick to coax it into edges and pop bubbles.
Add green sanding sugar or gold sprinkles while the icing is wet if you like extra sparkle.
Let decorated cookies dry at room temperature for several hours (overnight is best) until icing is completely set. Store in a single layer while drying to avoid smudging.
Note: If you’re short on time, you can freeze the dough (step 2) up to a month ahead. Just thaw in the fridge overnight before rolling and cutting. And if your icing gets too runny, just add a little more powdered sugar to thicken.
Pro Tips and Techniques for Foolproof Shamrock Sugar Cookies
- Chill is your friend: Cold dough makes all the difference for cookies that keep their shape. If your dough feels soft or sticky, chill it for another 20 minutes before rolling.
- Even thickness matters: I use rolling pin guides or two stacked wooden paint sticks on either side of my dough for perfectly even cookies. Uneven dough means uneven baking—been there, done that.
- Work in batches: If your kitchen is warm, keep half the dough in the fridge while you cut shapes from the other half. Warm dough = spread out shamrocks.
- Royal icing consistency: This took me a few tries to master. For outlining, you want a ribbon that holds its shape when drizzled back into the bowl. For flooding, aim for icing that settles flat in 10-12 seconds. Too thick? Add water. Too thin? Add a spoonful of powdered sugar.
- Air bubbles are sneaky: Always give your mixed icing a few gentle stirs with a spatula to pop big bubbles before piping.
- Let cookies cool completely: I’ve rushed this step and ended up with melted icing puddles—learn from my mistakes!
- Test a few first: Decorate one or two cookies before doing the whole batch. Adjust your icing consistency or technique as needed.
And don’t stress about making them “perfect”—a little wobbly icing just adds charm (and proof they’re homemade). I’ve made plenty of wonky shamrocks, and they always get eaten first.
Variations & Adaptations
- Gluten-Free: Use a 1:1 gluten-free flour blend instead of all-purpose. I’ve had good luck with King Arthur and Bob’s Red Mill brands—no one will know the difference.
- Dairy-Free: Substitute vegan butter (like Earth Balance) for the regular butter. The flavor is a little lighter but still delicious and the dough behaves the same.
- Natural Food Coloring: For a dye-free option, use powdered spinach or matcha in the icing. It’s subtle, but you get a pretty green hue without artificial dyes.
- Flavor Twists: Swap almond extract for lemon or orange zest in the dough for a citrusy kick. Or add a pinch of cinnamon for warmth.
- Different Shapes: No shamrock cutter? Use a heart-shaped cutter and press three together for a quick clover. Or just make circles and decorate with green dots and stripes.
- Allergy Adaptations: For egg-free royal icing, use aquafaba (the liquid from canned chickpeas) in place of egg whites—3 tbsp per egg white works well.
- Personal Favorite: I sometimes make a “hidden rainbow” version—add a little rainbow sprinkle mix inside the dough before cutting for a surprise when you bite in!
This shamrock sugar cookies recipe is a blank canvas—let your creativity (and your pantry) guide you. The real fun is seeing what you come up with!
Serving & Storage Suggestions
These shamrock sugar cookies are best served at room temperature, where the buttery flavor and crisp-then-chewy texture really shine. Arrange them on a festive platter, scatter a few extra gold sprinkles around, and you’ve got a Pinterest-worthy dessert table. Pair with hot tea, coffee, or a tall glass of milk—honestly, they go with just about anything.
For parties, stack the cookies between sheets of parchment in a pretty tin or box. They make charming gifts, especially when wrapped in cellophane with a green ribbon. For a full St. Patrick’s Day spread, serve alongside Irish coffee, mint brownies, or a fruit salad with kiwi and green grapes.
Storage is a breeze: Once the icing is dry, you can keep cookies in an airtight container at room temperature for up to a week. For longer storage, freeze the baked (undecorated) cookies for up to 2 months—just thaw and ice as needed. If you want to freeze decorated cookies, layer with parchment to prevent sticking, though the icing may lose some shine. To refresh, let them sit out at room temp for a few hours. The flavors develop and meld as they rest, so they’re often even better on day two (if you can wait that long!).
Nutritional Information & Benefits
Each shamrock sugar cookie (plain, without extra sprinkles) has about 110 calories, 5g fat, 16g carbs, and 1g protein. The royal icing adds a touch more sugar, but you can adjust the amount to your liking.
Key ingredients like butter and eggs provide a little protein and energy, while the flour offers satisfying carbs. If you use natural food coloring or swap in whole-grain flour for part of the white flour, you’ll add a bit of fiber and micronutrients.
This recipe can be made gluten-free or dairy-free by simple substitutions, making it friendly for most diets. Main allergens are wheat, eggs, and dairy (but all have easy swaps!). For those tracking sugar, you can drizzle instead of flood with icing to reduce overall sweetness.
From a wellness perspective, these cookies are a treat—meant for sharing, joy, and a little holiday fun. Sometimes, a green cookie is the best medicine for a gray March day!
Conclusion
There’s just something magical about pulling a tray of shamrock sugar cookies out of the oven—the golden edges, the sparkle of green icing, and the excitement they bring to the table. This is one of those recipes that brings everyone together, sparking laughter, little hands reaching for “just one more,” and memories you’ll want to repeat every March.
I love how easy this recipe is to customize, whether you go classic or add your own twist. Honestly, I look forward to making these every year—not just for the taste, but for the smiles and stories they create. If you try these shamrock sugar cookies, let me know how you decorate them or what variations you invent. Leave a comment, share your pictures, or tell me your favorite St. Patrick’s Day traditions below!
Happy baking, and may your day be as sweet and lucky as a plate of these cookies. You’ve got this—let the green fun begin!
Frequently Asked Questions About Shamrock Sugar Cookies
How long does it take to make shamrock sugar cookies from start to finish?
With chilling, baking, and decorating, you’ll need about 2-3 hours total. The dough can be made ahead to save time on baking day.
Can I make the dough or cookies ahead of time?
Absolutely! The dough can be chilled for up to 2 days or frozen for a month. Baked, undecorated cookies freeze well for up to 2 months.
What if I don’t have a shamrock cookie cutter?
No worries—use a heart-shaped cutter and make three-leaf clovers, or cut circles and decorate with green icing. The taste is just as good!
How do I get the royal icing to the right consistency?
For outlining, it should hold a ribbon on itself. For flooding, it should settle flat in 10-12 seconds. Adjust with water (thinner) or powdered sugar (thicker) as needed.
Are these cookies safe for nut or egg allergies?
You can skip almond extract and use an egg-free royal icing (with aquafaba or meringue powder). Always check labels and adapt as needed for your crowd.
Pin This Recipe!
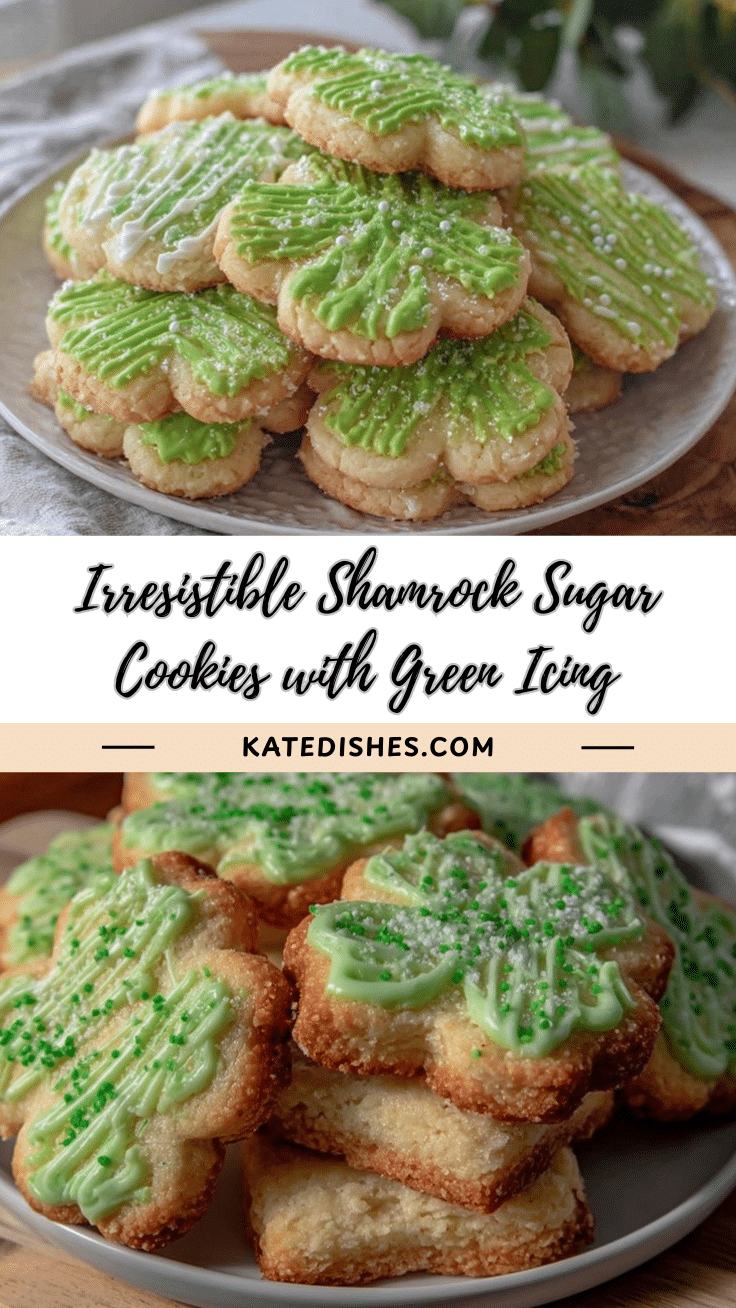
Shamrock Sugar Cookies Recipe: Easy Green Royal Icing for St. Patrick’s Day
These festive shamrock sugar cookies feature a buttery, classic sugar cookie base and a vibrant green royal icing, perfect for St. Patrick’s Day celebrations. They’re easy to make, fun to decorate, and guaranteed to bring smiles to any holiday table.
- Prep Time: 15 minutes
- Cook Time: 10 minutes
- Total Time: 2-3 hours (including chilling and decorating)
- Yield: 24 cookies 1x
- Category: Dessert
- Cuisine: American
Ingredients
- 2 3/4 cups all-purpose flour
- 1 cup unsalted butter, room temperature
- 1 cup granulated sugar
- 1 large egg, room temperature
- 2 teaspoons pure vanilla extract
- 1/2 teaspoon almond extract (optional)
- 1/2 teaspoon baking powder
- 1/2 teaspoon salt
- 4 cups powdered sugar
- 3 large egg whites or 3 tablespoons meringue powder + 6 tablespoons water
- 1 teaspoon vanilla extract (for icing)
- Green gel food coloring
- Water (as needed for icing consistency)
- Green sanding sugar (optional)
- Gold sprinkles (optional)
Instructions
- In a large mixing bowl, beat unsalted butter and granulated sugar together on medium speed for 2-3 minutes until pale and fluffy. Scrape down the bowl as needed.
- Add the egg, vanilla extract, and almond extract (if using). Beat again until smooth, about 1 minute.
- In a separate bowl, whisk together flour, baking powder, and salt.
- Gradually add the dry ingredients to the wet mixture, mixing at low speed just until the dough starts to pull away from the sides. Do not overmix.
- Shape the dough into a flat disc, wrap in plastic, and chill for at least 1 hour (up to 2 days).
- Preheat oven to 350°F (175°C). Line two baking sheets with parchment paper.
- Roll dough out on a lightly floured surface to about 1/4 inch thickness. Cut out shamrock shapes using a cookie cutter and place them 1 inch apart on prepared baking sheets.
- Gather scraps, re-roll, and continue cutting until all dough is used.
- Bake cookies for 8-10 minutes, just until the edges are set and barely golden. Let cookies cool on the sheet for 5 minutes, then transfer to a wire rack to cool completely.
- For the royal icing, combine powdered sugar, meringue powder (or egg whites), water, and vanilla extract in a clean bowl. Beat on low, then increase to medium-high for 5-7 minutes until stiff peaks form.
- Add green gel food coloring until desired shade is reached. Thin with water for flood icing, or keep thick for outlining.
- Fill a piping bag with thick icing and outline each shamrock. Immediately fill with flood-consistency icing, using a toothpick to spread and pop bubbles.
- Add green sanding sugar or gold sprinkles while icing is wet, if desired.
- Let decorated cookies dry at room temperature for several hours (overnight is best) until icing is completely set.
Notes
Chill dough for sharp shapes and best texture. For gluten-free or dairy-free adaptations, use a 1:1 gluten-free flour blend and vegan butter. Royal icing consistency is key—adjust with water or powdered sugar as needed. Decorate cookies while icing is wet for best sprinkle adhesion. Store in an airtight container for up to a week, or freeze undecorated cookies for up to 2 months.
Nutrition
- Serving Size: 1 cookie
- Calories: 110
- Sugar: 10
- Sodium: 50
- Fat: 5
- Saturated Fat: 3
- Carbohydrates: 16
- Protein: 1
Keywords: shamrock sugar cookies, St. Patrick's Day cookies, green royal icing, holiday cookies, easy sugar cookies, festive cookies, kid-friendly baking