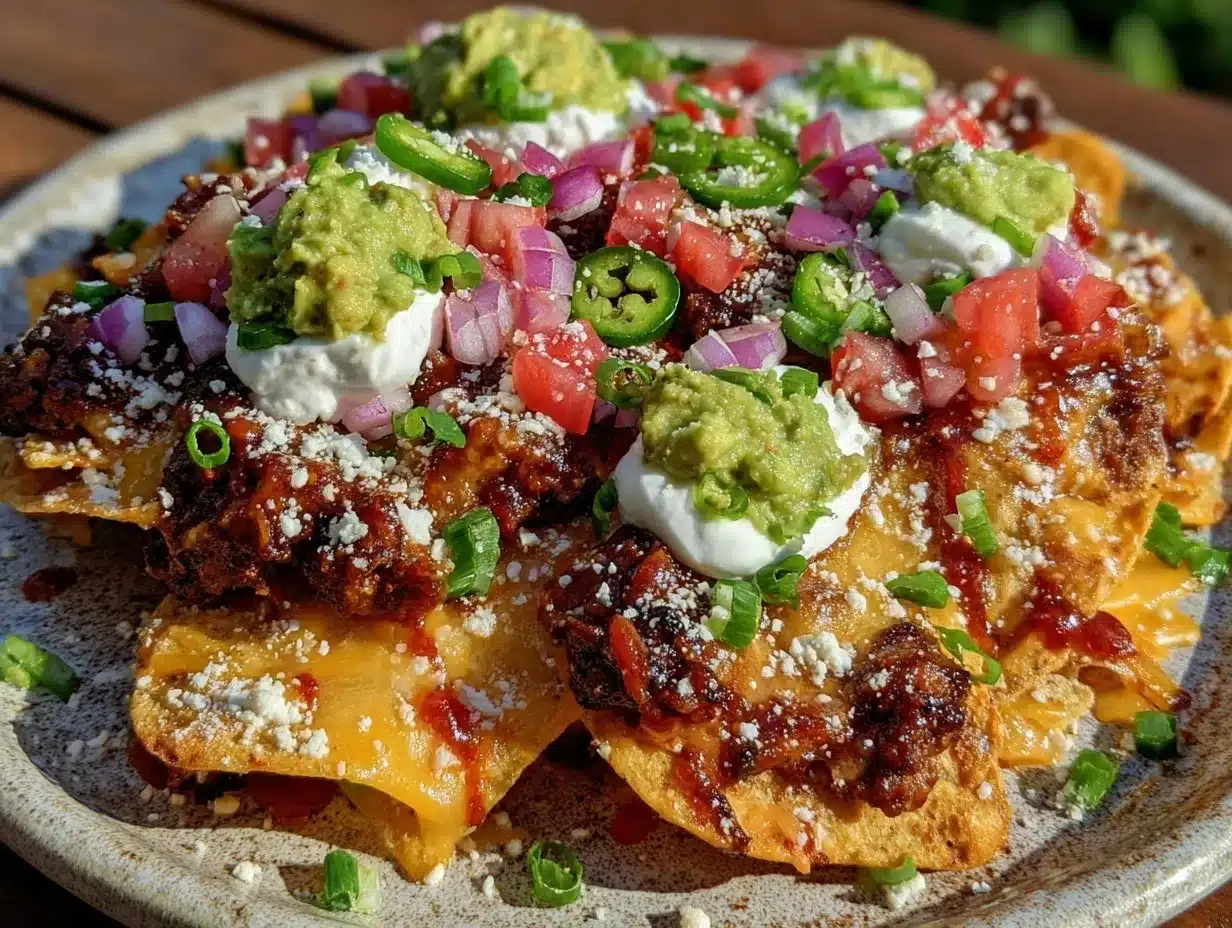
Let me set the scene: you walk into the house after a long day, and the unmistakable aroma of spiced beef, melted cheese, and roasted peppers fills the air. There’s a sizzle coming from the oven, and the anticipation is almost too much. The first time I made my Loaded Nachos Supreme, I remember watching the cheese bubble and the edges of the chips turn golden brown—and that smell, oh my goodness, it was pure happiness. I was instantly hooked. It’s the kind of moment where you pause, take a deep breath, and just smile because you know you’re onto something truly special.
This recipe isn’t just any nacho pile—it’s one born out of chaotic family game nights, backyard barbecues, and way too many “make-your-own-nacho” parties. Honestly, when I was knee-high to a grasshopper, we’d heap the chips with whatever was in the fridge (sometimes not the best idea, but always fun). As I grew up, I started tweaking, testing, and finally landing on a Loaded Nachos Supreme recipe that’s a little wild, a lot flavorful, and dangerously easy to make.
My family couldn’t stop sneaking chips off the tray before I even got the toppings on. (And I can’t really blame them.) Friends have asked for this recipe after every party, and it’s become my go-to move for sports nights, potlucks, and those lazy Saturdays when you want comfort food that feels like a warm hug. I wish I’d been making these nachos years ago. They’re the kind of dish that brightens up your Pinterest board, makes kids giggle, and gets adults crowding around the kitchen.
I’ve tested this Loaded Nachos Supreme recipe more times than I care to admit (in the name of research, of course). It’s now a staple for family gatherings and gifting—yes, I’ve delivered nachos as a housewarming treat, and they were met with actual cheers. If you’re searching for a party snack that’s brimming with flavor, loaded with toppings, and just plain fun, you’re going to want to bookmark this one.
Why You’ll Love This Loaded Nachos Supreme Recipe
When it comes to nachos, I’ve been around the block—homemade, restaurant-style, you name it. After years of trial and error (and a few burned trays), I can say with confidence that these Loaded Nachos Supreme are in a league of their own. Here’s what sets them apart and why you’ll find yourself dreaming up excuses to make them:
- Quick & Easy: Comes together in under 30 minutes. Perfect for last-minute guests, Friday movie nights, or that “I need cheese NOW” situation.
- Simple Ingredients: No need for a fancy grocery haul. Most of what you need is probably already in your pantry or fridge.
- Perfect for Every Occasion: Whether it’s a game day snack, a crowd-pleasing appetizer, or dinner for the family, these nachos fit the bill.
- Crowd-Pleaser: Kids, teens, grandparents—everyone loves nachos. I’ve watched even picky eaters come back for seconds.
- Unbelievably Delicious: The combination of melty cheese, savory beef, bright veggies, and all the toppings makes every bite crave-worthy comfort food.
But here’s the real secret: this Loaded Nachos Supreme recipe isn’t just about piling stuff on chips. It’s about balance—seasoned beef that’s never dry, beans for softness, pickled jalapeños for zing, and a careful cheese-to-chip ratio so every bite is loaded. I use a simple trick: layering cheese both under and over the toppings for that ooey-gooey pull. And, honestly, a squeeze of lime at the end makes all the difference (I didn’t believe it until I tried it myself).
This isn’t just another nacho recipe; it’s the one that makes people stop talking and just eat for a moment. It’s comfort food that feels like a celebration—familiar, but just a little better than you remember. Whether you want to impress guests without breaking a sweat, use up leftovers, or simply treat yourself, these nachos are the answer. And if you’re anything like me, you’ll find yourself making them “just because.”
What Ingredients You Will Need
This Loaded Nachos Supreme recipe is all about simple, flavorful ingredients that come together for an unforgettable snack or meal. Most of these are pantry staples, and you can easily swap or add based on what you have. Here’s what you’ll need:
- For the Chips:
- Thick-cut tortilla chips (about 12 oz / 340g; sturdy ones won’t get soggy)
- For the Beef & Beans:
- Ground beef – 1 lb (450g), 80/20 for best flavor
- Yellow onion – 1 small, finely diced
- Garlic – 2 cloves, minced
- Taco seasoning – 2 tbsp (store-bought or homemade; I like McCormick or Trader Joe’s brands)
- Canned black beans – 1 cup (170g), drained and rinsed (or pinto beans)
- Salt & pepper, to taste
- For the Cheese:
- Shredded cheddar cheese – 1 cup (115g)
- Shredded Monterey Jack cheese – 1 cup (115g) (or use pepper jack for extra kick)
- Tip: Grate your own for best melt (pre-shredded works in a pinch, but doesn’t melt as smoothly)
- Vegetable Toppings:
- Roma tomatoes – 2, seeded and diced
- Red onion – 1/4 cup (30g), finely chopped
- Jalapeños – 1-2, thinly sliced (use pickled for milder heat)
- Fresh cilantro – small handful, chopped (optional but recommended)
- Sweet corn – 1/2 cup (80g), fresh or thawed from frozen (adds sweetness and crunch)
- Finishing Touches:
- Sour cream – for drizzling or dipping
- Guacamole – homemade or store-bought
- Salsa or pico de gallo – your favorite kind
- Lime wedges – for squeezing over the top (don’t skip!)
Substitutions & Tips:
- Swap ground beef for ground turkey or veggie crumbles for a lighter or vegetarian version.
- Use dairy-free cheese to keep things vegan.
- Try kidney beans or refried beans if you prefer.
- Add sliced black olives or diced avocado for extra richness.
- In summer, fresh garden tomatoes and grilled corn make these even better.
Honestly, don’t stress if you’re missing something—these nachos are forgiving. The key is piling on what you love, and making sure every chip gets some attention!
Equipment Needed
- Baking sheet or oven-safe platter: Large enough to spread the chips out in a single layer. I often use a rimmed half-sheet pan (18×13 inches / 46x33cm) for even heating. In a pinch, a pizza pan works too.
- Parchment paper: Optional, but helps with cleanup. (Let’s face it, melted cheese can get everywhere.)
- Large skillet: For browning the beef and onions. Nonstick or cast iron both work great.
- Wooden spoon or spatula: For breaking up the meat and stirring the beans.
- Chef’s knife and cutting board: For dicing veggies and prepping toppings.
- Measuring cups and spoons: For accuracy, though nachos are forgiving if you eyeball it.
- Optional: Cheese grater (if shredding your own cheese—highly recommended for best melt and flavor).
If you don’t have a big baking sheet, you can use two smaller trays or even an ovenproof casserole dish. For parties, I’ve used disposable foil pans—no shame, and no dishes to wash! And if you’re making nachos for one, you can halve everything and use a toaster oven tray. Just keep an eye on things, since smaller batches melt quicker.
Quick tip: If you use a cast-iron skillet, you can cook the beef and then layer your nachos right on top to bake—less clean-up, more crispy bits. Wash cheesy pans right after they cool a bit, and soak if needed (we’ve all had that stuck-on cheese struggle!).
Preparation Method
- Preheat the oven: Set your oven to 400°F (200°C). Give it a good 10 minutes to heat up so the cheese melts evenly.
- Prepare the beef mixture: Heat your large skillet over medium-high heat. Add 1 lb (450g) ground beef and cook, breaking it up with a wooden spoon, until browned—about 5-6 minutes. Drain excess fat if needed (a little fat adds flavor, but too much makes soggy chips).
- Add onion and garlic: Stir in the diced onion and minced garlic. Cook for 2-3 minutes, until the onion is soft and fragrant. You want everything golden, not burned.
- Season and add beans: Sprinkle in 2 tbsp taco seasoning and toss to coat. Add the drained black beans, and cook for another 2 minutes. Taste and adjust with salt and pepper. The mixture should be juicy but not watery—let any extra moisture simmer off.
- Line your baking sheet: Lay out parchment paper for easy cleanup. Spread half the tortilla chips (about 6 oz / 170g) in a single layer. This first layer is your nacho foundation.
- Layer the cheese: Sprinkle half the shredded cheddar and Monterey Jack over the chips. This helps “glue” the toppings to every chip. (If you skip this, the bottom layer can end up sad and bare—trust me, I’ve learned the hard way!)
- Add the beef and beans: Spoon half the beef-bean mixture over the chips and cheese. Spread it out for even coverage.
- Repeat layers: Add the rest of the chips, top with remaining cheese, then the rest of the beef and beans. Finish with more cheese (yes, double cheese is the secret to those epic cheese pulls).
- Add veggies: Scatter the tomatoes, red onion, corn, and jalapeños over the top. If you like things spicy, add extra jalapeños here.
- Bake: Pop the tray in the oven for 8-10 minutes. Watch closely—the cheese should be melted and bubbly, and the chips just starting to toast. If your oven runs hot, check at 7 minutes.
- Finish and serve: Remove from the oven and let cool for 2 minutes (if you can wait!). Top with dollops of sour cream, guacamole, and your favorite salsa. Finish with chopped cilantro and a big squeeze of lime.
Troubleshooting:
If the chips turn soggy, your beef mixture might have too much liquid—let it simmer longer next time. Cheese not melting? Try covering the tray with foil for half the bake, then finish uncovered. For extra-crispy nachos, pre-toast the chips for 3 minutes before assembling.
Personal tip: I prep all my toppings while the beef cooks, so assembly is a breeze. And if you want every chip loaded, take a minute to tuck cheese and beans under and between the chips—a little fussy, but totally worth it!
Cooking Tips & Techniques
- Layering is key: Don’t just dump everything on top—layering chips, cheese, and toppings ensures every chip gets love. I used to just pile it on, but it always left half the chips bare.
- Don’t drown your chips: Too much salsa or wet toppings before baking makes for a soggy mess. Add fresh toppings after baking for crunch and brightness.
- Grate your own cheese: Pre-shredded cheese contains anti-caking agents, which can result in a less-melty finish. Freshly grated cheese melts silkily—totally worth the extra minute.
- Watch the oven: Cheese can go from gooey to burnt in a blink. Set a timer, and check early if your oven runs hot.
- Let it rest (just a little): Two minutes after baking helps everything settle and makes it easier to serve big, loaded scoops.
I’ll admit, I’ve made every nacho mistake in the book—soggy chips, burnt cheese, bland beef. The best lesson? Taste as you go, and don’t be afraid to adjust. If you like more heat, add extra jalapeños. For a smoky twist, sprinkle in a little smoked paprika. And if you need to multitask, prep all your toppings while the oven preheats (or make the beef mixture ahead and just reheat).
Consistency is the name of the game: keep toppings small and evenly distributed, and use a spatula to serve so you get all the cheesy bits from the bottom up. With a little practice, you’ll have nachos that look as good as they taste—Pinterest-worthy and party-ready every single time.
Variations & Adaptations
- Vegetarian Nachos Supreme: Skip the beef and double up on beans, or use seasoned lentils or a plant-based ground “meat.” Add more veggies like roasted peppers and zucchini for a hearty, meatless version.
- Breakfast Nachos: Swap the beef for scrambled eggs and top with breakfast sausage or crumbled bacon. Add sliced avocado and a drizzle of hot sauce—perfect for brunch!
- Seafood Twist: Use cooked shrimp or flaked white fish seasoned with a little lime and chili powder. Top with mango salsa for a bright, tropical spin.
- Gluten-Free: Most tortilla chips are, but double-check your brand. Use gluten-free taco seasoning as well.
- Dairy-Free: Use your favorite dairy-free cheese and skip the sour cream or try a plant-based yogurt for drizzling.
- Kid-Friendly Mild: Leave out the jalapeños and serve salsa on the side for little ones.
- Personal favorite: Sometimes I add a drizzle of chipotle mayo or a sprinkle of smoked paprika right before serving—adds smoky depth and a pop of color.
Don’t be afraid to get creative with your Loaded Nachos Supreme. Try adding chopped pineapple, pickled onions, or even a swirl of barbecue sauce. The recipe is more of a canvas than a rulebook—make it yours!
Serving & Storage Suggestions
Serving: Loaded Nachos Supreme are at their best served hot—right out of the oven while the cheese is still melty and the chips are crispy. I like to serve them straight from the baking sheet, with a big spatula for scooping. Pile on fresh toppings just before serving for crunch and color. If you’re hosting, set out bowls of salsa, extra guac, and sour cream so everyone can customize their plate.
Pairings: These nachos go great with icy cold soda, a pitcher of margaritas, or even a fruity agua fresca. Round out your spread with a simple salad, Mexican rice, or roasted corn for a full meal.
Storage: Nachos don’t last long, but if you do have leftovers, store them in an airtight container in the fridge for up to 2 days. To reheat, spread them back on a baking sheet and bake at 350°F (175°C) for 8-10 minutes—they’ll crisp up again. Avoid microwaving if possible (chips get chewy).
Overnight, the flavors mingle and get even better—but the chips will soften. If that happens, just scoop the toppings onto fresh chips and pop them back in the oven for a quick refresh. (Honestly, I’ve eaten them cold, standing at the fridge—still delicious!)
Nutritional Information & Benefits
Loaded Nachos Supreme are definitely a treat, but they offer a nice balance of protein, fiber, and veggies. Here’s an estimate for a generous serving (about 1/4 of the tray):
- Calories: 480-520
- Protein: 22g
- Carbs: 45g
- Fat: 26g
- Fiber: 7g
Black beans add heart-healthy fiber and plant-based protein. Tomatoes, corn, and onions pack in vitamins and antioxidants. If you use lean beef or swap for turkey or plant-based crumbles, you can lighten things up even more. Tortilla chips are usually gluten-free, but always check your bag. Dairy-free and vegetarian swaps are easy, making this recipe adaptable to many diets.
From my own experience, these nachos satisfy both the craving for cheesy comfort and the desire to sneak in a little extra veggie goodness. Just remember, potential allergens include dairy, corn, and gluten (depending on chips). Always check labels if you’re cooking for others.
Conclusion
Loaded Nachos Supreme with all the toppings is the kind of recipe that brings people together—no fancy skills needed, just big flavor and a little bit of fun. Whether you’re feeding a crowd, spicing up a weeknight, or looking for something to brighten a rainy day, these nachos check all the boxes.
Feel free to mix and match toppings, swap out proteins, or get a little wild with your cheese choices—nachos are meant for creativity! Personally, I love this recipe because it always reminds me of laughter and good times shared around the table (or sometimes, the coffee table during movie night).
If you try this Loaded Nachos Supreme recipe, I’d love to hear how you made it your own. Leave a comment, share your photos, or tag me on Pinterest. Your feedback and twists make this recipe even better for everyone. Happy snacking—and remember, the best nachos are the ones you share!
Frequently Asked Questions
Can I make Loaded Nachos Supreme ahead of time?
It’s best to bake and serve nachos fresh so the chips stay crispy. If you need to prep in advance, make the beef and chop toppings ahead, then assemble and bake just before serving.
What are the best chips for loaded nachos?
Thick-cut, sturdy tortilla chips work best. They hold up to all the toppings and stay crispy. Avoid thin, restaurant-style chips—they get soggy fast.
How do I keep nachos from getting soggy?
Don’t overload with wet toppings before baking. Make sure your beef mixture isn’t watery, and add fresh salsa or guac after baking, not before.
Can I make these nachos vegetarian or vegan?
Absolutely! Swap the beef for extra beans, lentils, or plant-based crumbles. Use dairy-free cheese and yogurt for topping to make them vegan.
What toppings can I add to make nachos unique?
Try roasted peppers, pineapple, pickled onions, chipotle mayo, or even BBQ chicken for a twist. The sky’s the limit—use whatever you love!
Pin This Recipe!
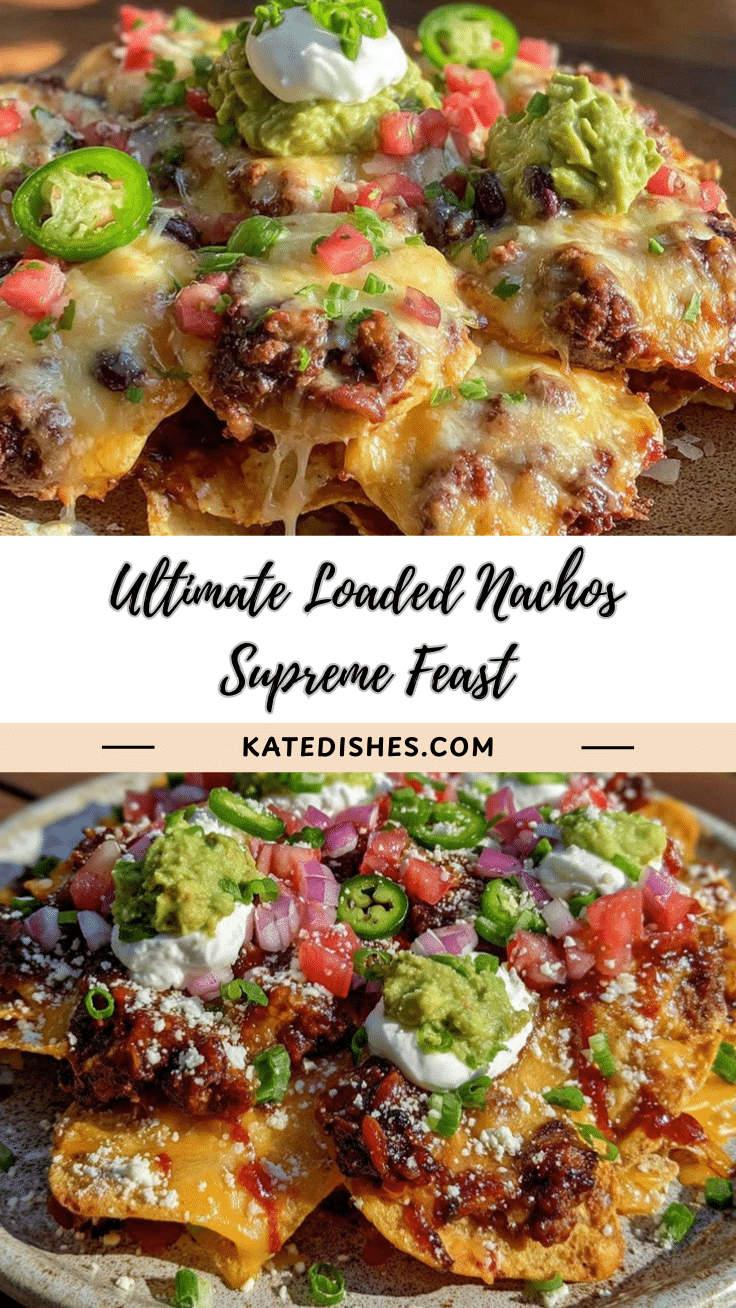
Loaded Nachos Supreme

Loaded Nachos Supreme is the ultimate party snack, featuring layers of crispy tortilla chips, seasoned beef, beans, melty cheese, and all your favorite toppings. Perfect for game nights, gatherings, or a comforting weeknight treat.
- Prep Time: 15 minutes
- Cook Time: 15 minutes
- Total Time: 30 minutes
- Yield: 4 servings 1x
- Category: Appetizer
- Cuisine: Mexican
Ingredients
- 12 oz thick-cut tortilla chips
- 1 lb ground beef (80/20)
- 1 small yellow onion, finely diced
- 2 cloves garlic, minced
- 2 tbsp taco seasoning
- 1 cup canned black beans, drained and rinsed (or pinto beans)
- Salt & pepper, to taste
- 1 cup shredded cheddar cheese
- 1 cup shredded Monterey Jack cheese (or pepper jack)
- 2 Roma tomatoes, seeded and diced
- 1/4 cup red onion, finely chopped
- 1–2 jalapeños, thinly sliced (pickled for milder heat)
- Small handful fresh cilantro, chopped (optional)
- 1/2 cup sweet corn, fresh or thawed from frozen
- Sour cream, for drizzling or dipping
- Guacamole, homemade or store-bought
- Salsa or pico de gallo
- Lime wedges, for squeezing over the top
Instructions
- Preheat oven to 400°F (200°C) and let it heat for 10 minutes.
- Heat a large skillet over medium-high. Add ground beef and cook, breaking up with a wooden spoon, until browned (5-6 minutes). Drain excess fat if needed.
- Stir in diced onion and minced garlic. Cook for 2-3 minutes until onion is soft and fragrant.
- Sprinkle in taco seasoning and toss to coat. Add drained black beans and cook for another 2 minutes. Season with salt and pepper. Let any excess moisture simmer off.
- Line a baking sheet with parchment paper. Spread half the tortilla chips in a single layer.
- Sprinkle half the cheddar and Monterey Jack cheese over the chips.
- Spoon half the beef-bean mixture over the chips and cheese.
- Repeat layers: add remaining chips, top with remaining cheese, then the rest of the beef and beans. Finish with more cheese.
- Scatter tomatoes, red onion, corn, and jalapeños over the top.
- Bake for 8-10 minutes until cheese is melted and bubbly and chips are just starting to toast. Check at 7 minutes if your oven runs hot.
- Remove from oven and let cool for 2 minutes.
- Top with dollops of sour cream, guacamole, and salsa. Finish with chopped cilantro and a squeeze of lime. Serve immediately.
Notes
Layering cheese both under and over toppings ensures every chip is loaded. For vegetarian, use plant-based crumbles or double beans. For vegan, use dairy-free cheese and yogurt. Pre-shredded cheese melts less smoothly than freshly grated. Add fresh toppings after baking for crunch. For extra-crispy nachos, pre-toast chips for 3 minutes before assembling.
Nutrition
- Serving Size: About 1/4 tray (1 ge
- Calories: 500
- Sugar: 4
- Sodium: 900
- Fat: 26
- Saturated Fat: 12
- Carbohydrates: 45
- Fiber: 7
- Protein: 22
Keywords: nachos, loaded nachos, party snack, Mexican appetizer, game day, comfort food, beef nachos, easy nachos, supreme nachos, oven nachos